Milk Chocolate Chunk Blondies with Brown Butter
Published: June 21, 2026
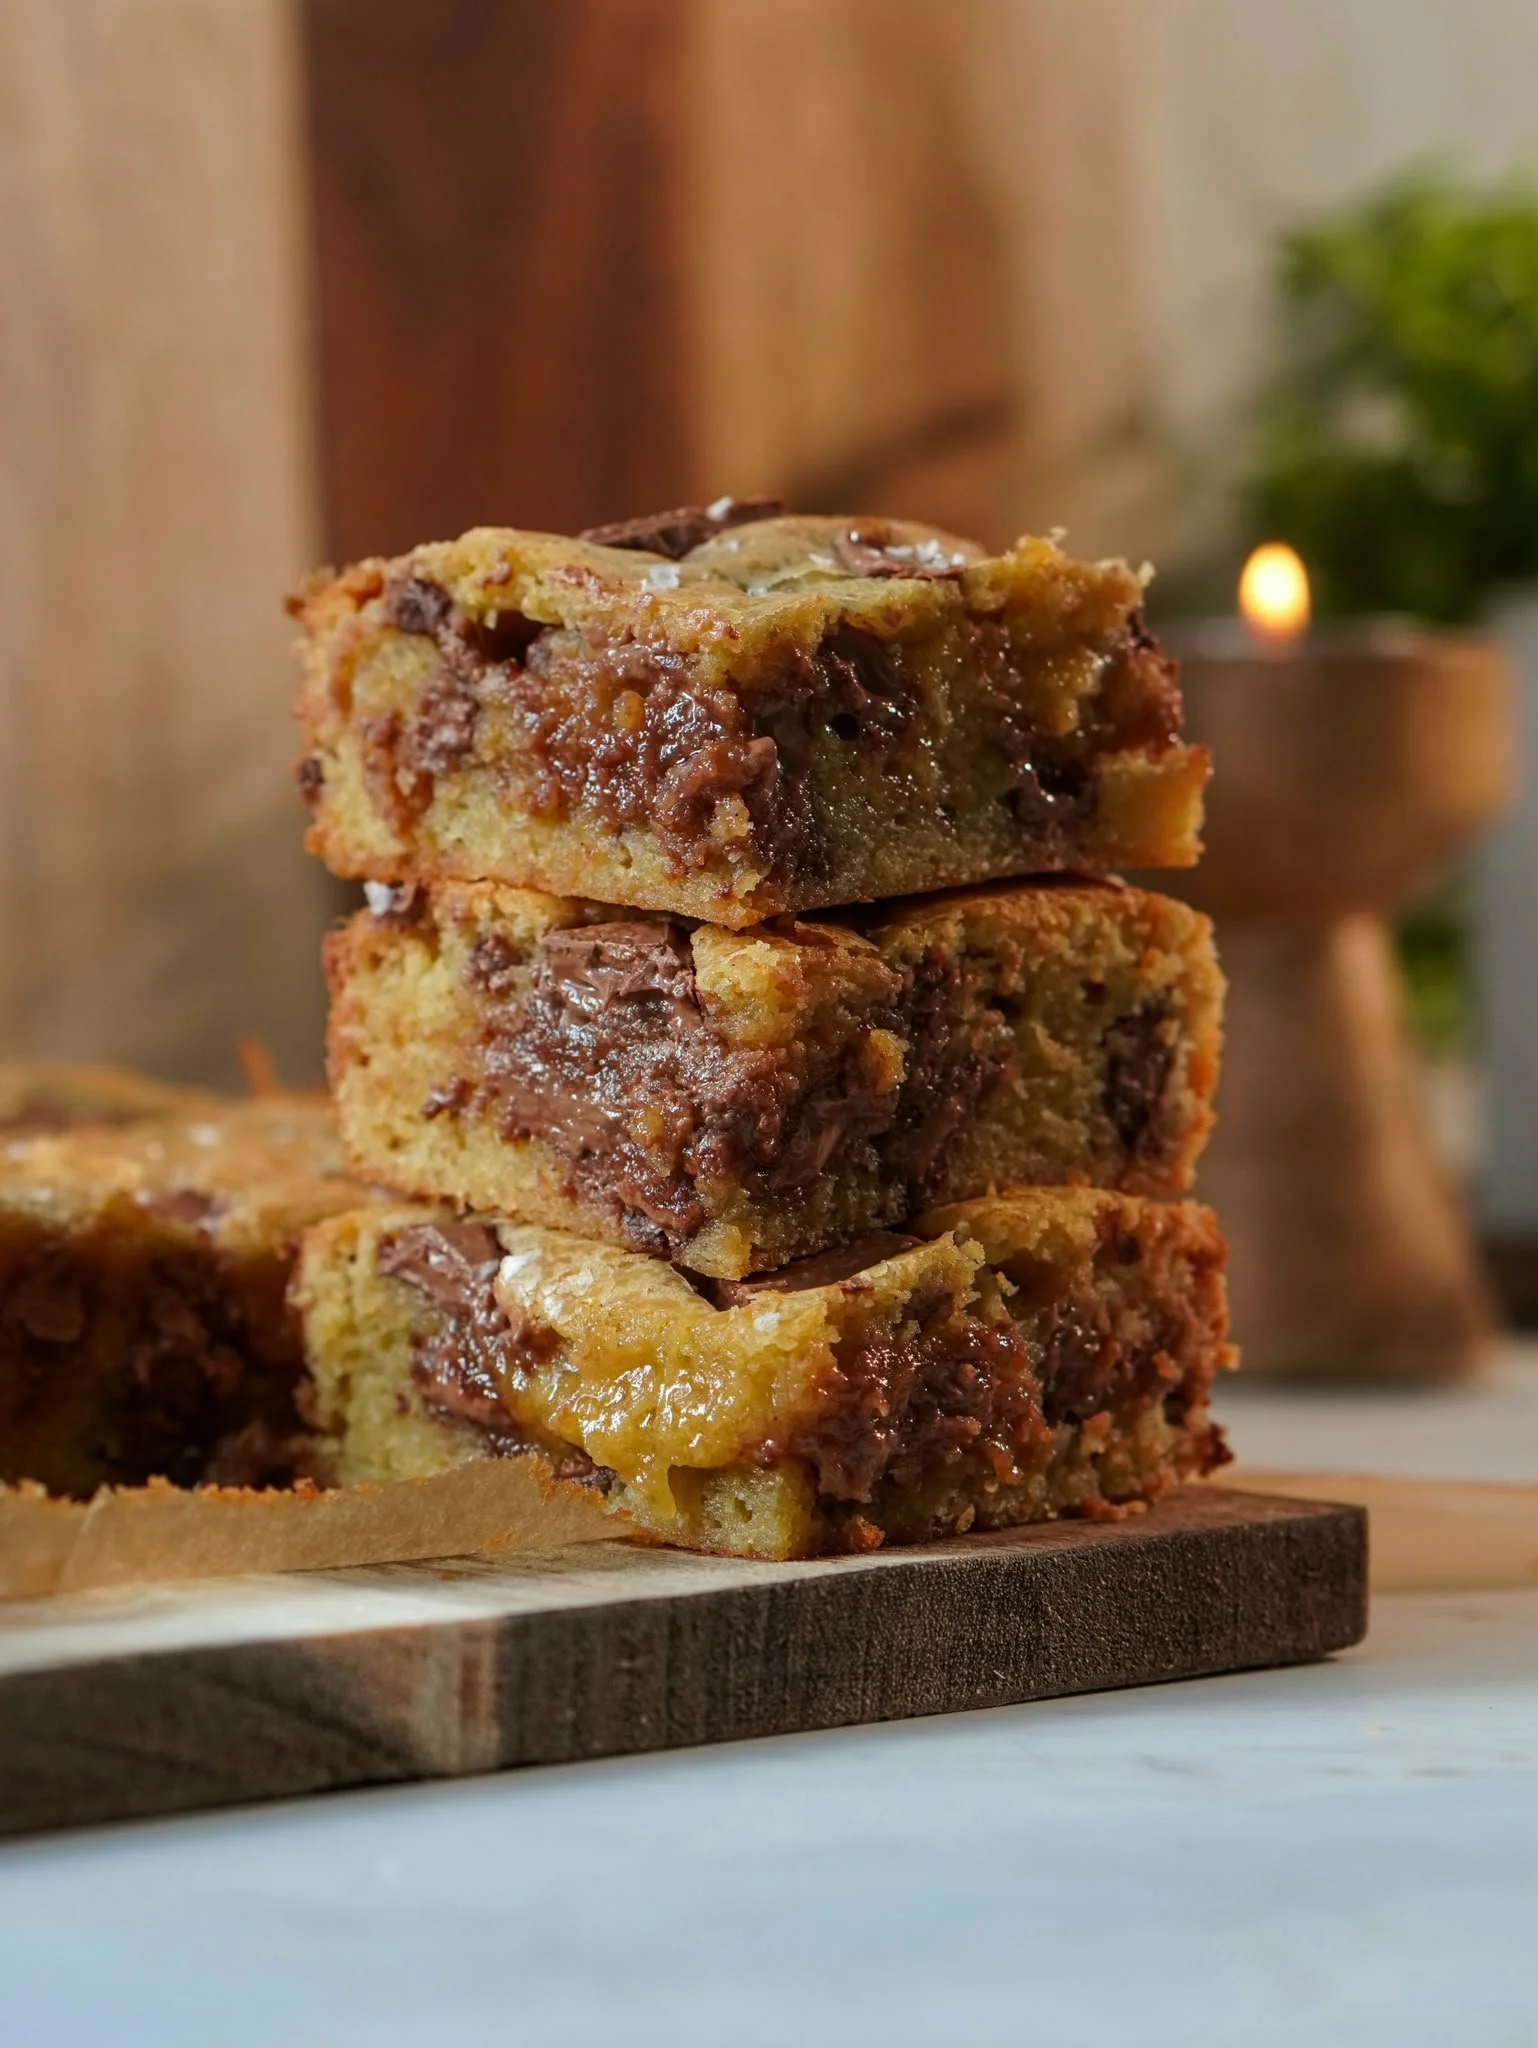
These Brown Butter Milk Chocolate Chunk Blondies are rich, fudgy and packed with melty chocolate in every bite. The brown butter adds a delicious nutty flavor, while a sprinkle of flaky sea salt perfectly balances the sweetness. They're simple to make and hard to stop eating!
WHY YOU’LL LOVE THIS RECIPE
🤎 Made with brown butter - Browning the butter adds a rich, nutty flavor that takes these Blondies to the next level.
🤎 Soft and fudgy texture - These blondies have the perfect balance of fudgy centers and slightly crisp edges.
🤎 Packed with chocolate chunks - Every bite is loaded with melty milk chocolate for plenty of chocolate flavor.
🤎 Easy to make - No mixer required and the batter comes together with simple pantry ingredients.
🤎 Perfectly balanced sweetness - The flaky sea salt helps balance the sweetness and enhances the overall flavor.
🤎 Beginner-friendly - The recipe is straightforward and easy enough for bakers of any skill level.

Tips and Tricks
→ Don't overmix once the flour is added - Once you add the flour, mix only until a few dry streaks remain. Overmixing develops the gluten in the flour, which can make the Blondies tougher and more cake-like instead of soft and chewy. A few small streaks are fine, as they'll disappear as you fold in the chocolate.
→ Let the brown butter cool for about 15 minutes - After browning the butter, allow it to cool slightly before mixing it with the other ingredients. If the butter is too hot, it can affect the texture of the batter and may even start cooking the eggs. About 15 minutes is usually the perfect amount of time.
→ Use regular butter if browning butter feels intimidating - If you don't feel like browning butter, you can use regular melted butter instead. Simply melt it, let it cool slightly and use it in the recipe. Since brown butter loses some moisture during the cooking process, reduce the butter amount by about 20g when using regular melted butter.
→ Use a 20x20 cm (8x8 inch) baking tin - For the thickness and texture shown in the photos, I recommend using a 20x20 cm (8x8 inch) baking tin. Using a larger pan will result in thinner Blondies that bake more quickly.
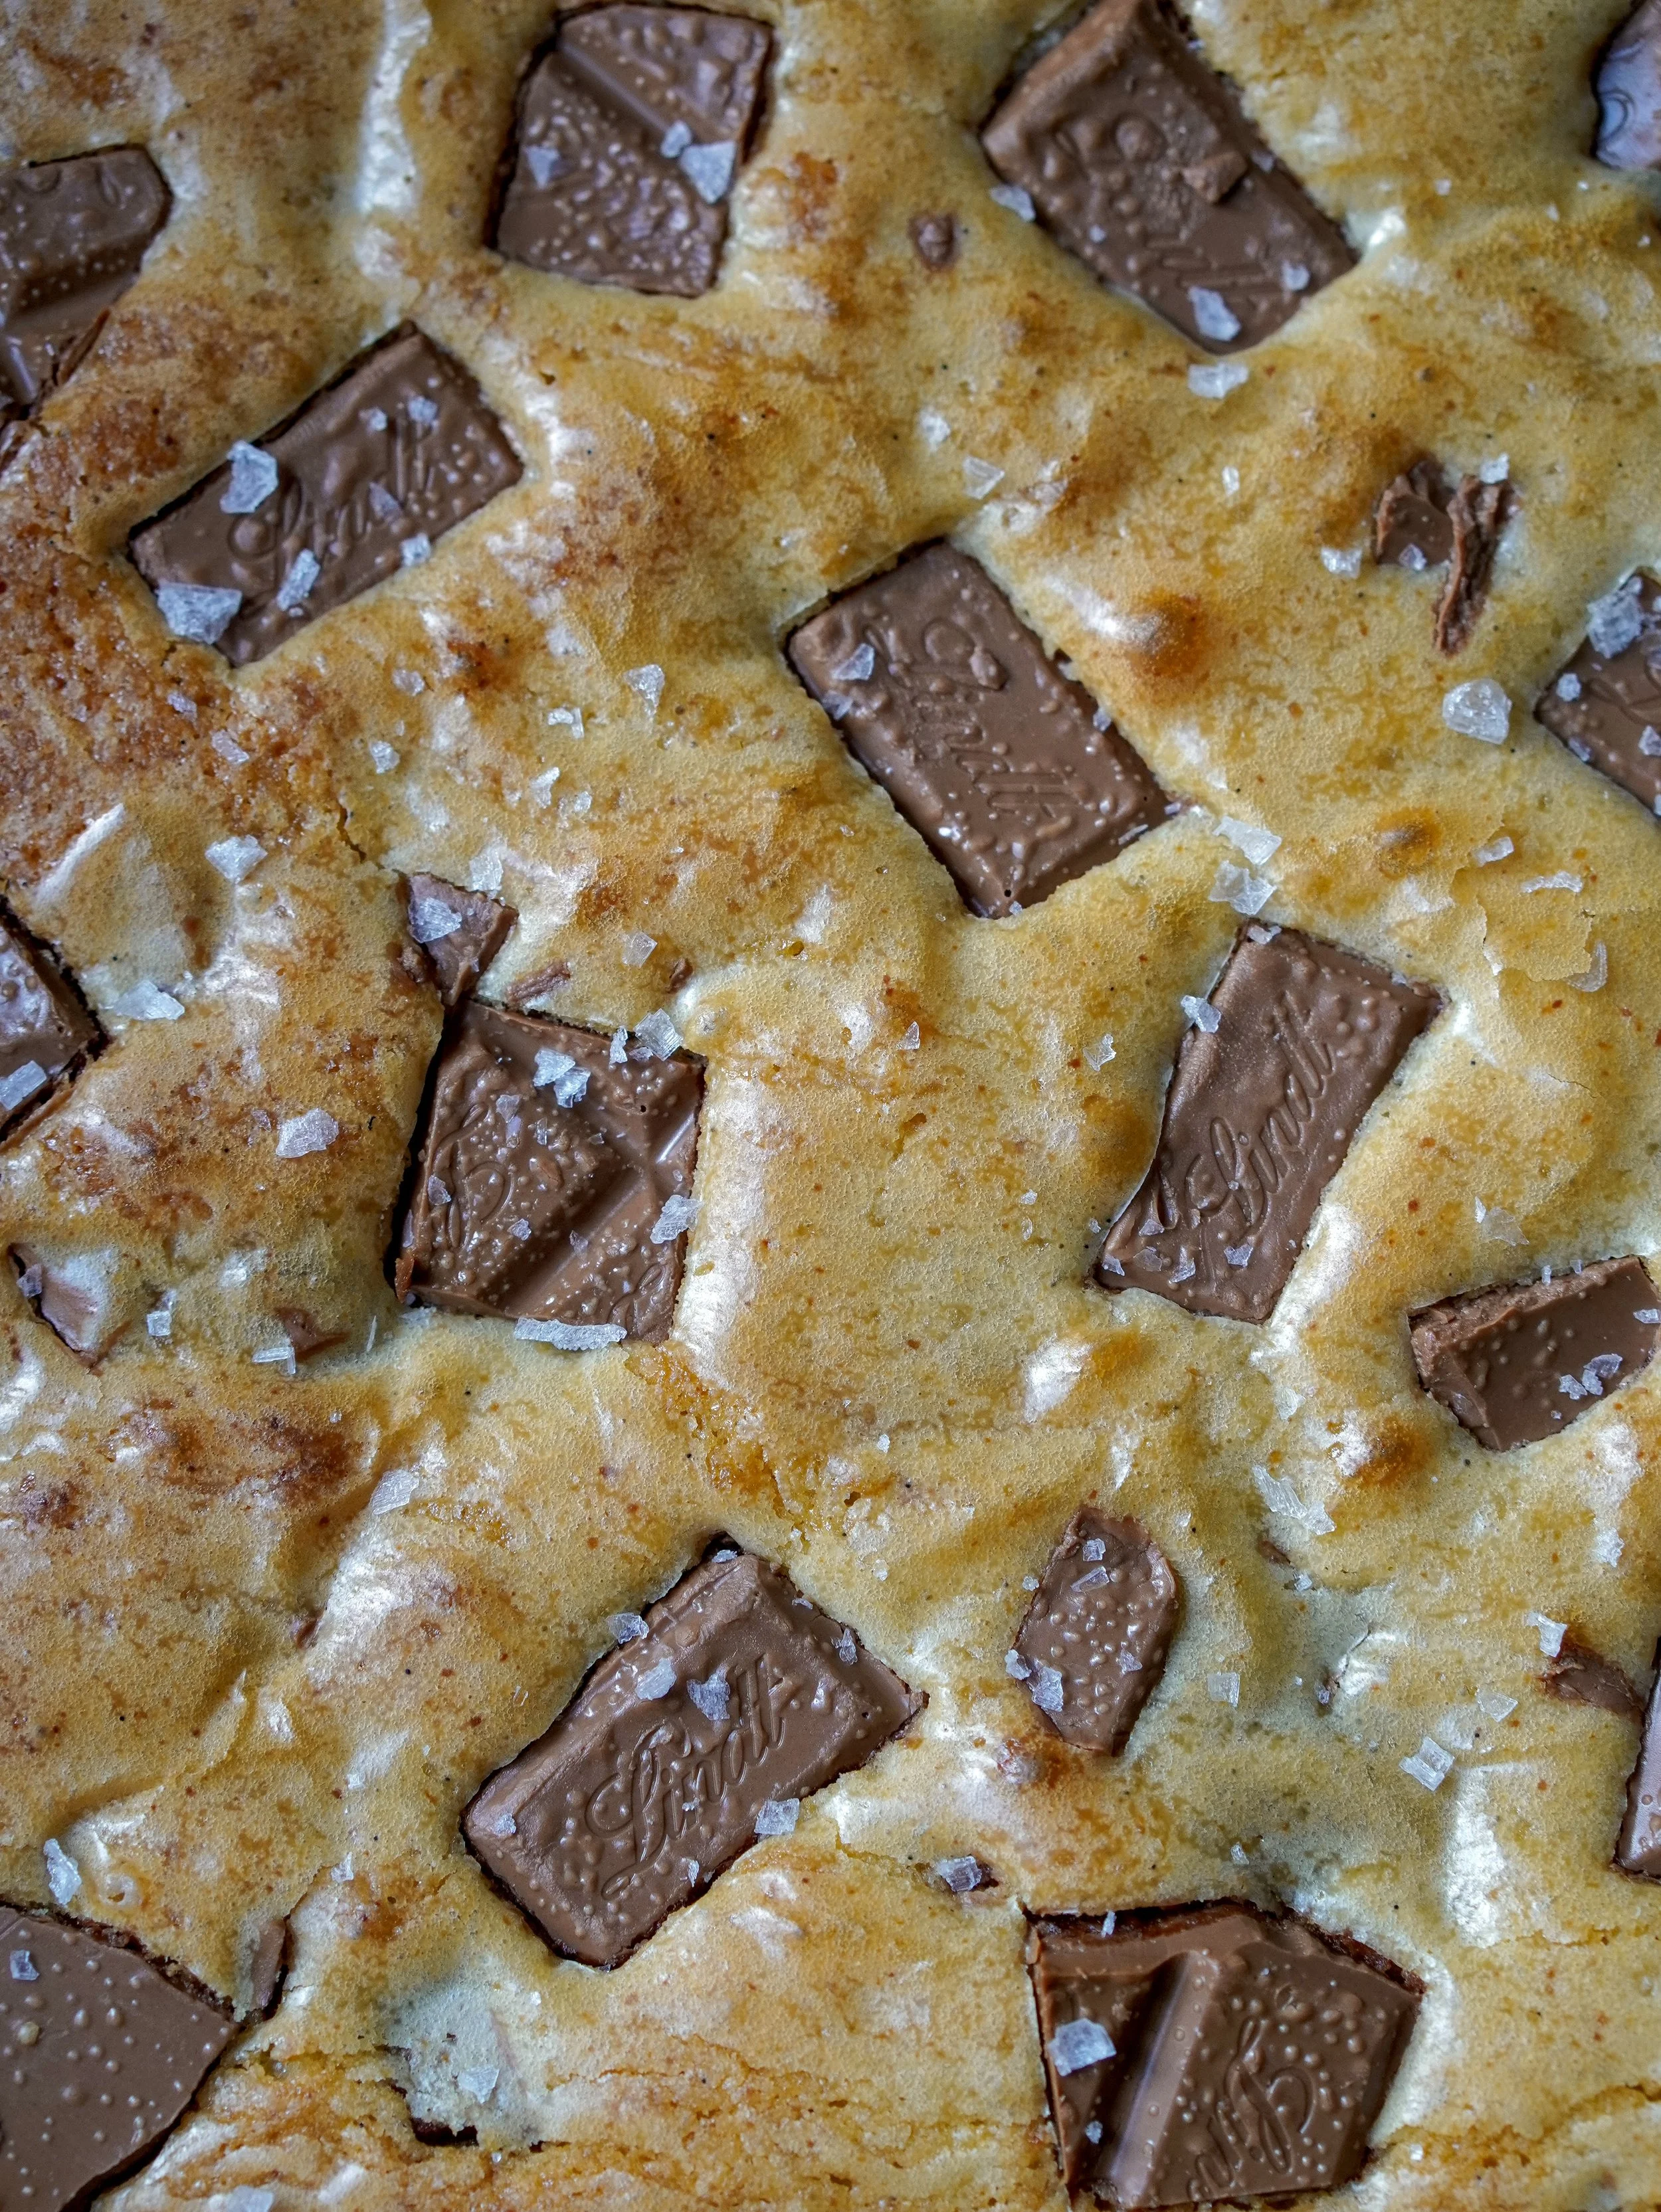
→ Use chocolate chunks instead of chocolate chips - Chocolate chunks melt more beautifully throughout the Blondies and create larger pockets of melted chocolate.
→ Customize the chocolate to your preference - While I love milk chocolate in this recipe, feel free to use dark chocolate, white chocolate or a combination of different chocolates. This recipe is very versatile and can easily be adjusted based on your personal preference.
Frequently Asked Questions
1. What is the difference between a Blondie and a Brownie?
Blondies are often described as the vanilla version of Brownies. Instead of cocoa powder or melted chocolate in the batter, they rely on butter, brown sugar and vanilla for their flavor.
2. Can I skip browning the butter?
Yes. If browning butter feels intimidating, you can use regular melted butter instead. Just reduce the amount by about 20g and allow it to cool before using.
3. How do I know when the Blondies are done baking?
The edges should be set and lightly golden, while the center may still look slightly soft. They will continue to set as they cool.
4. Why did my Blondies turn out cakey?
This is usually caused by overmixing the batter once the flour is added or overbaking them.
5. Can I use chocolate chips instead of chocolate chunks?
Yes, but chocolate chunks tend to melt better and create larger pockets of chocolate throughout the Blondies.
6. Can I use dark chocolate instead of milk chocolate?
Absolutely. Dark chocolate, white chocolate or a combination of different chocolates all work well in this recipe.
7. Can I add nuts to the batter?
Yes. Chopped pecans, walnuts or hazelnuts would all be delicious additions.
8. How should I store the Blondies?
Store them in an airtight container at room temperature for up to 4 days.
9. Why do you add flaky sea salt on top?
The flaky sea salt helps balance the sweetness and enhances the flavor of both the brown butter and chocolate.
Ingredients you will need for this recipe
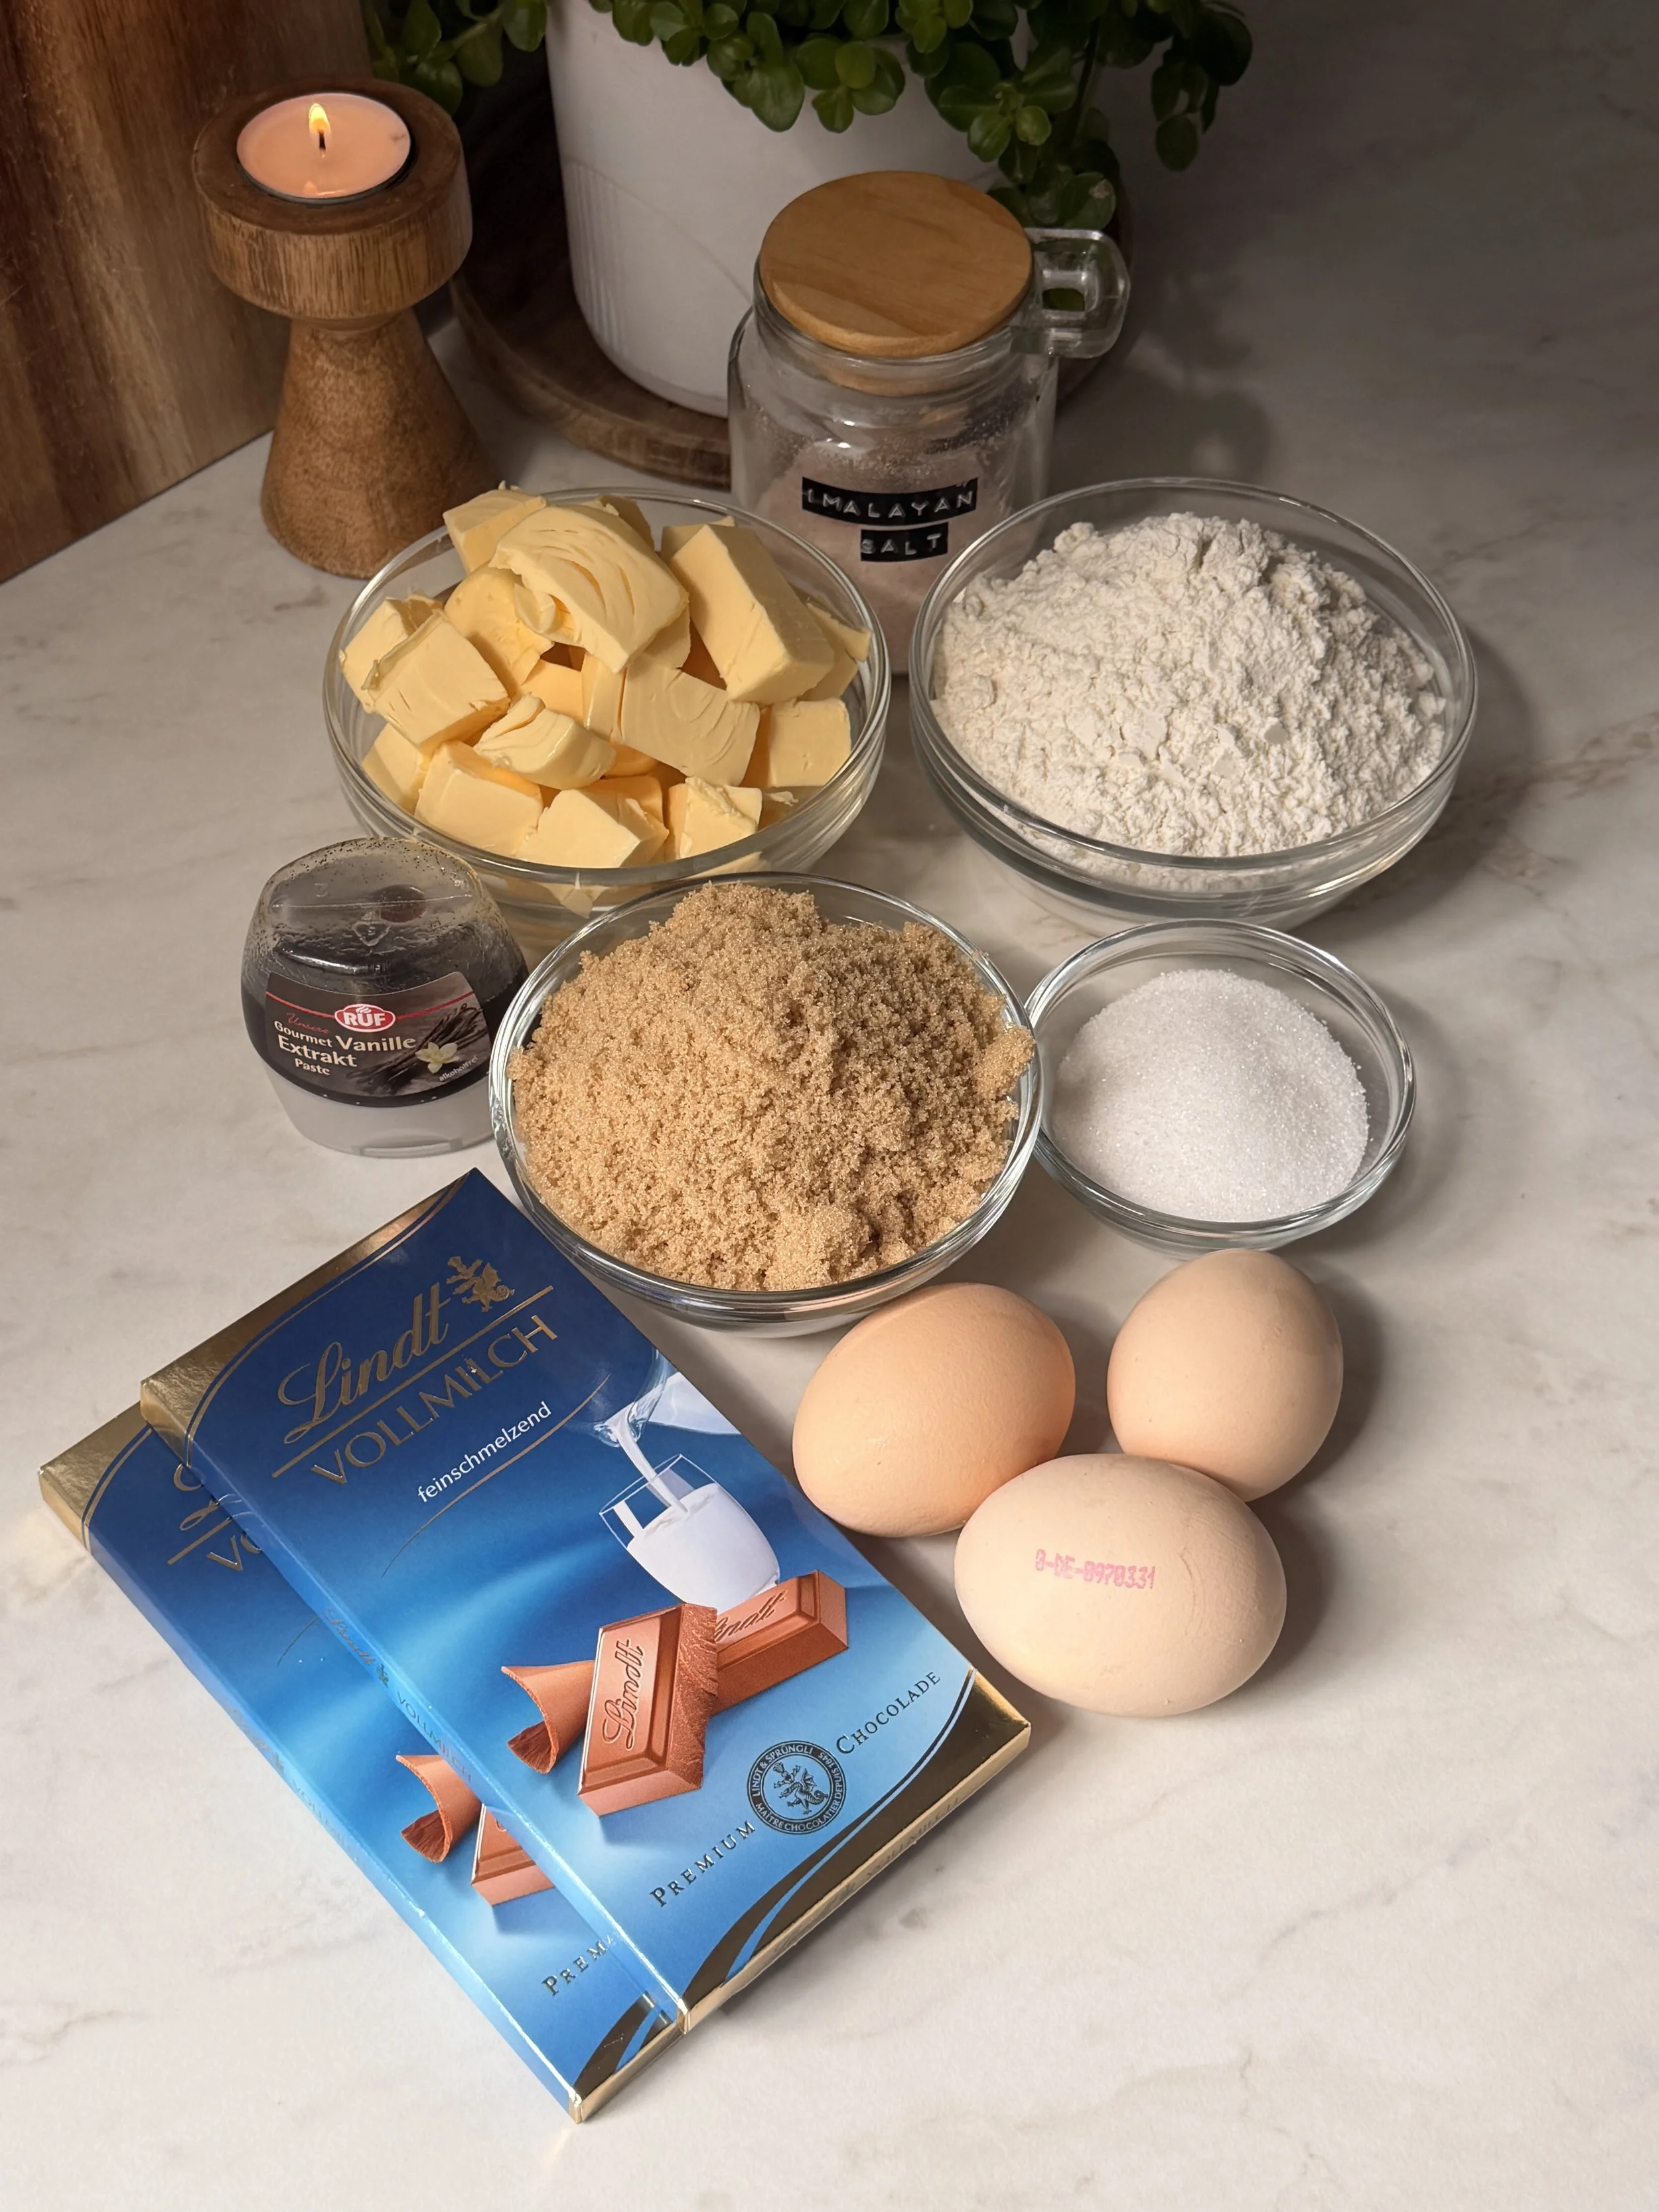
Unsalted butter: Browning the butter adds a rich, nutty flavor. If preferred, use regular melted butter, but reduce the amount by about 20g.
Granulated sugar: Adds sweetness and helps create those slightly crisp edges. Fine caster sugar works well too.
Light brown sugar: Adds moisture, chewiness and a subtle caramel flavor. Dark brown sugar can be used for a deeper flavor.
Eggs + egg yolk: Help bind everything together while adding richness and creating a chewy texture. The extra yolk makes the Blondies super fudgy.
Vanilla bean paste: One of the main flavors in Blondies.
All purpose flour: Provides structure while keeping the Blondies soft and chewy.
Salt: Balances the sweetness and enhances all the other flavors.
Milk chocolate chunks (for the batter): Add melty pockets of chocolate throughout the blondies.
Chocolate chunks (for topping): Added on top for extra chocolate.
Flaky sea salt: Balances the sweetness and makes the chocolate flavor stand out even more.
Step by step instructions with photos
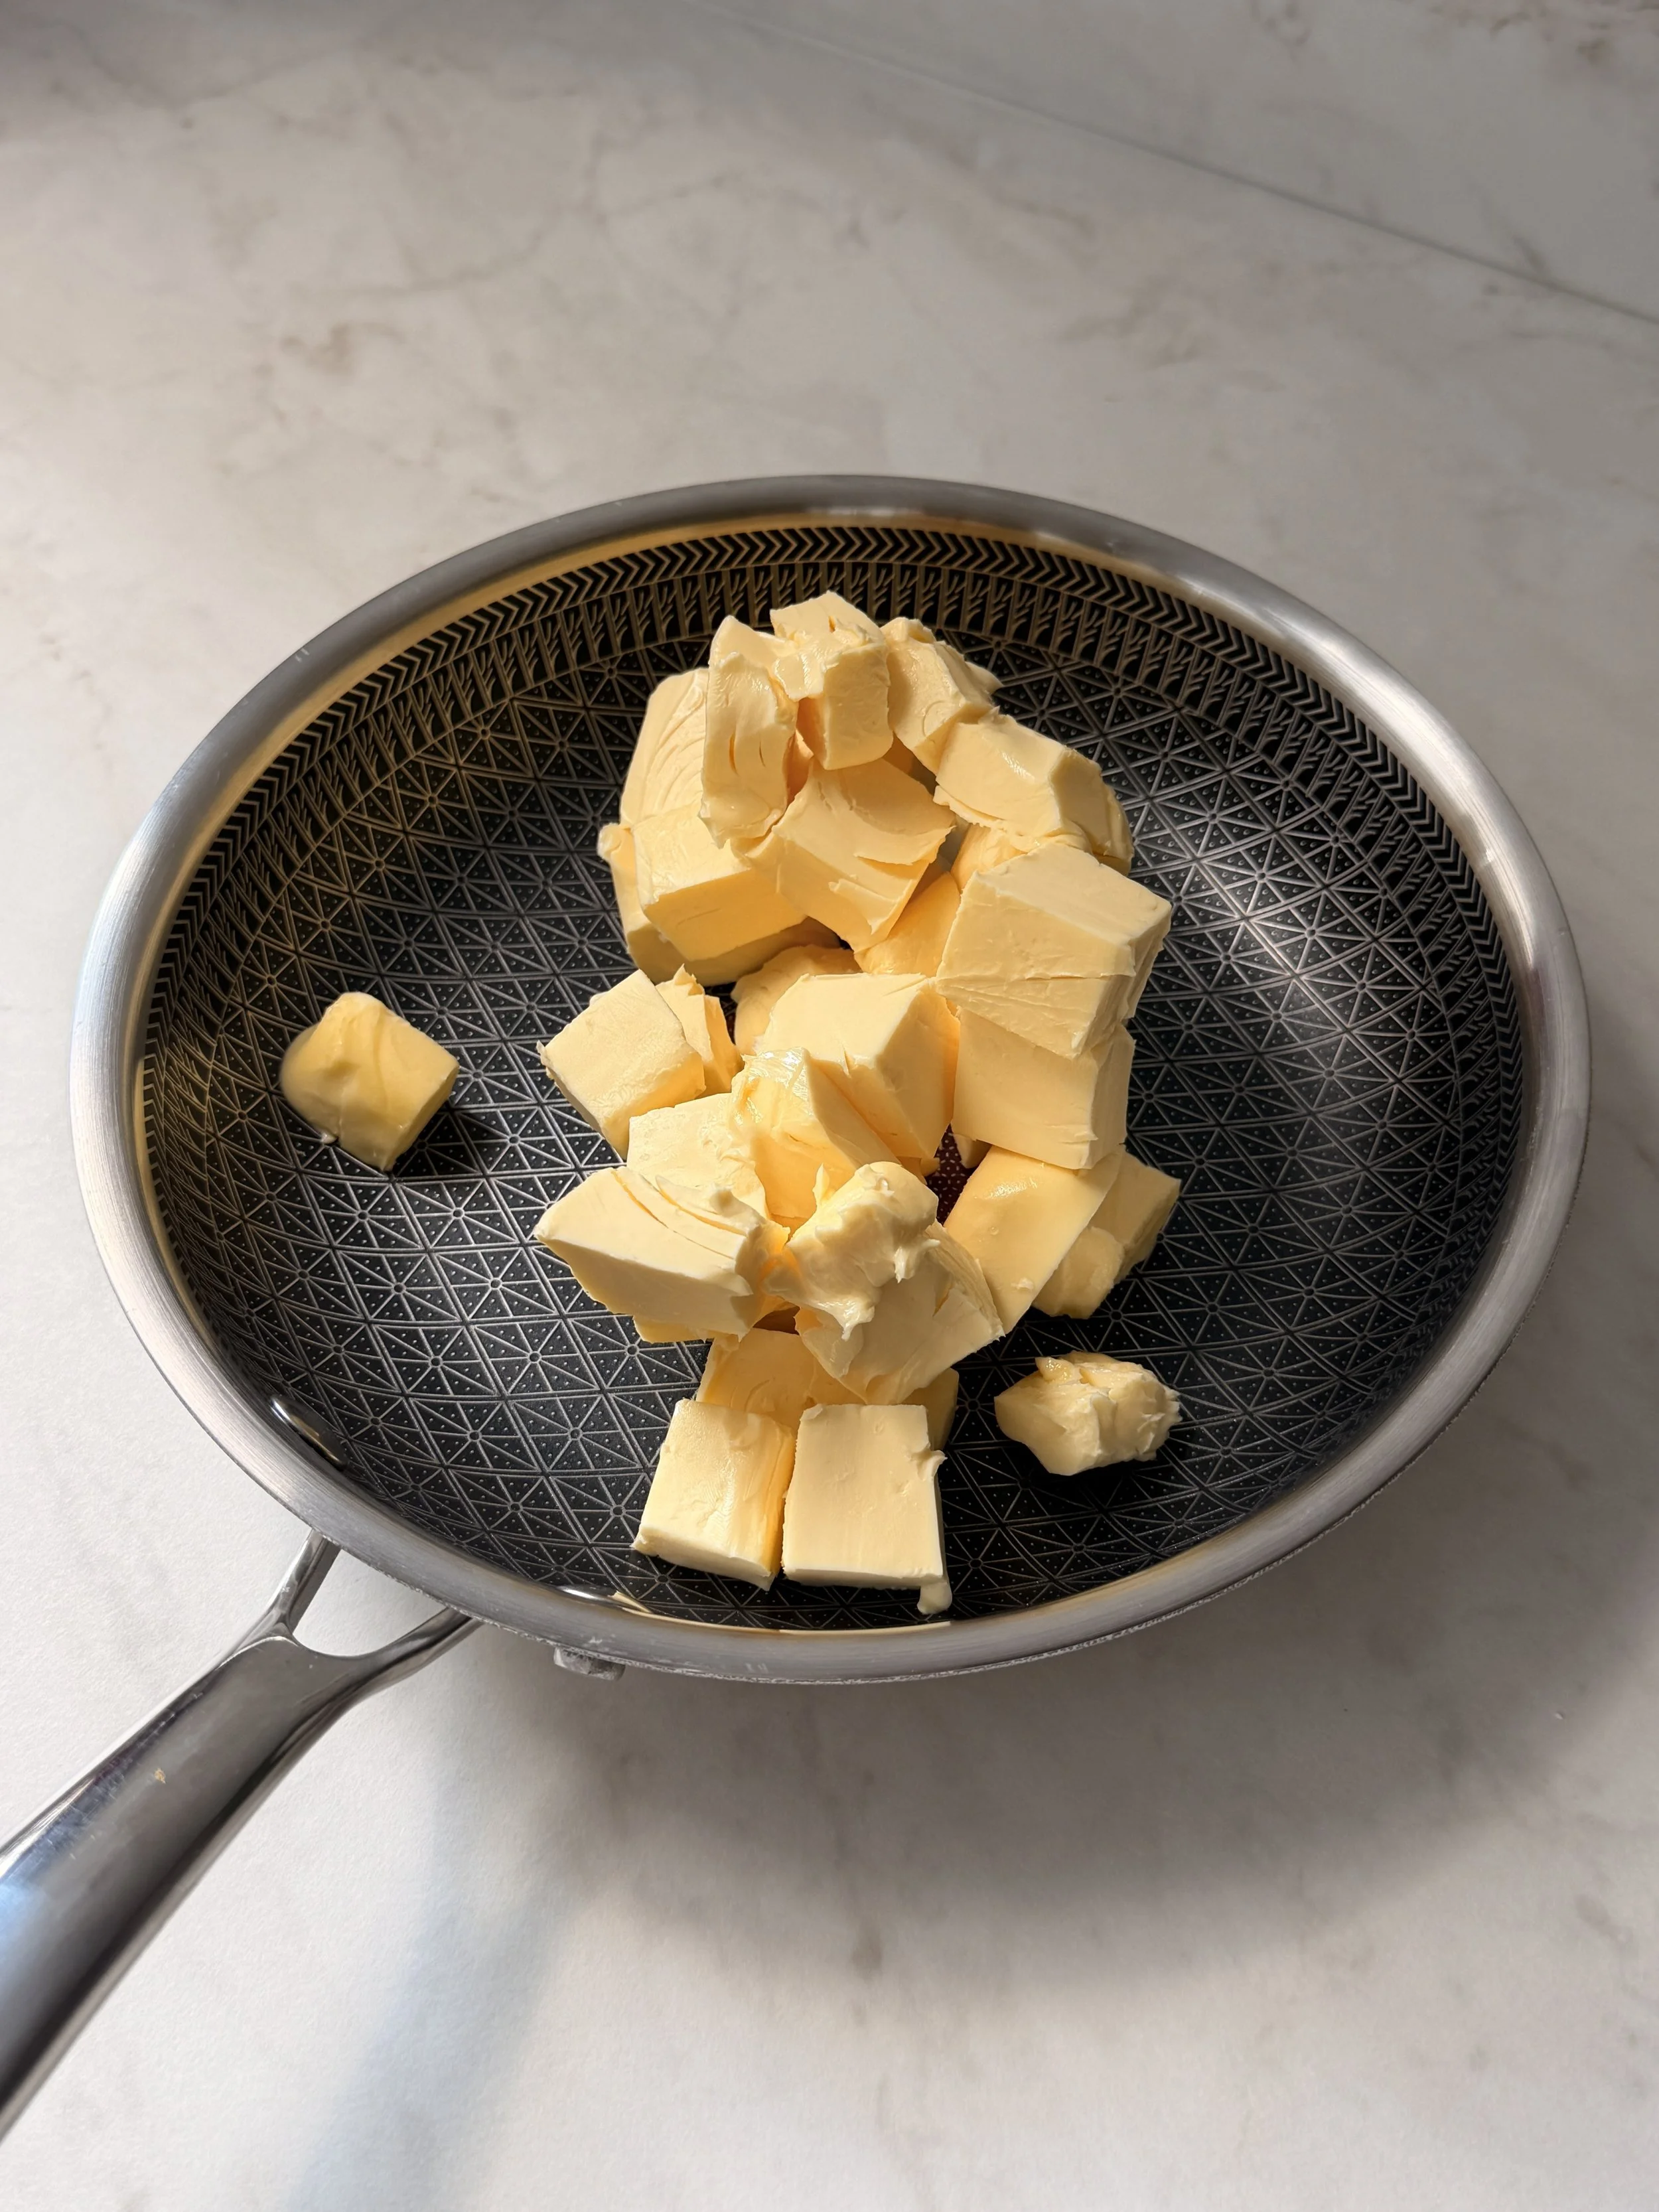
1. First, brown the butter.
2. In a saucepan, melt the butter over medium heat.
3. Once melted, continue cooking, stirring constantly, until it foams and turns golden brown.
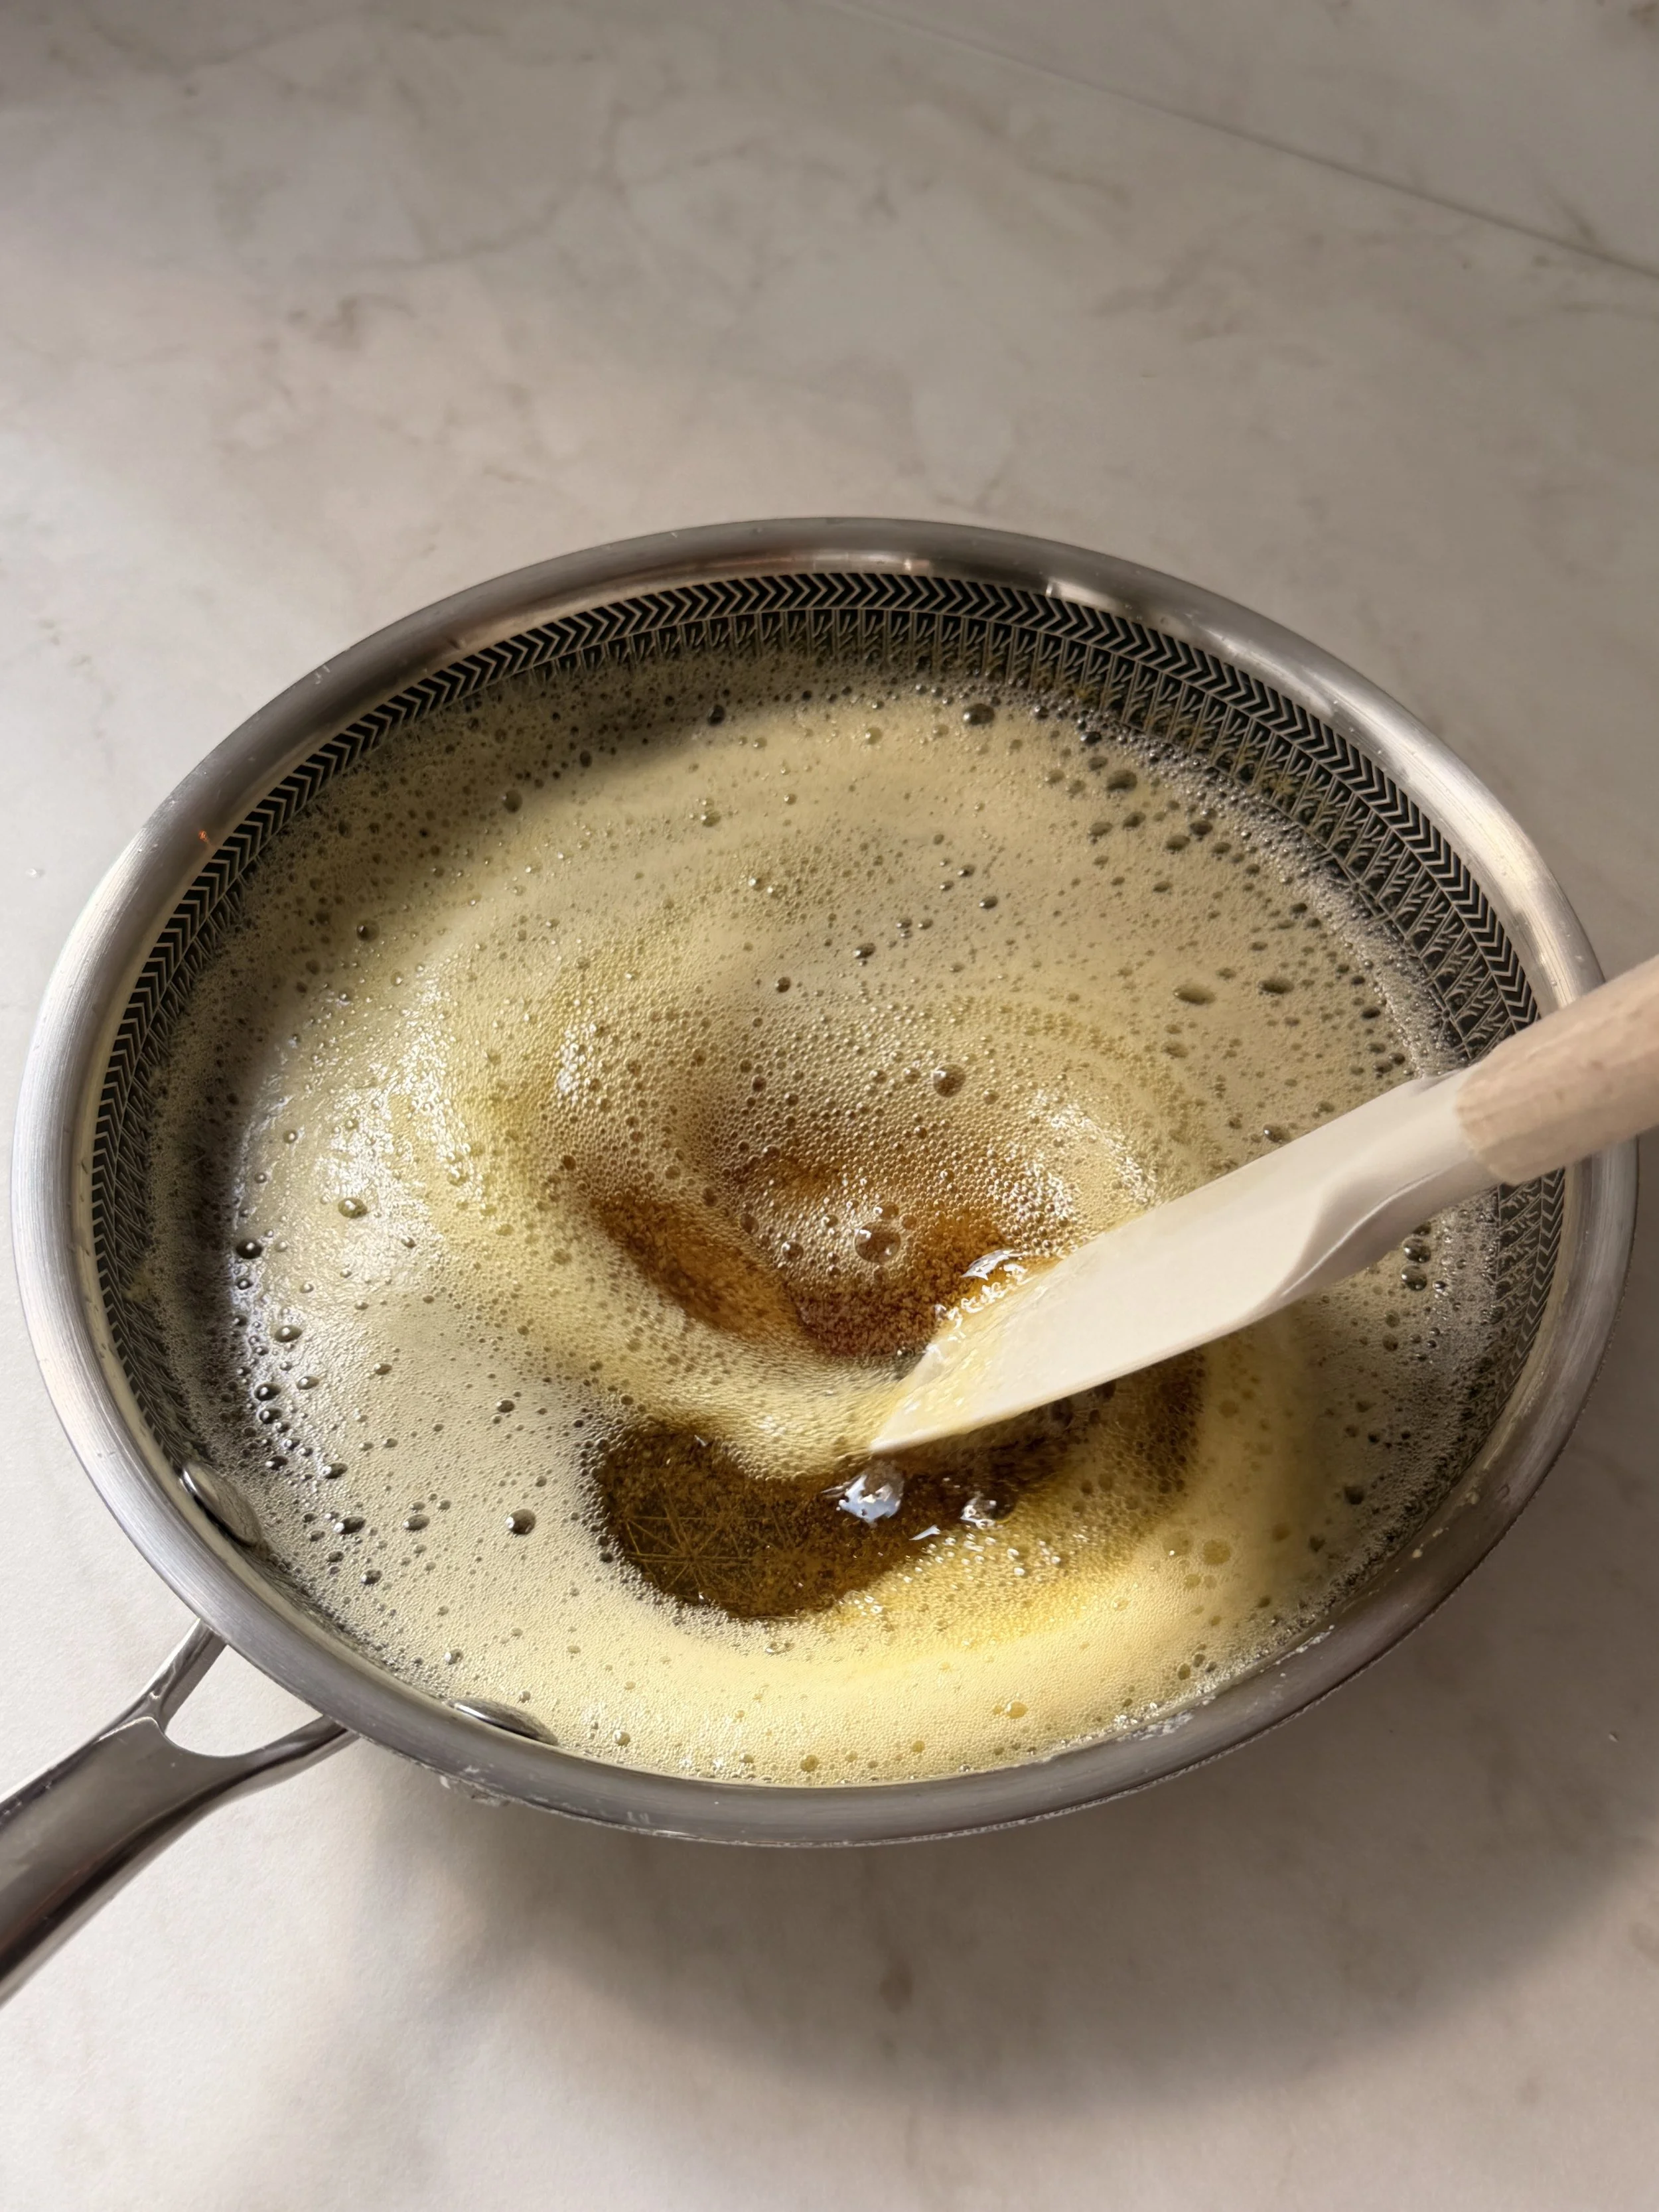
4. Pour the browned butter into a separate bowl and let it cool slightly for about 15 minutes.
5. Preheat your oven to 180°C and line a 20x20 cm baking tin with parchment paper.
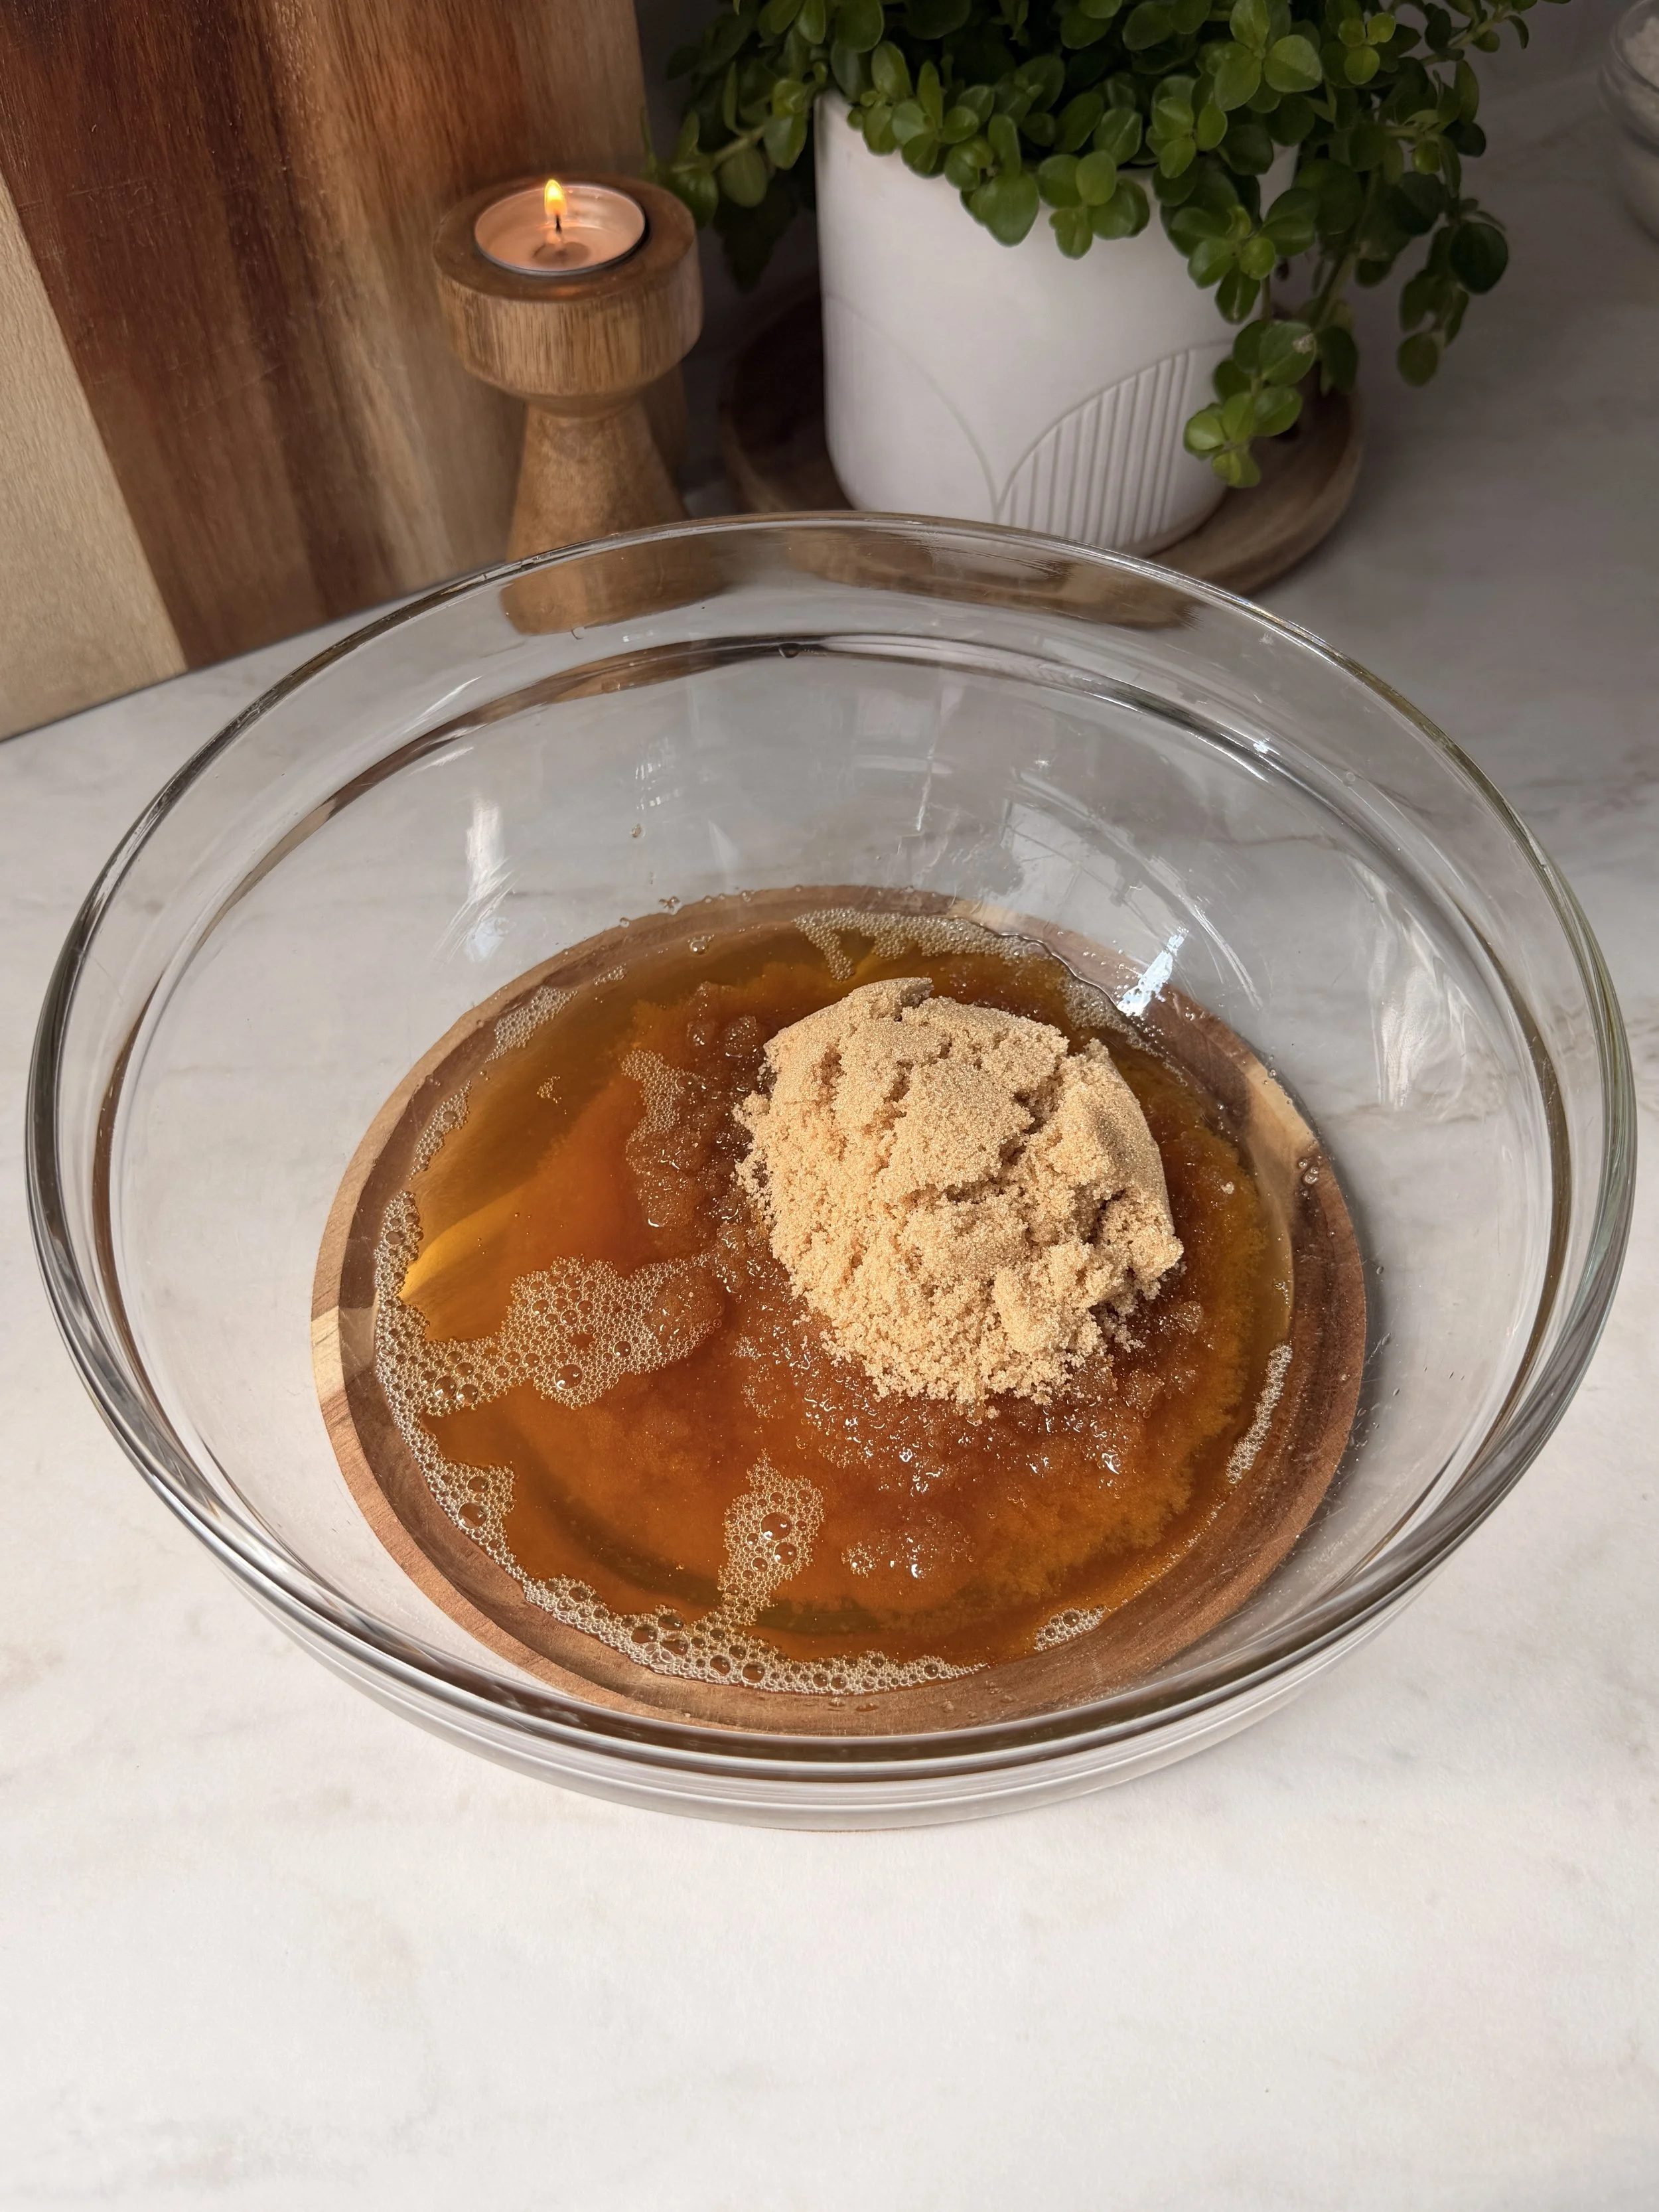
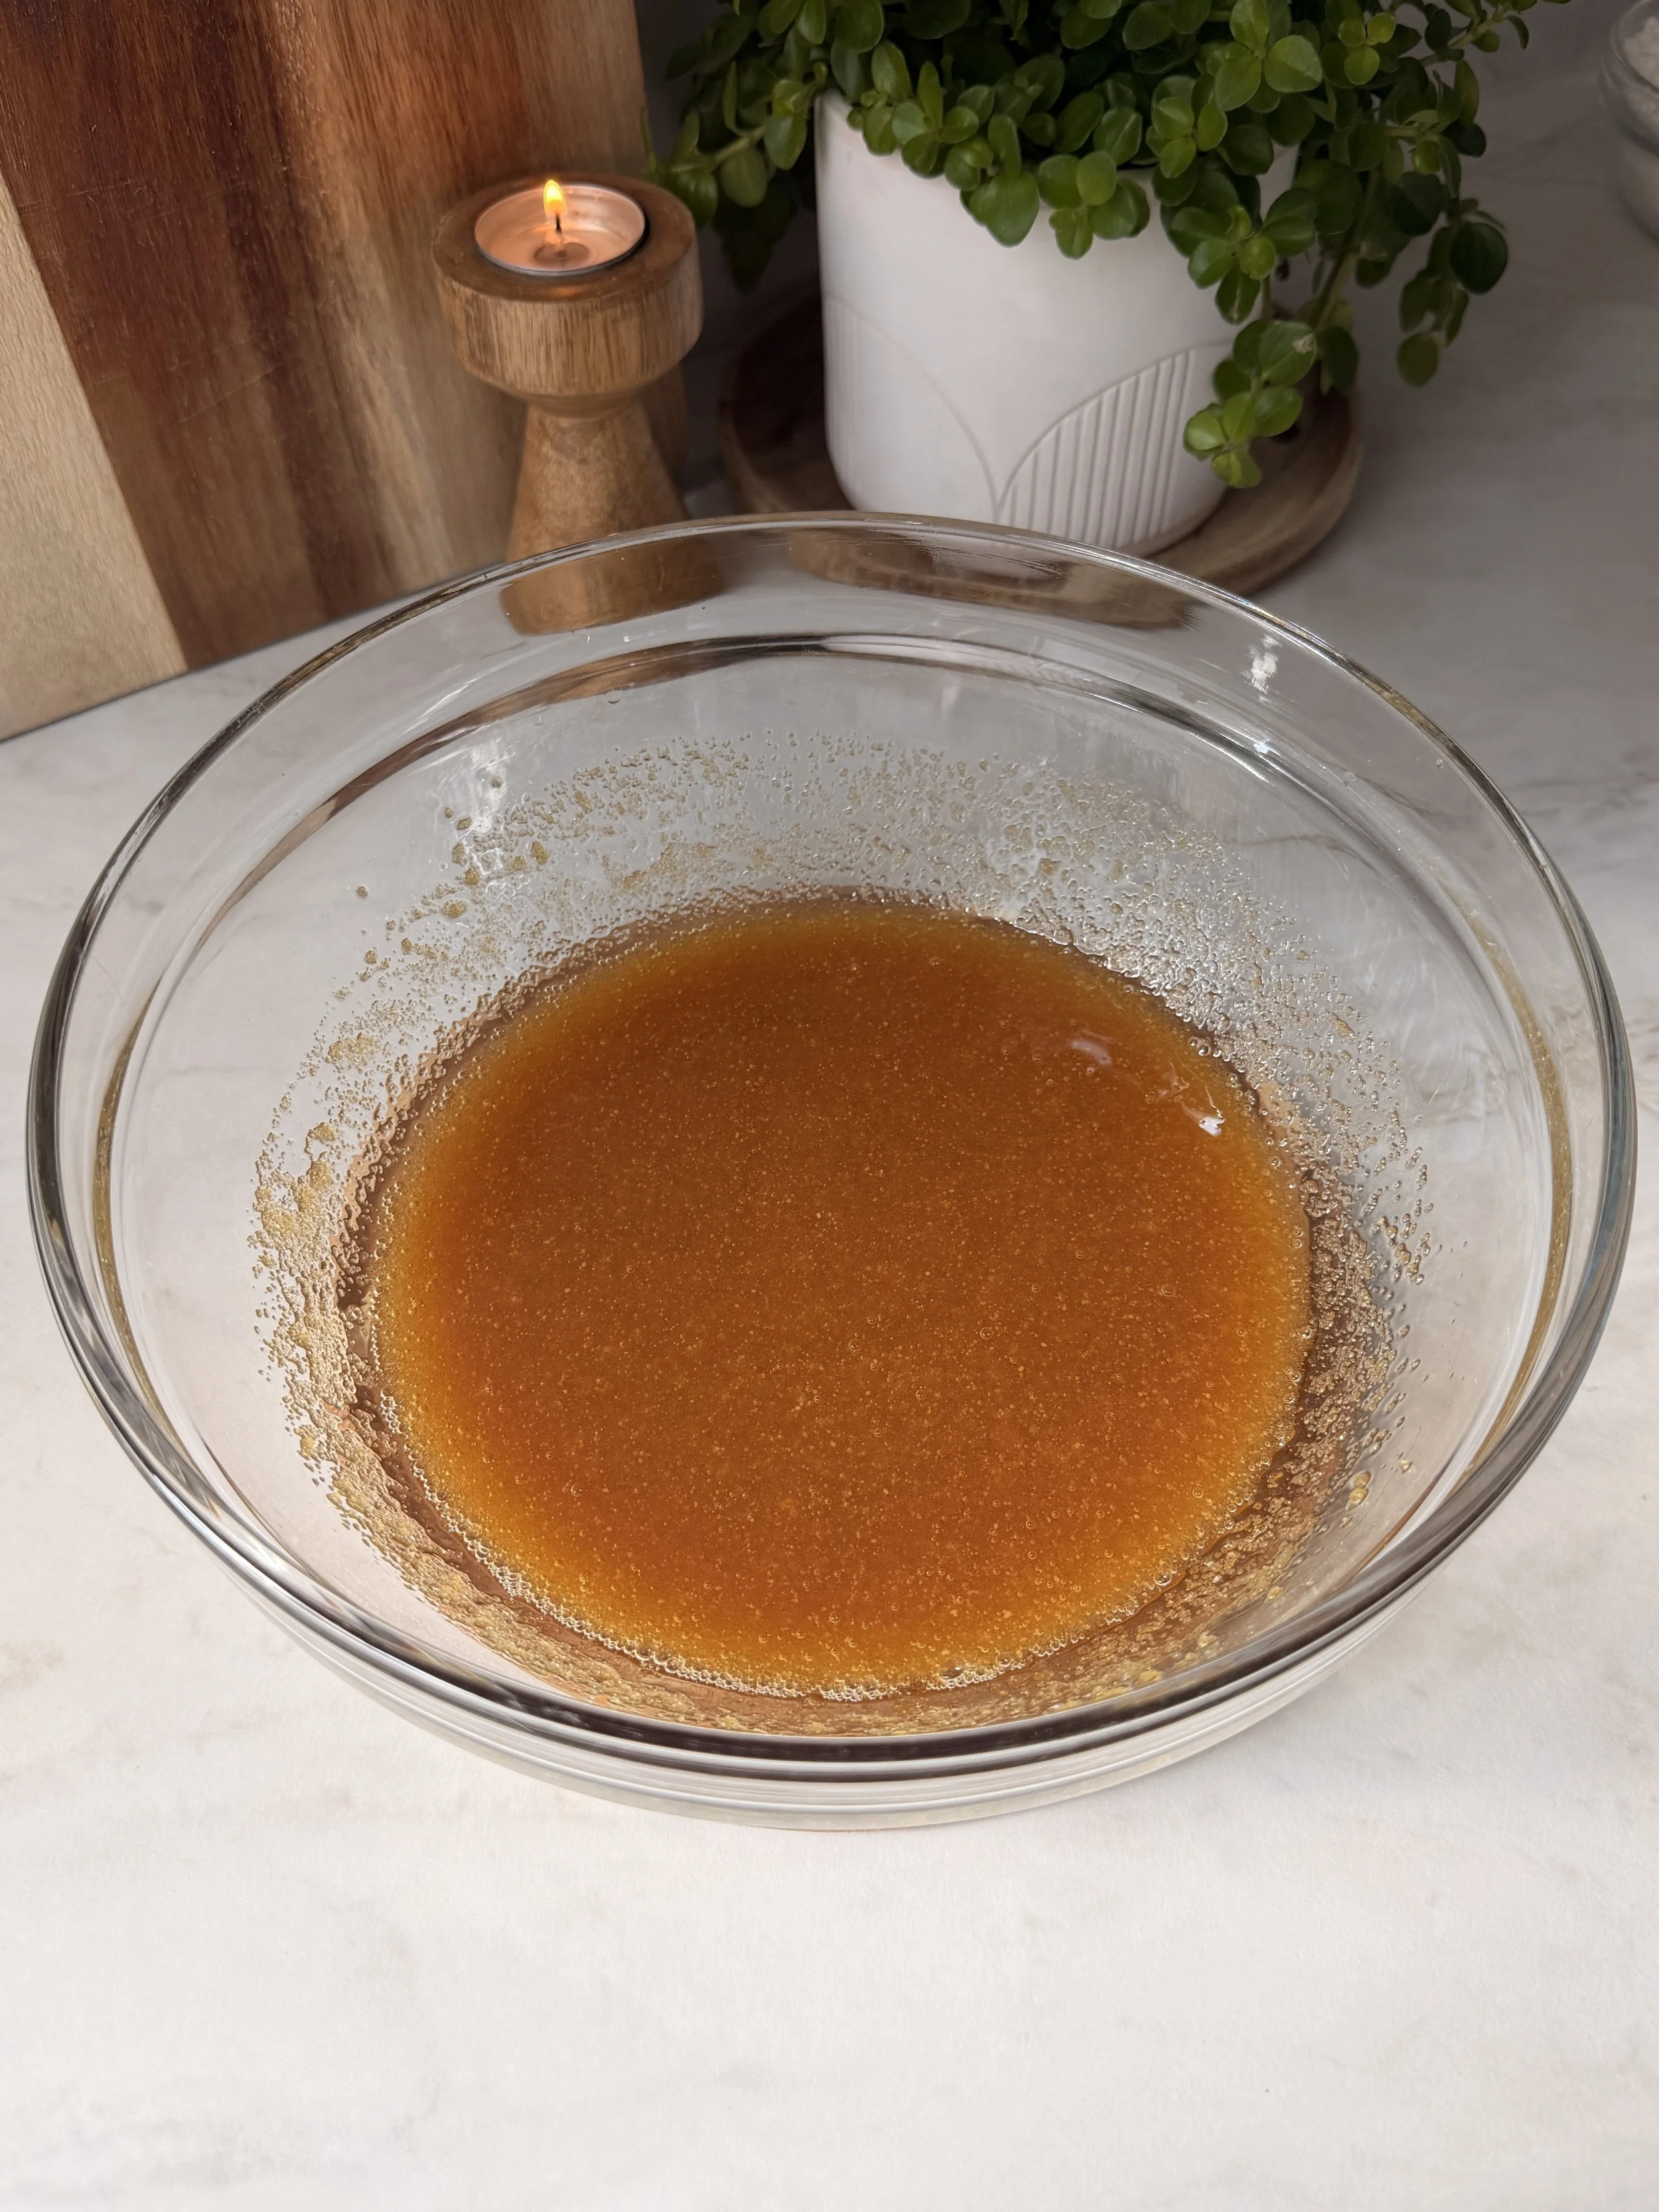
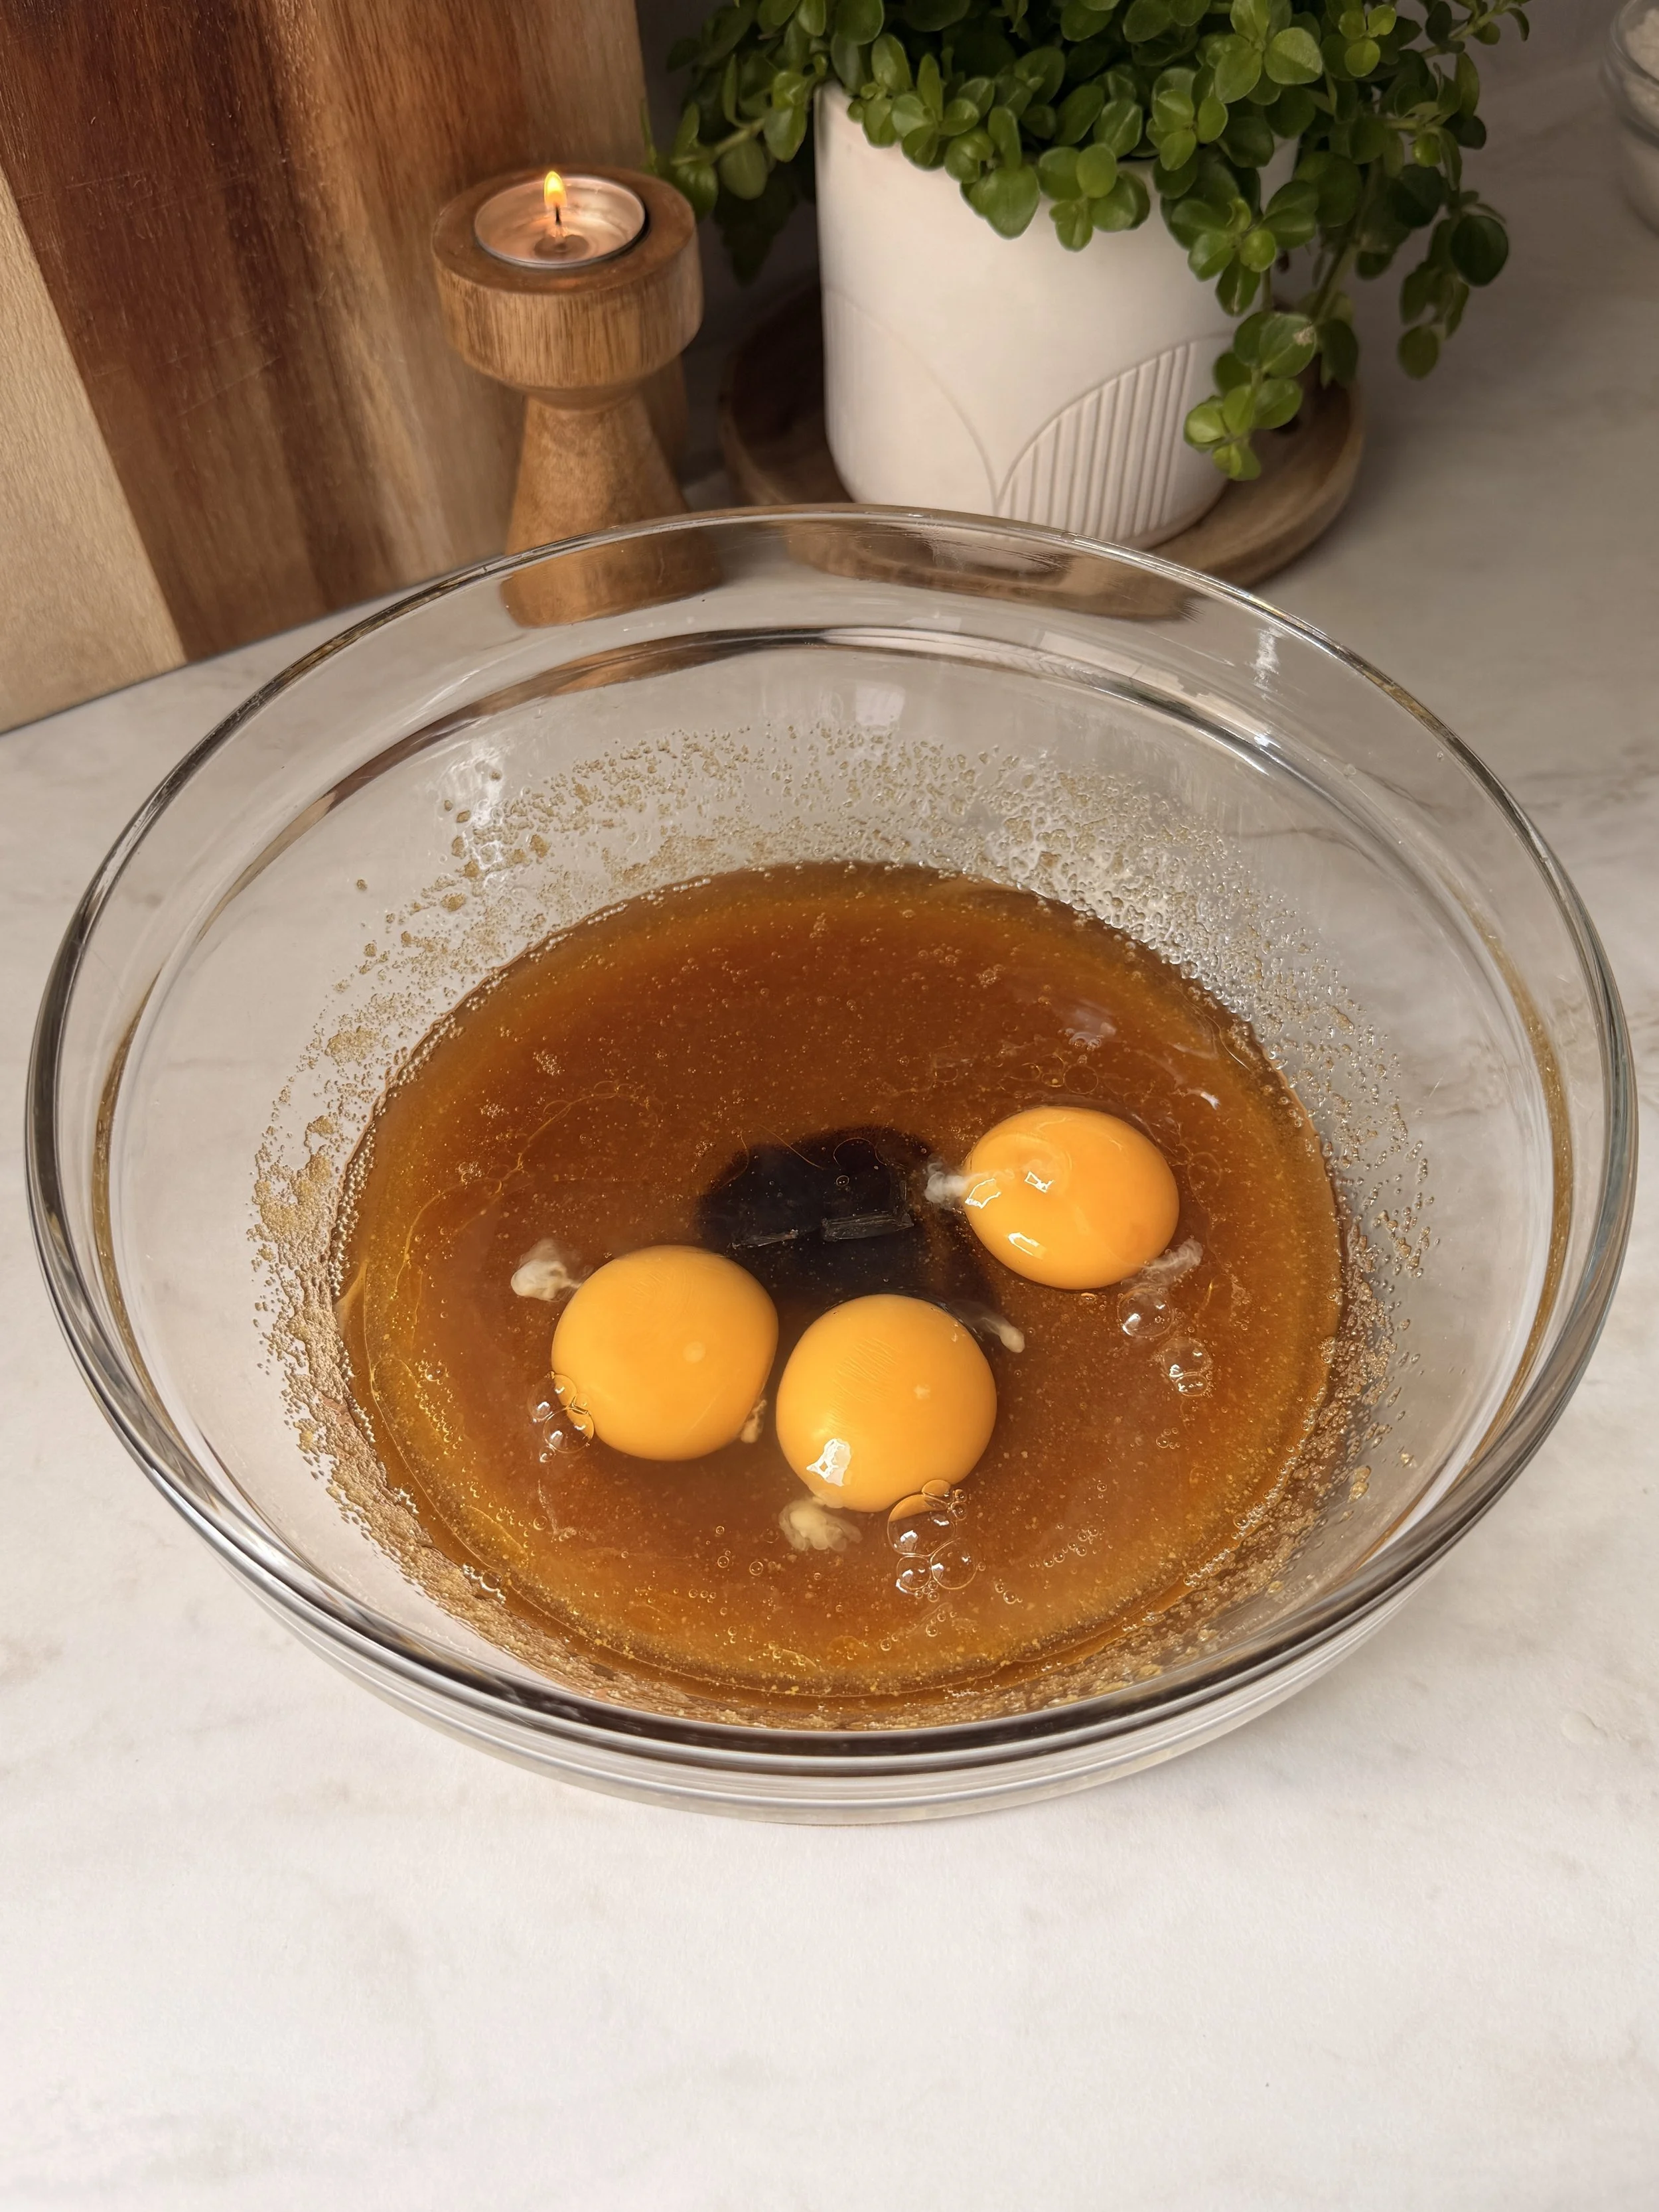
6. In a large bowl, whisk together the browned butter, granulated sugar and light brown sugar.
7. Add the eggs, egg yolk and vanilla bean paste, then whisk until fully combined.
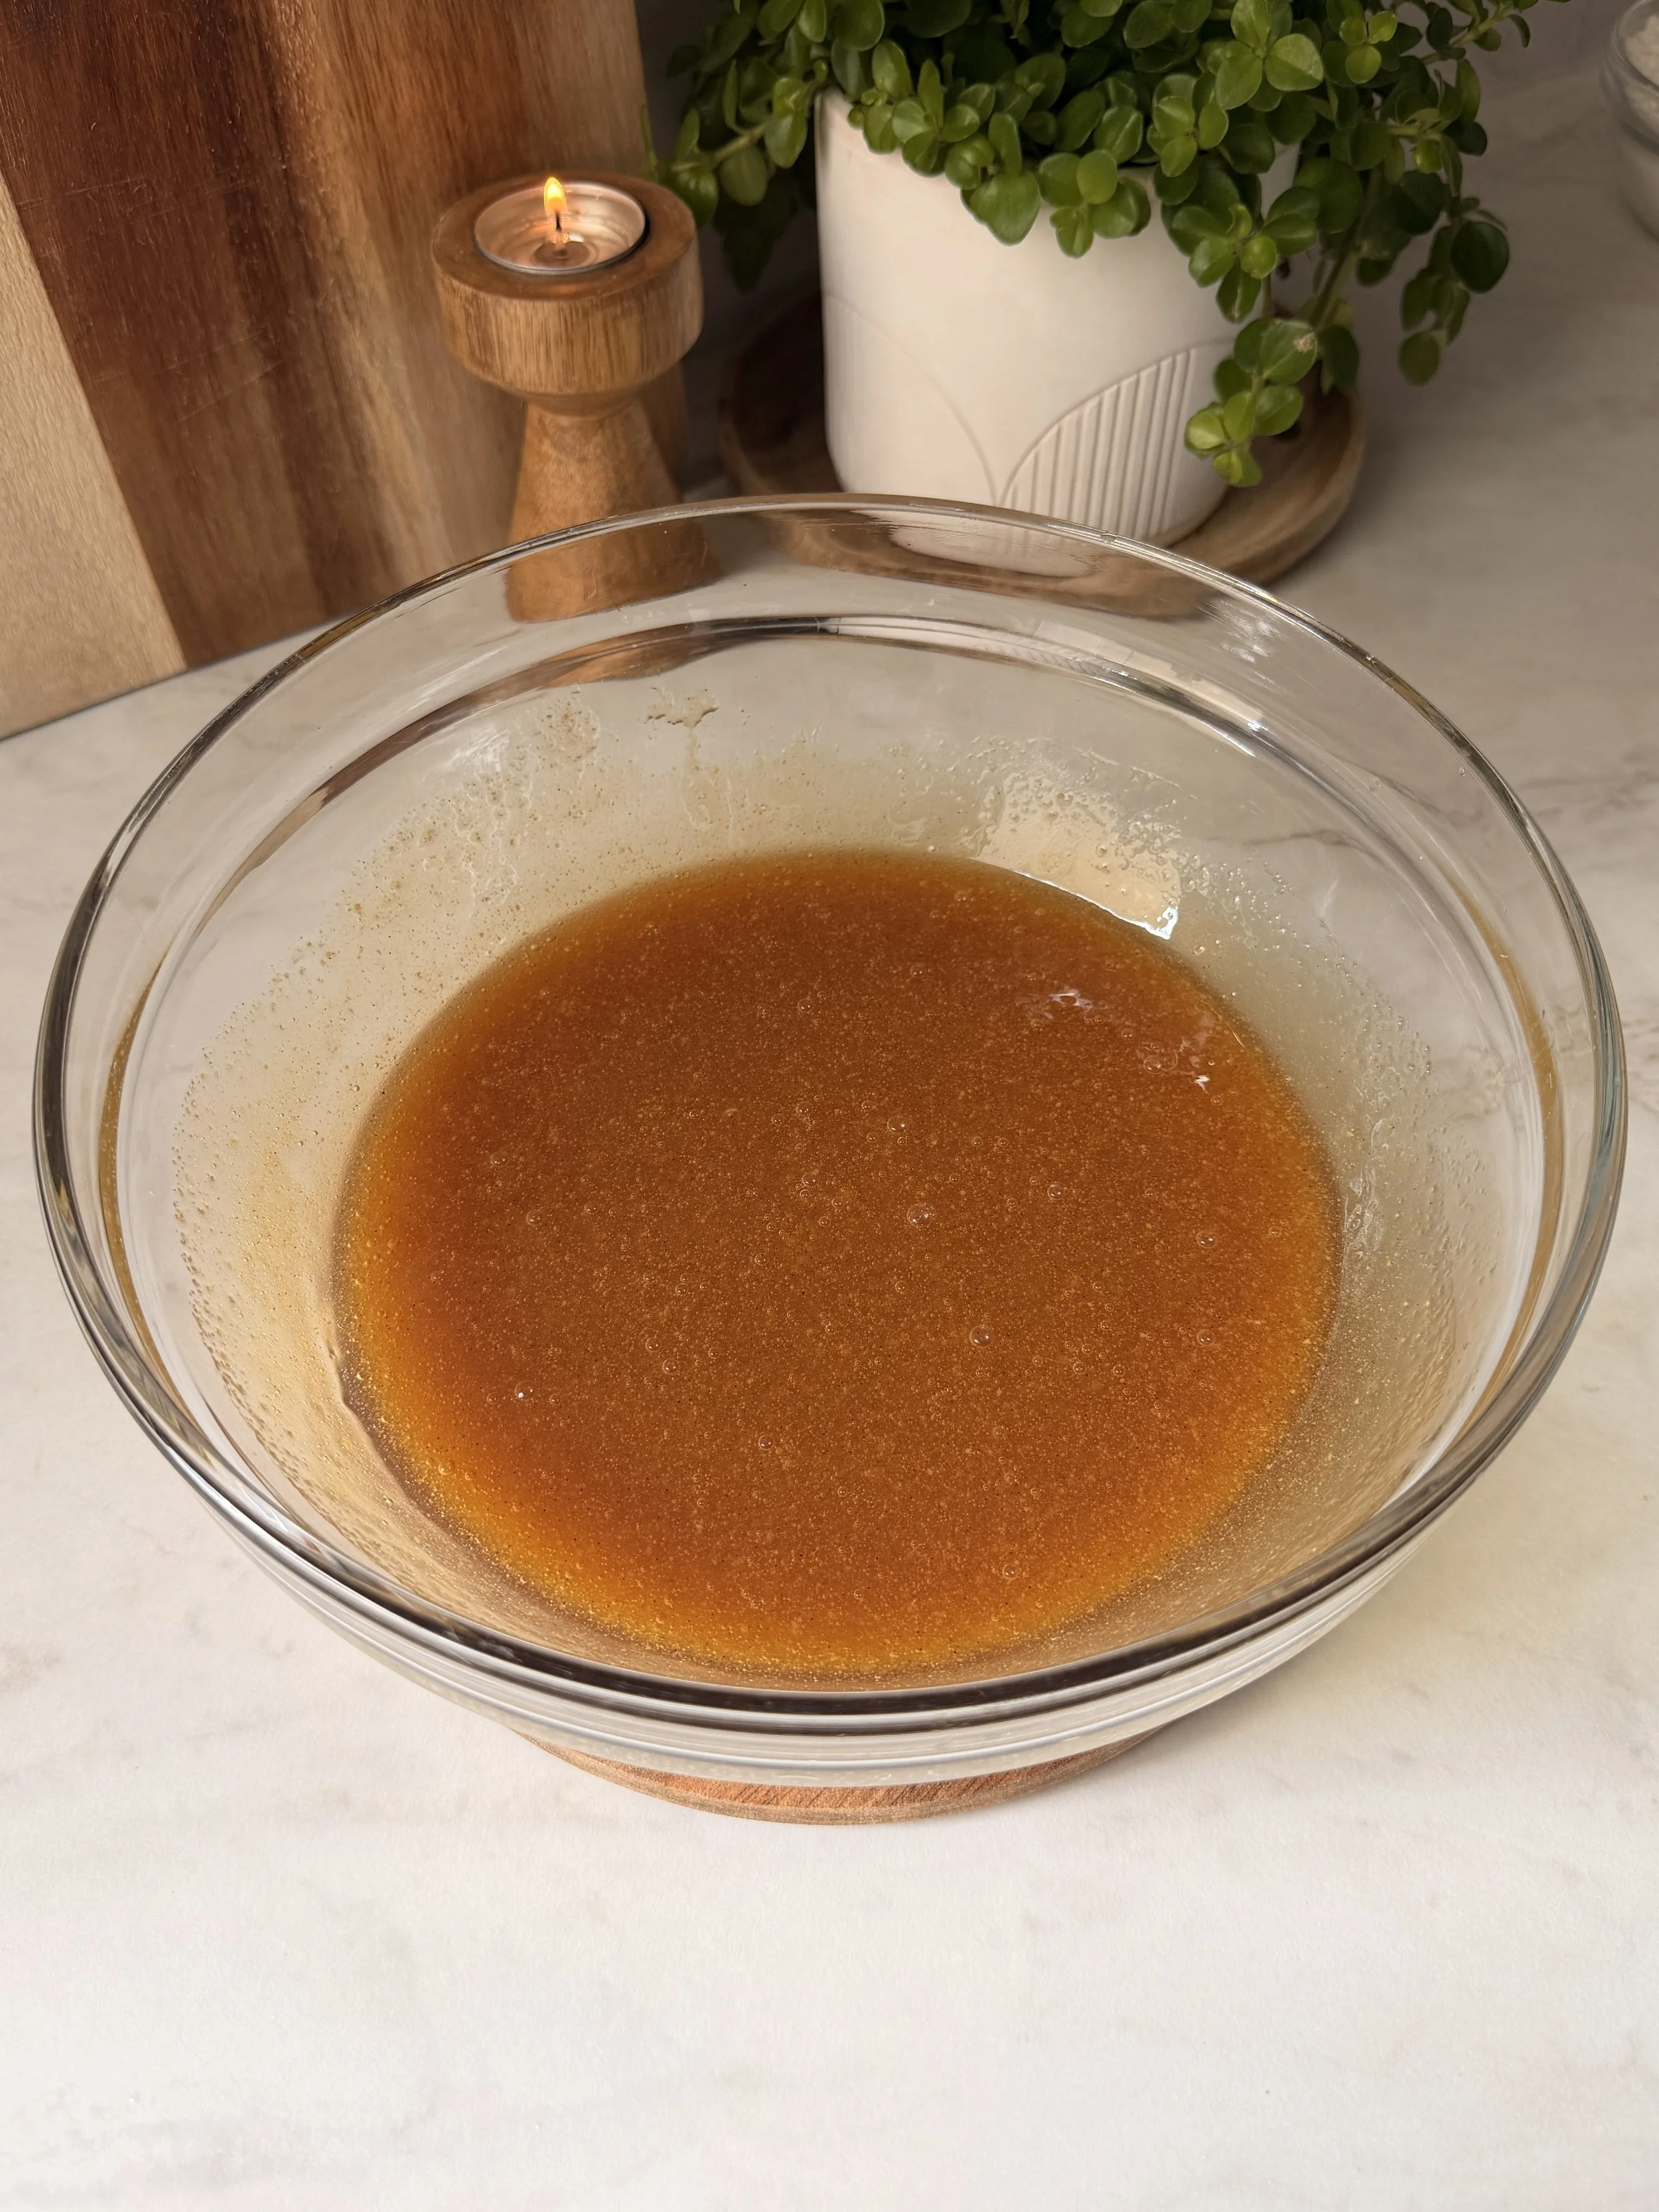
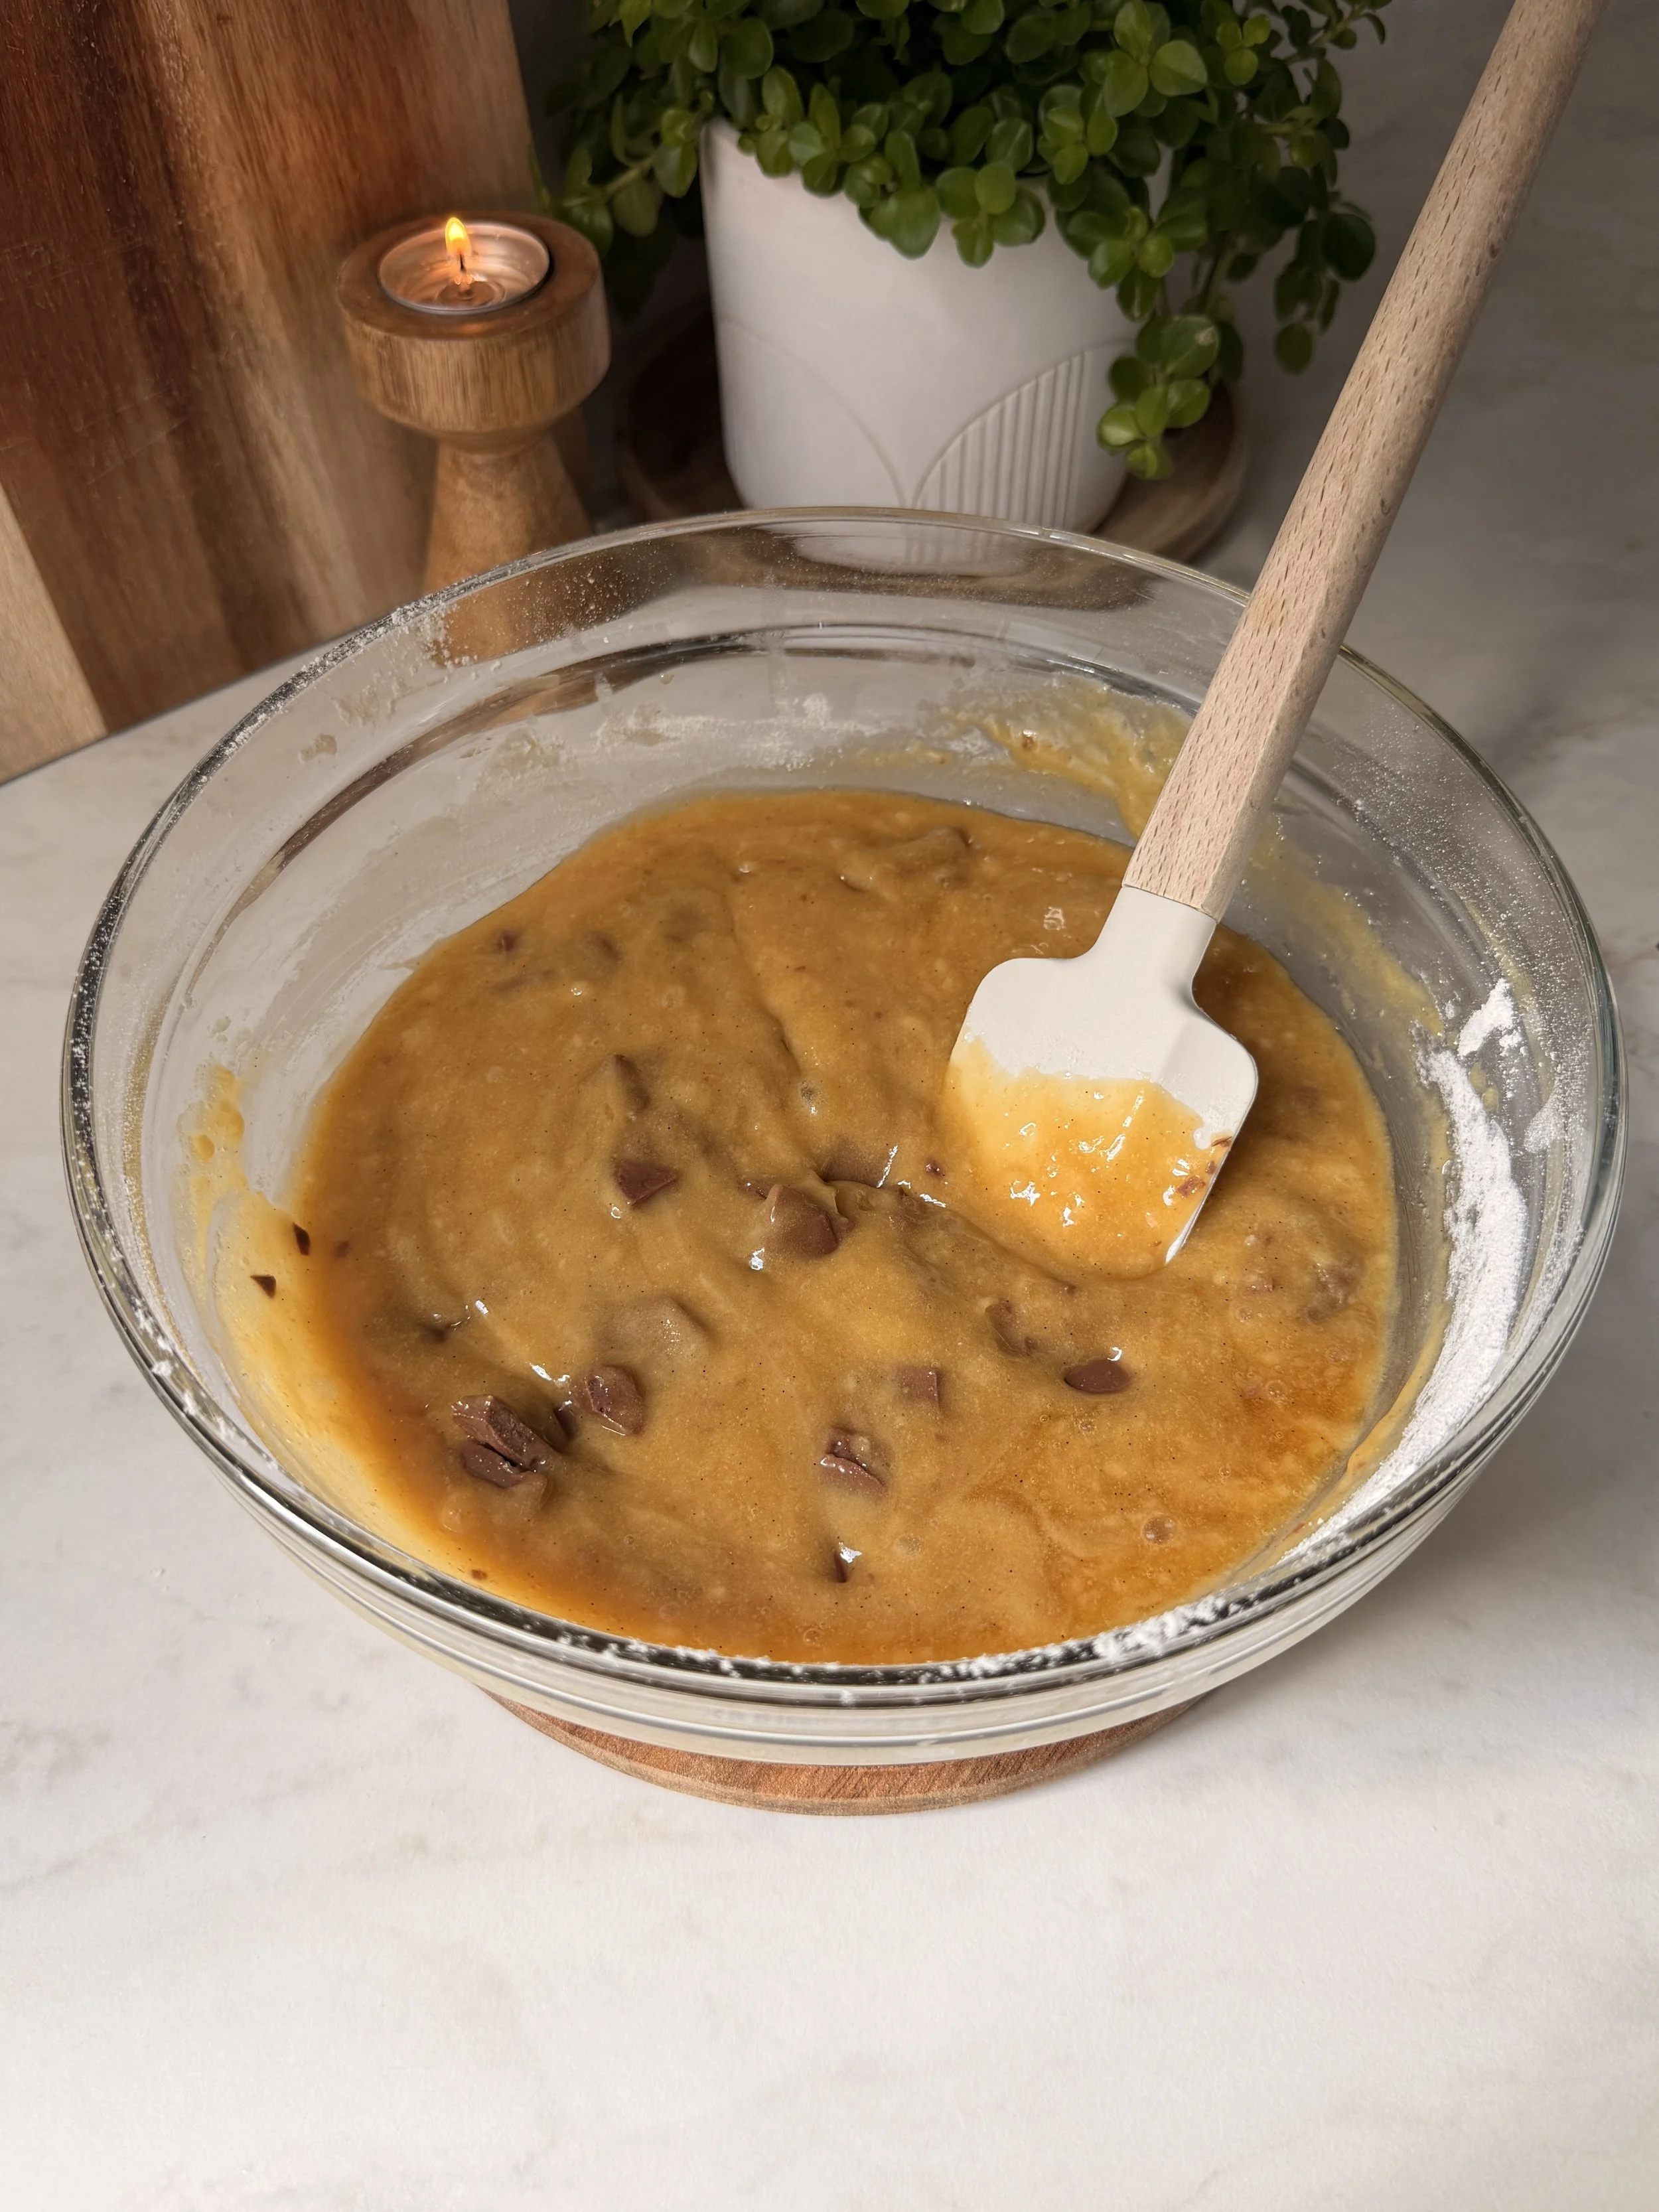
8. Add the flour along with the salt, and fold everything together until just combined.

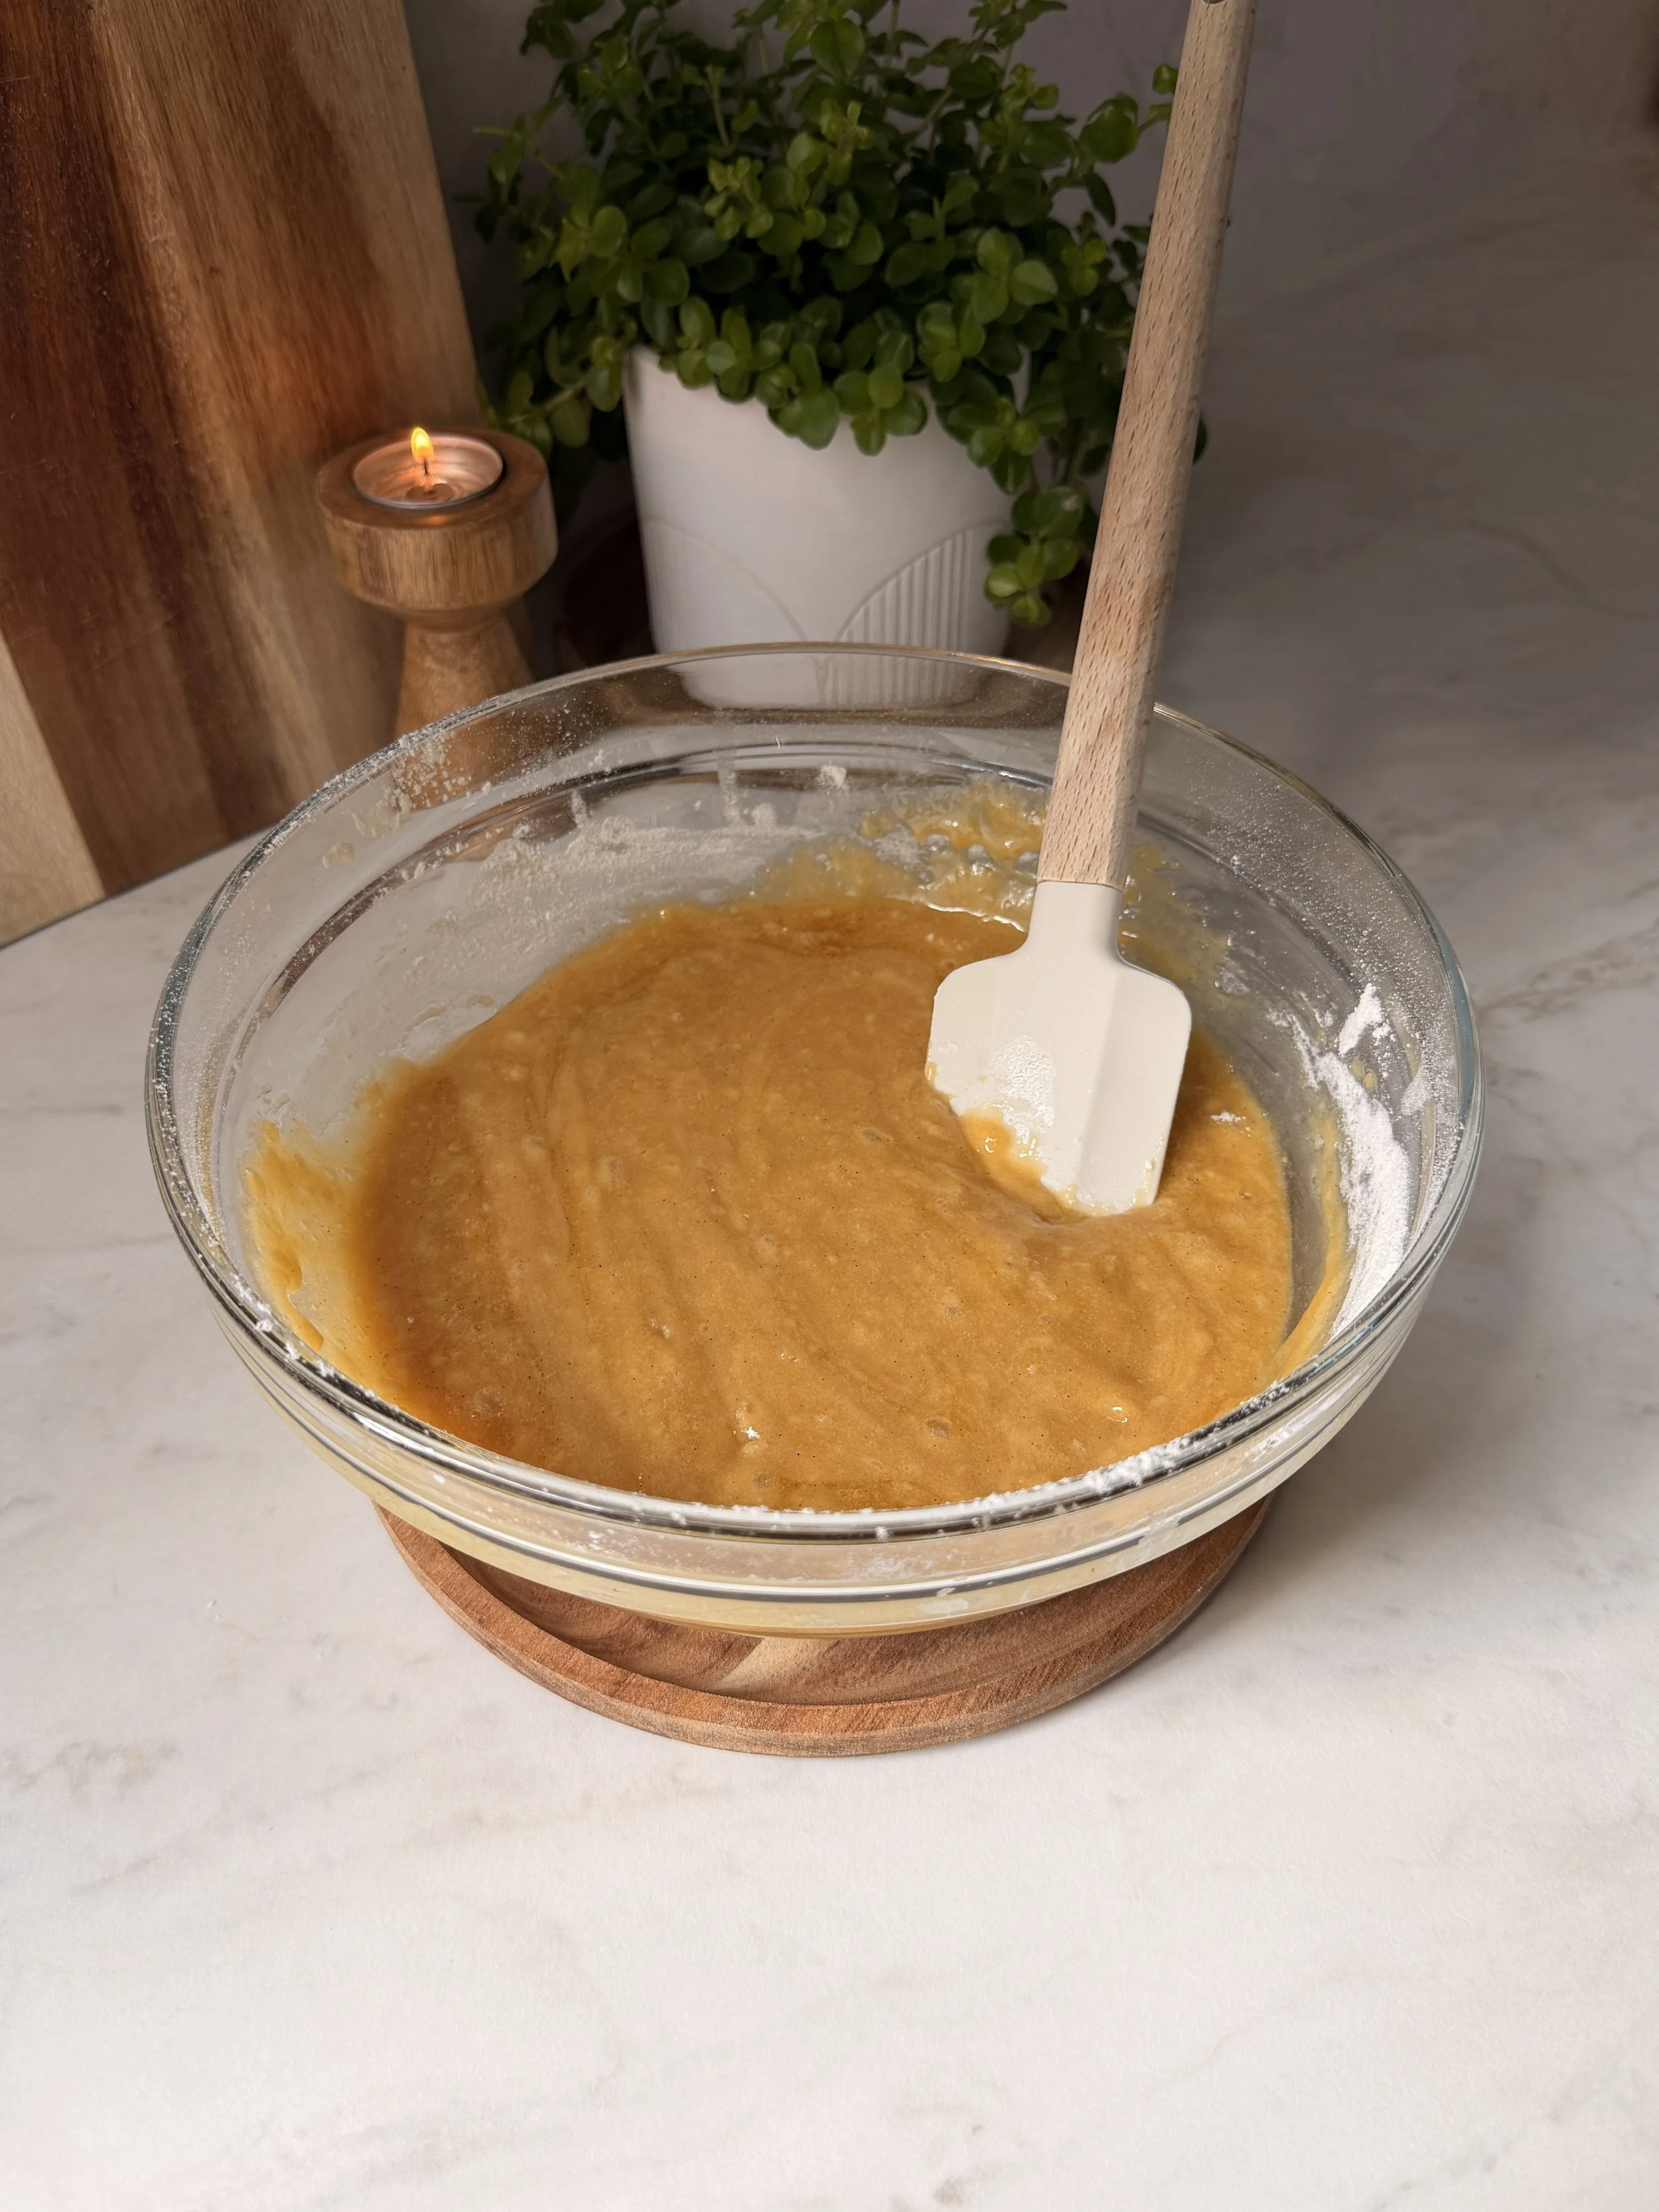
9. Fold in the chocolate chunks.
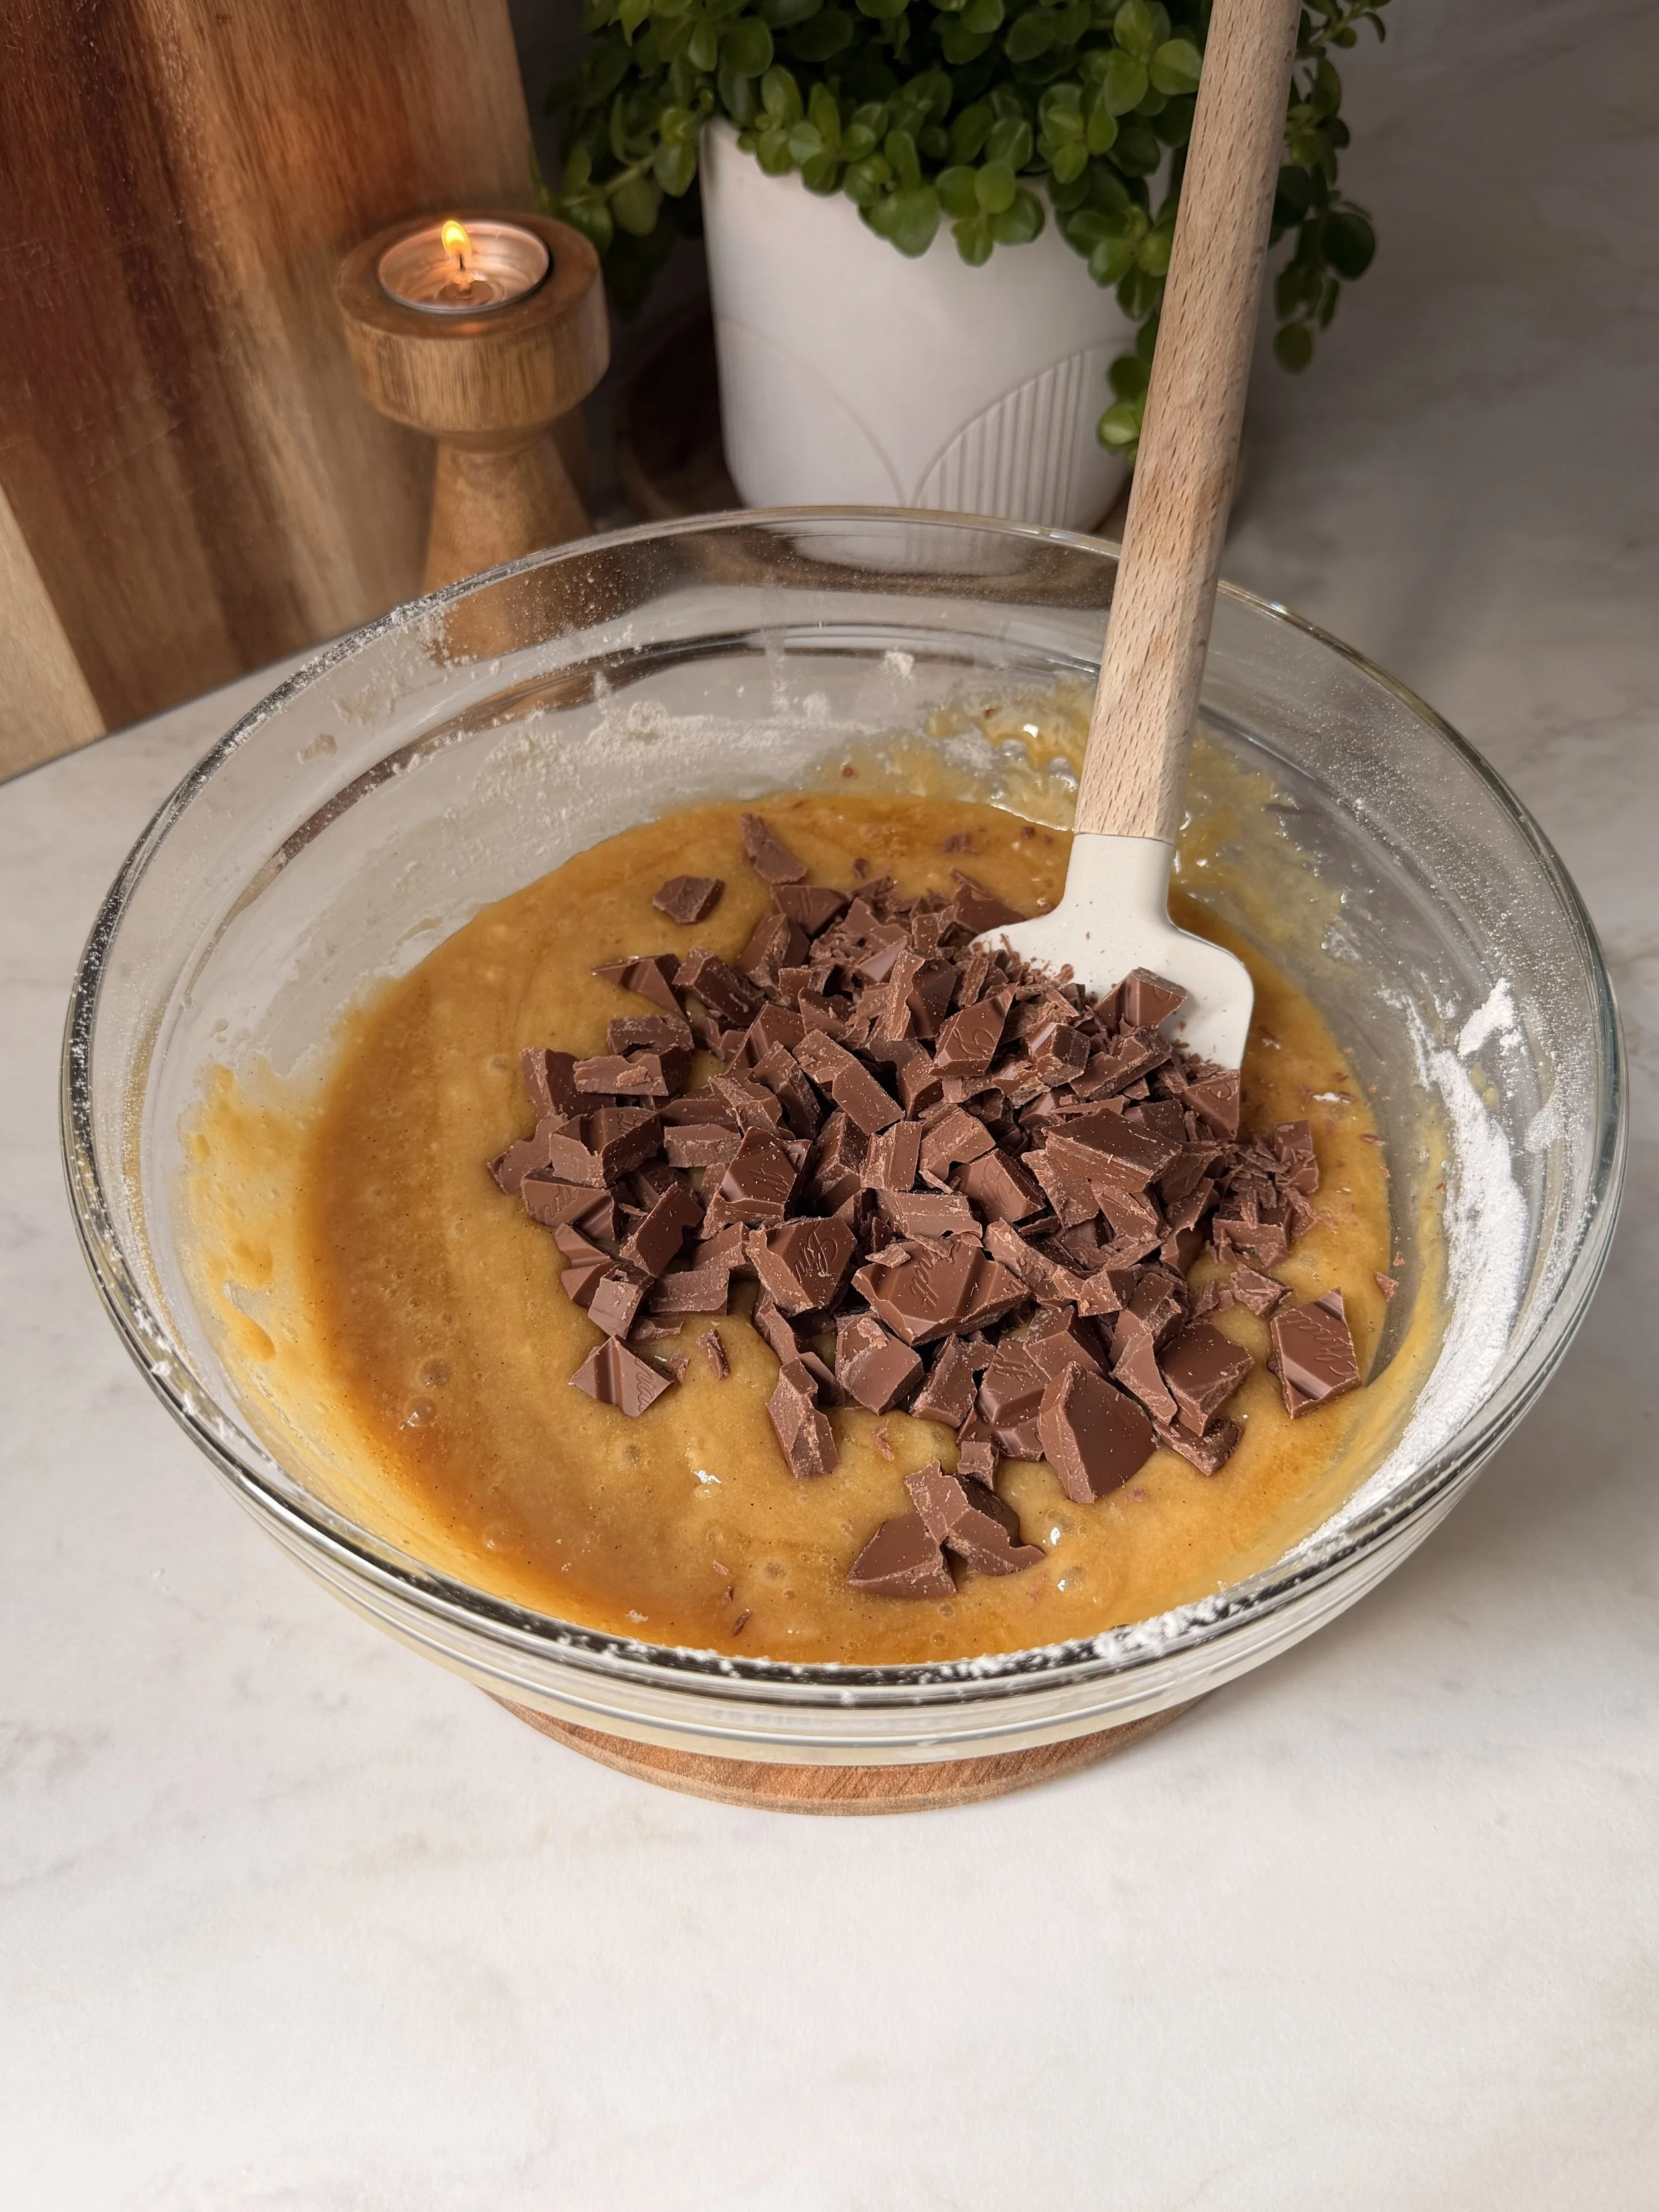
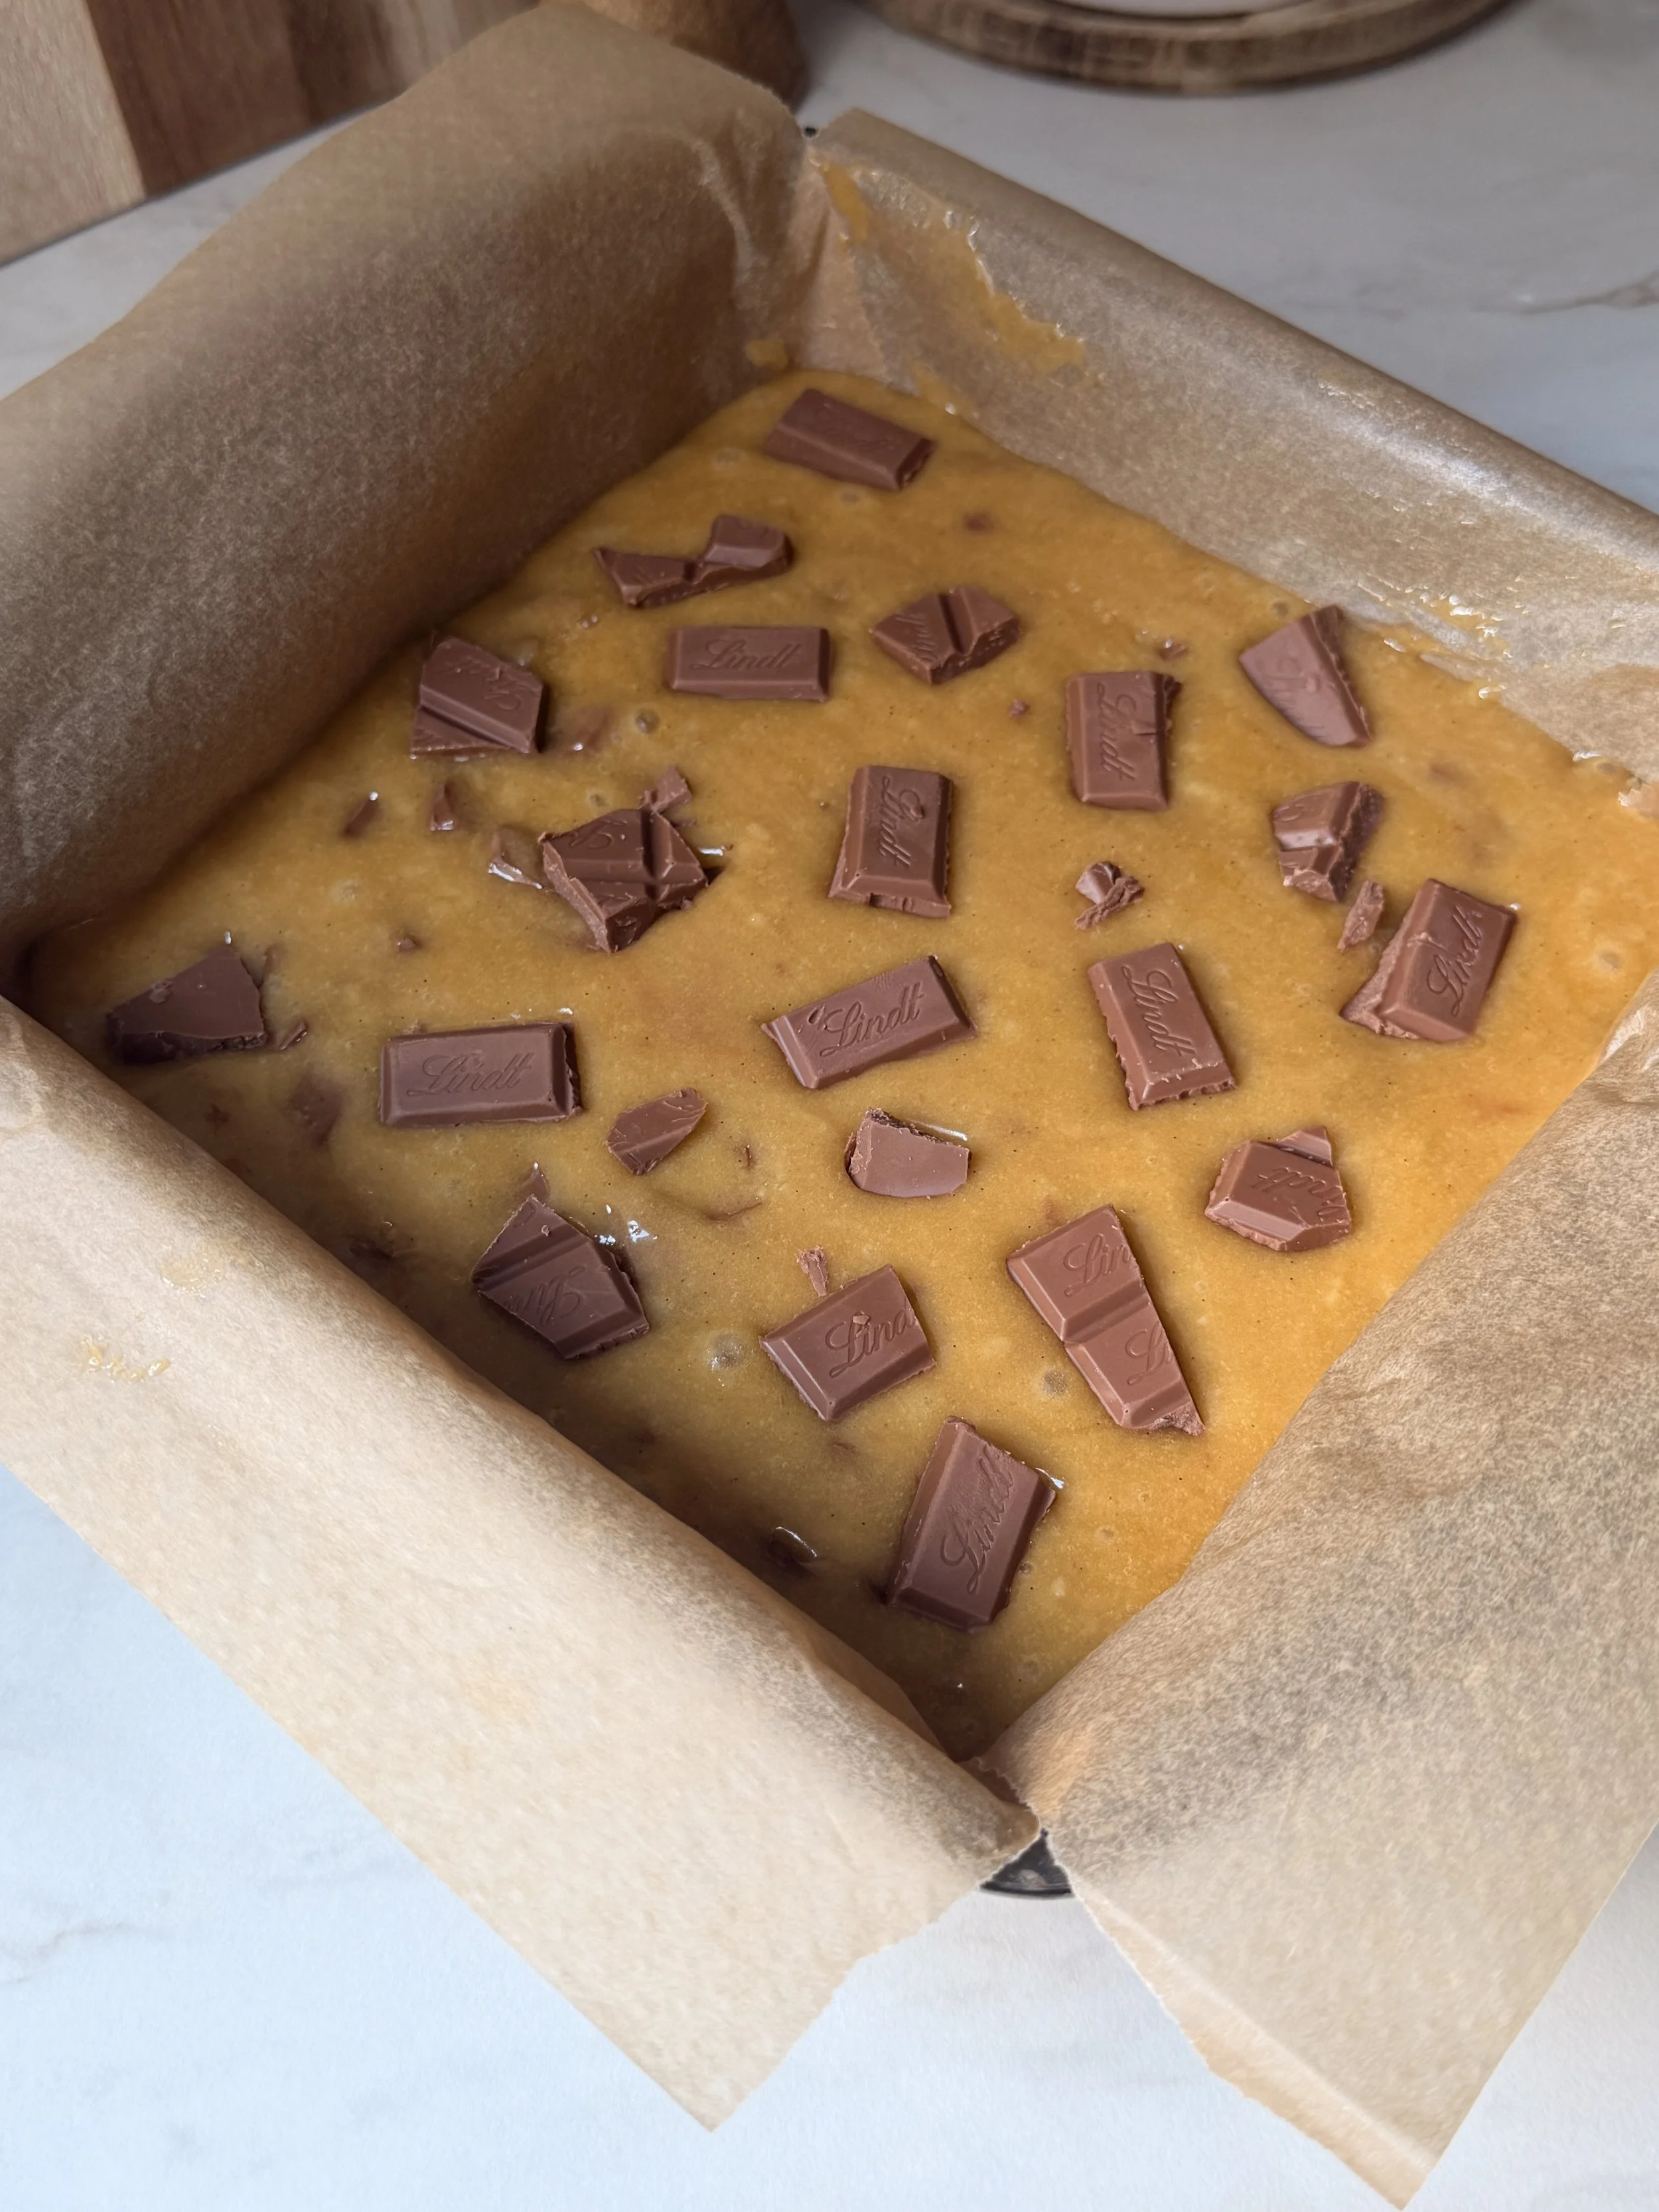
10. Pour the blondie batter into the prepared baking tin and spread it into an even layer.
11. Top with a few extra chocolate chunks and bake in the preheated oven for 25 minutes.
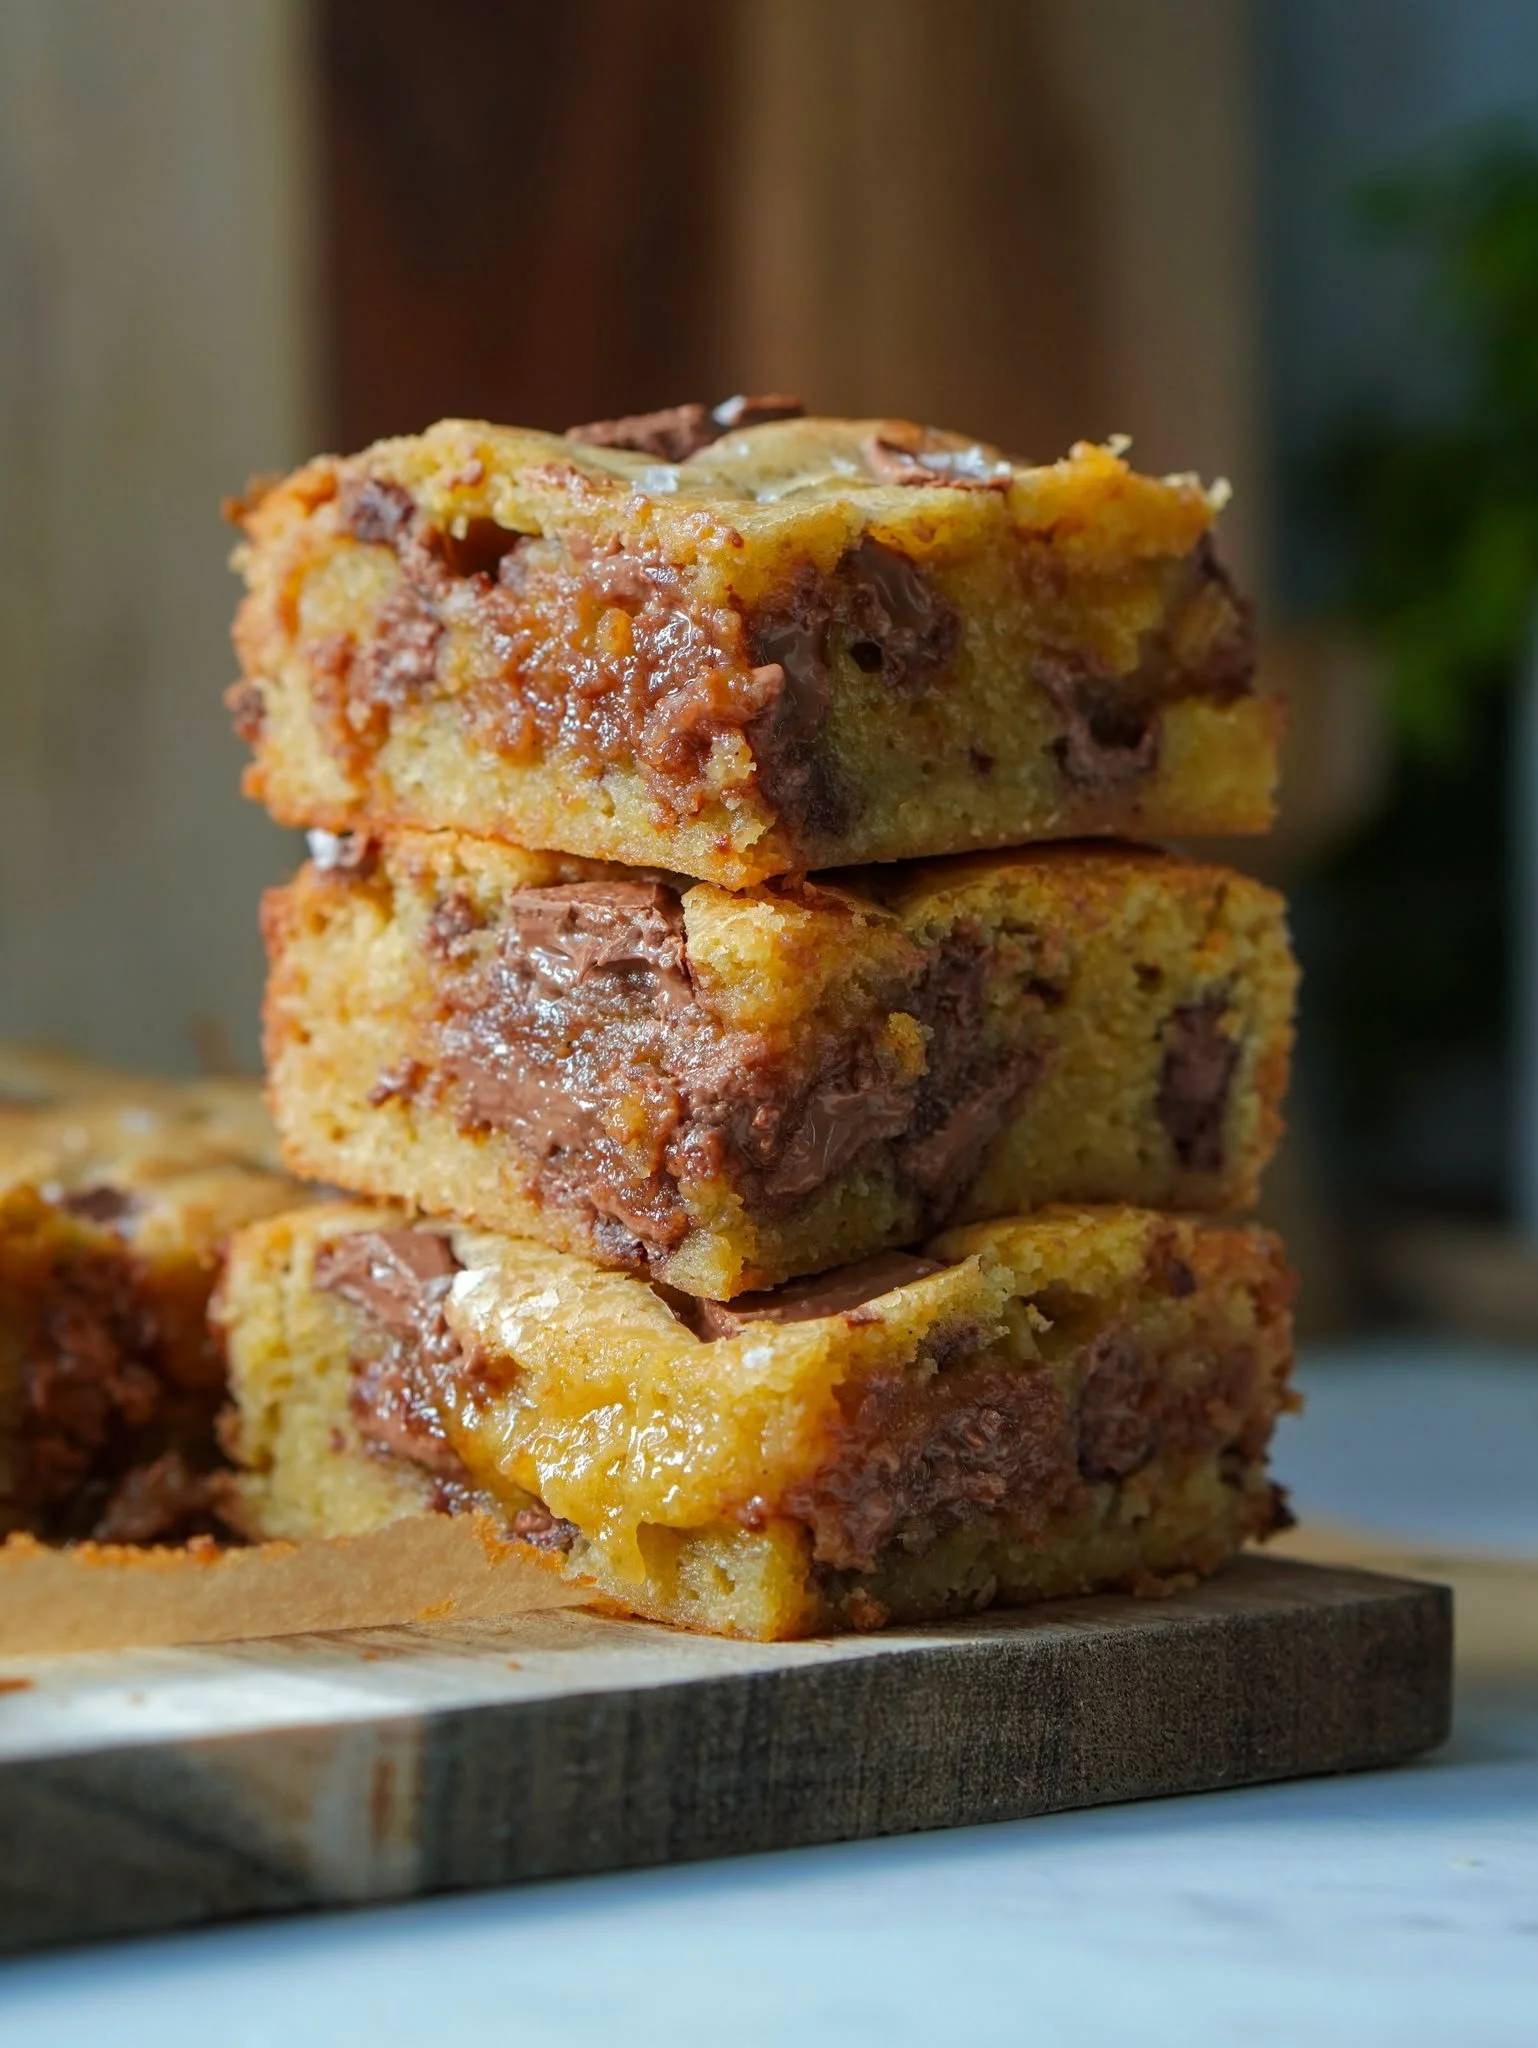
12. Once baked, let the blondies cool in the pan for 30 minutes before slicing and serving.
13. Top with flaky sea salt and enjoy!

Milk Chocolate Chunk Blondies with Brown Butter
These Brown Butter Milk Chocolate Chunk Blondies are rich, fudgy and packed with melty chocolate in every bite. The brown butter adds a delicious nutty flavor, while a sprinkle of flaky sea salt perfectly balances the sweetness. They're simple to make and hard to stop eating!
Ingredients
- 220g unsalted butter (1 cup)
- 50g granulated sugar (1/4 cup)
- 150g light brown sugar (2/3 cup)
- 2 large eggs + 1 large egg yolk
- 1 tablespoon vanilla bean paste
- 220g all purpose flour (1 cup + 3/4 cup)
- 1 teaspoon salt
- 150g milk chocolate chunks, for the batter (1 cup)
- 50g chocolate chunks, for topping (1/3 cup)
- A pinch of flaky sea salt, for topping
Instructions
- First, brown the butter.
- In a saucepan, melt the butter over medium heat.
- Once melted, continue cooking, stirring constantly, until it foams and turns golden brown.
- Pour the browned butter into a separate bowl and let it cool slightly for about 15 minutes.
- Preheat your oven to 180°C and line a 20x20 cm baking tin with parchment paper.
- In a large bowl, whisk together the browned butter, granulated sugar and light brown sugar.
- Add the eggs, egg yolk and vanilla bean paste, then whisk until fully combined.
- Add the flour along with the salt, and fold everything together until just combined.
- Fold in the chocolate chunks.
- Pour the blondie batter into the prepared baking tin and spread it into an even layer.
- Top with a few extra chocolate chunks and bake in the preheated oven for 25 minutes.
- Once baked, let the blondies cool in the pan for 30 minutes before slicing and serving.
- Top with flaky sea salt and enjoy!