Biscoff Cheesecake
This cheesecake is a very delicious, creamy, baked cheesecake. If you’d like to try it, I recommend reading the Tips and Tricks section, as it contains important information and useful details. If you love Biscoff and cheesecake, you should definitely give this recipe a try.
Anyone who knows me knows that I’m not a huge fan of Biscoff. It’s tasty and all, but it’s definitely not in my top 10 favorite desserts. That said, I still plan to make a lot of Biscoff based desserts in the future, since my lovely followers and friends really enjoy them. Of course, taste testing is important to know what needs adjusting in a recipe, but luckily I’m not doing it alone. My boyfriend helps out a lot by tasting everything and giving honest, realistic feedback without sugarcoating.
For this cheesecake, you’ll need both Biscoff spread and Biscoff cookies. The cookies will form the base of the cheesecake, which we’ll mix with melted butter and press firmly into the baking pan to make sure it holds together and doesn’t fall apart later. Then we’ll chill the base in the fridge while we prepare the cheesecake batter. The Biscoff spread is mixed into the batter itself, and we’ll also pour some on top after baking for extra flavor.
I should also mention that I baked this cheesecake in a 26 cm round baking tin. But if you'd like a taller cheesecake, you can use a 24 cm diameter pan instead.
This cheesecake is best served chilled, after resting in the fridge overnight. The texture becomes firmer, the flavors settle beautifully and it’s much easier to slice cleanly. I hope you give a go :)
Tips and tricks
1. I used a 26 cm round pan, but use a 24 cm for a taller cheesecake - The recipe was tested in a 26 cm springform pan, which results in a slightly shorter cheesecake. If you prefer a taller, bakery style cheesecake, go for a 24 cm pan instead.
2. Don’t skip the water bath - A water bath helps the cheesecake bake gently and evenly.You can do this in two ways:
– Method 1: Wrap the outside of your springform pan in foil to keep water from getting in, then place it in a larger pan filled with hot water (about halfway up the sides).
– Method 2: If you want to avoid dealing with foil, place a separate oven safe dish filled with hot water on the bottom rack of your oven while the cheesecake bakes. This creates steam!
3. Chill overnight for best results - Cheesecake needs time to set and develop its flavor. It will be much creamier, firmer and easier to slice after chilling in the fridge overnight.
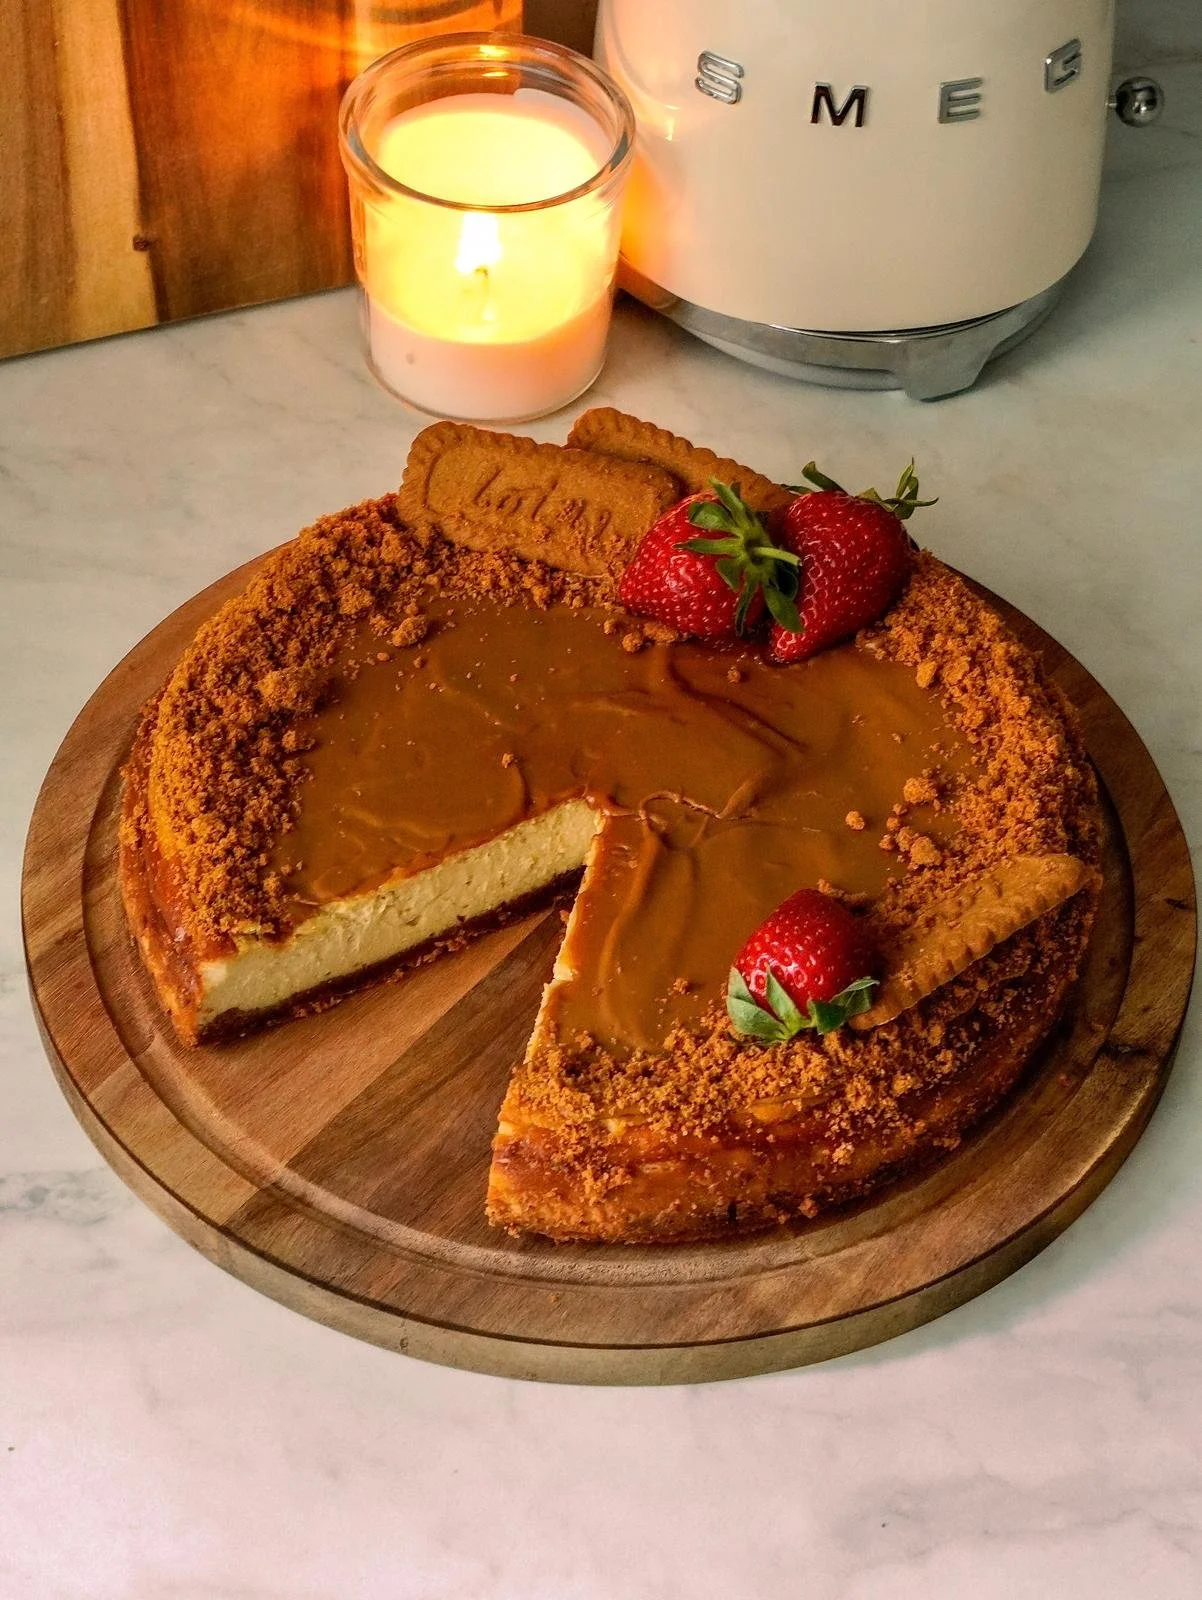
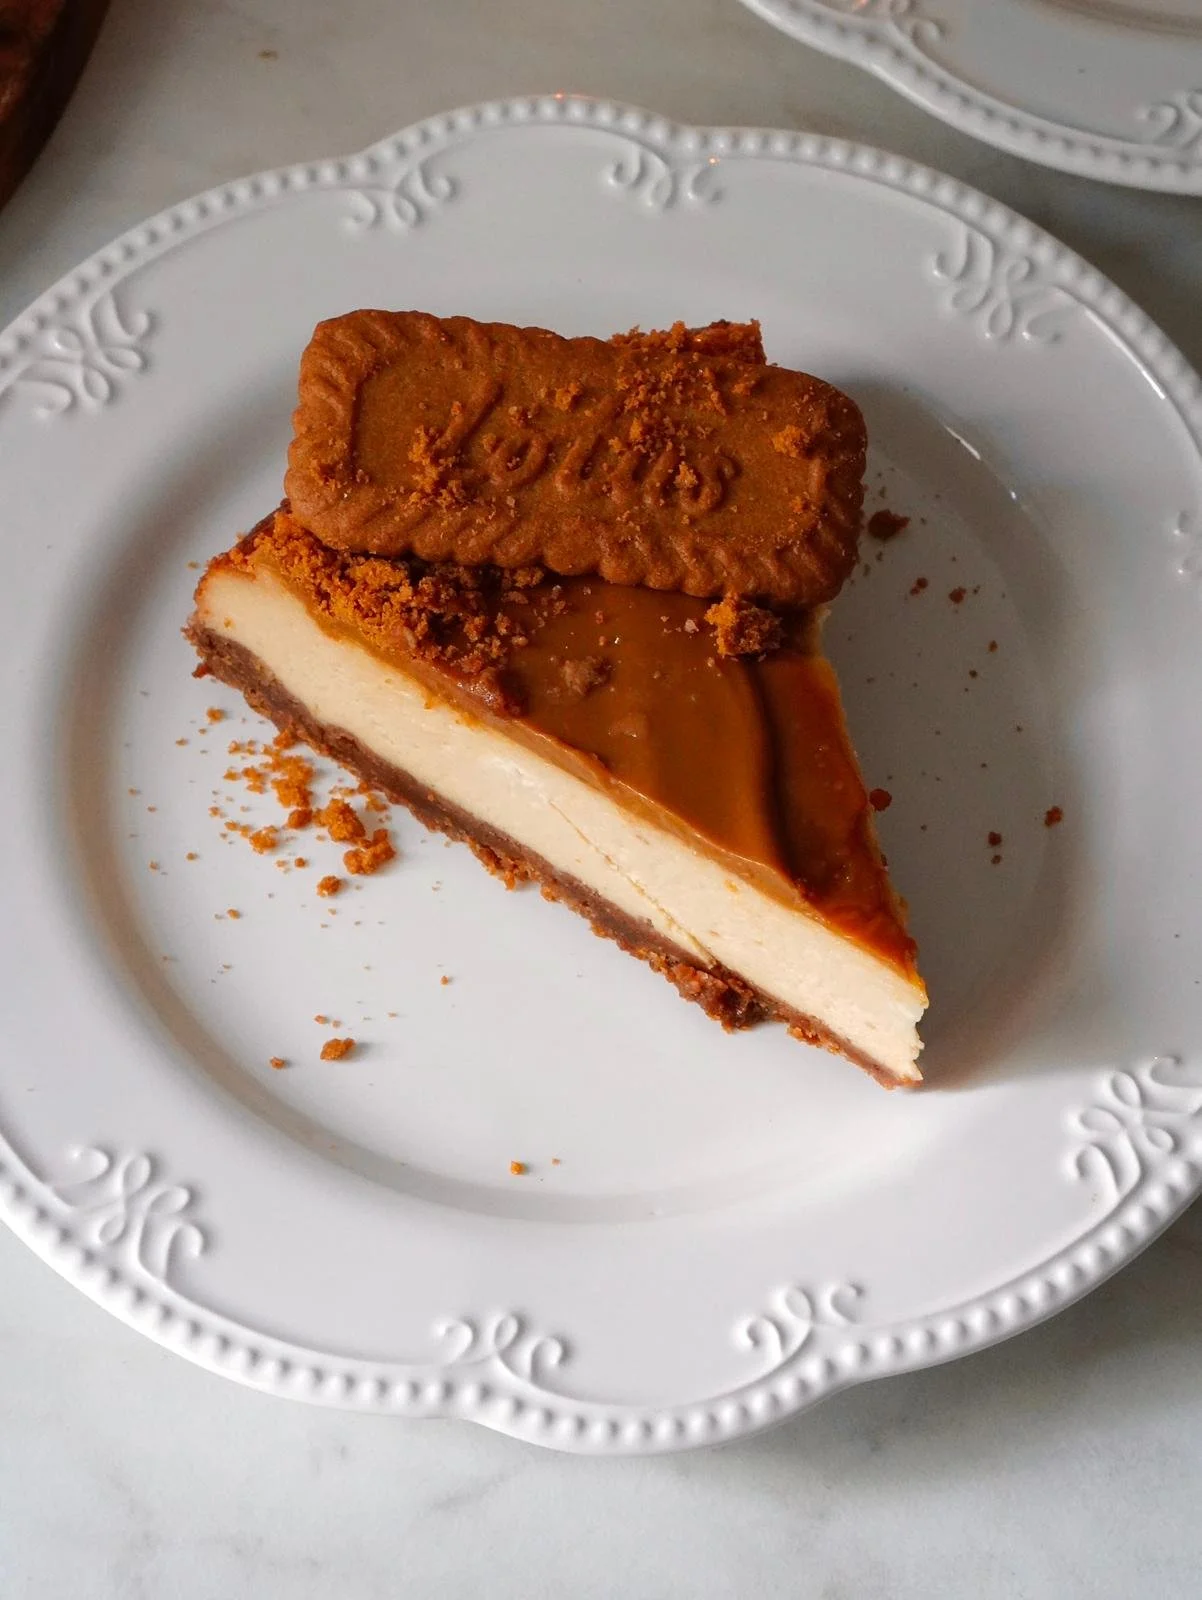
4. Top with melted Biscoff spread and more biscuits - Once the cheesecake is fully cooled and set, melt some Biscoff spread (just microwave it for a few seconds) and pour it over the top. You can also crumble extra Biscoff cookies on top for a bit of crunch and decoration.
5. Mix in the eggs one at a time - Add the eggs to your batter one by one, mixing just until combined. This helps keep the texture smooth and prevents overmixing, which can cause the cheesecake to crack.
6. Refrigerate the crust until you prepare the batter - After pressing the crust into the pan, pop it in the fridge while you make the cheesecake batter. This helps it firm up and stick together better when it bakes.
7. Let it cool for 30 minutes in the oven with the door cracked - Once the cheesecake is done baking, turn off the oven and crack the door open slightly. Let the cheesecake sit inside for 30 minutes. This slow cooling helps prevent sudden temperature changes, which can cause cracking on the surface.
Ingredients you will need for this recipe
For the crust:

Biscoff biscuits: They form the base of the crust.
Unsalted butter, melted: Butter binds the crushed biscuits together to form a firm, buttery crust. Unsalted is best so you can control the salt level.
For the cheesecake batter:
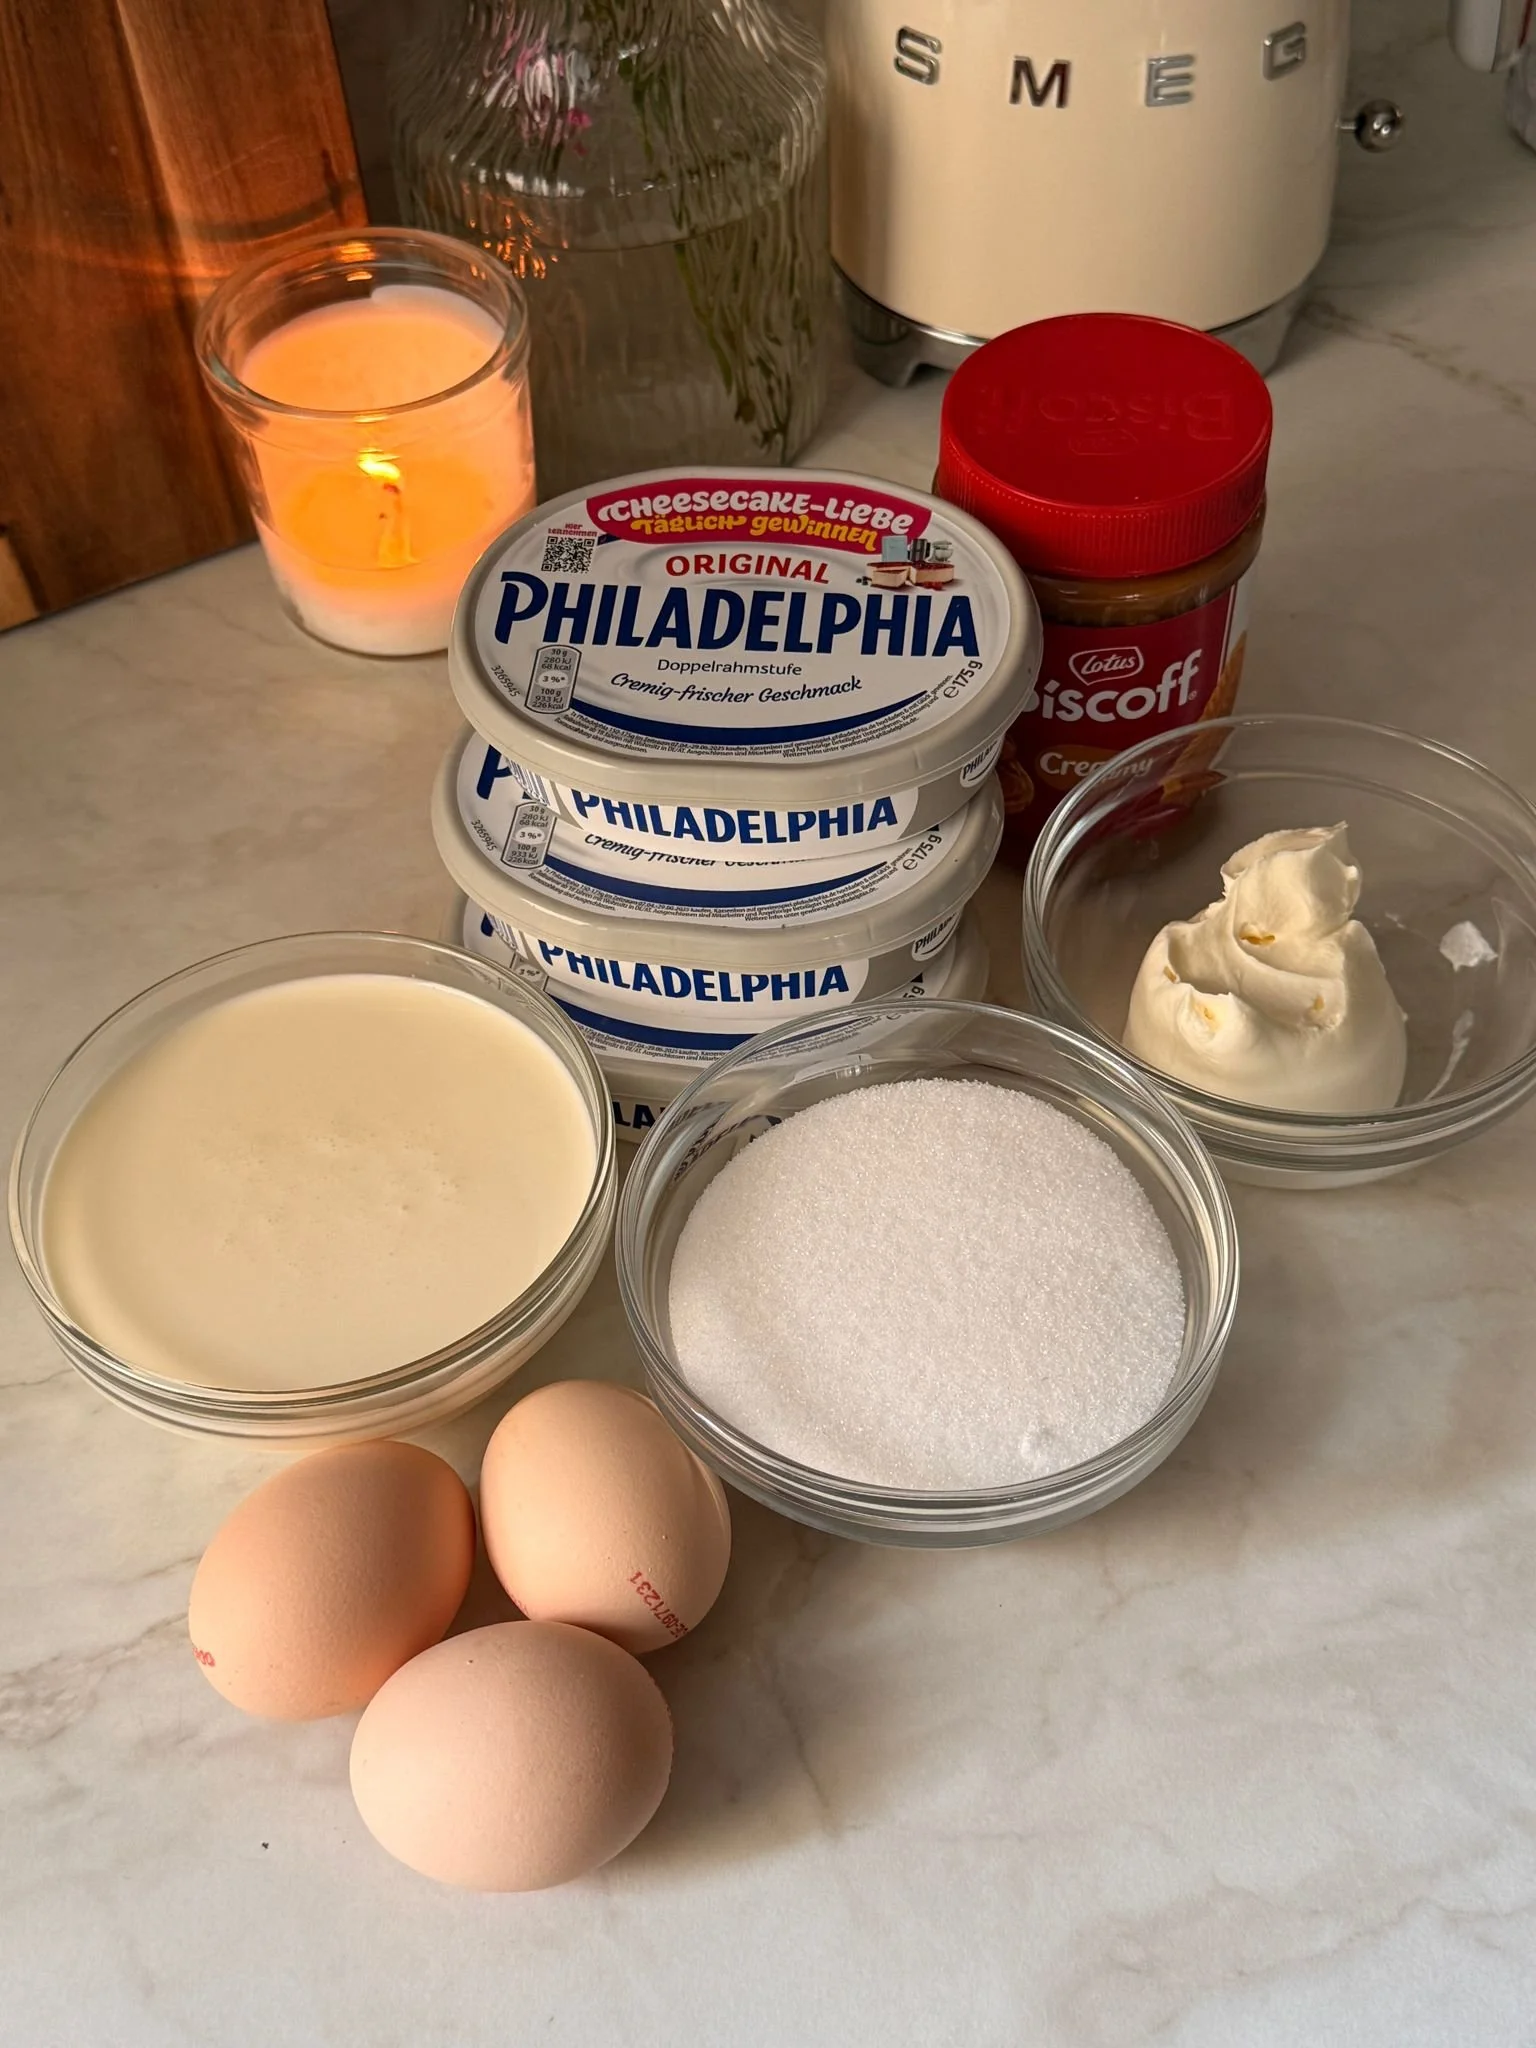
Cream cheese: Philadelphia is my absolute favourite cream cheese for cheesecakes. Of course, you can use whatever brand you prefer.
Sour cream: Sour cream adds a bit of tanginess and smoothness to the batter, balancing out the sweetness. If you don’t have it, you can substitute it with Greek yogurt or plain yogurt, just make sure it’s not too runny.
Biscoff spread: This is the main flavour of the cheesecake! We will also use this to top the cheesecake with once baked.
Granulated sugar: This sweetens the cheesecake.
Eggs: Eggs give the cheesecake structure by holding everything together and helping it set as it bakes.
Heavy cream (32% fat content): This makes the filling extra creamy and rich and a bit custardy. Make sure you’re using heavy cream or whipping cream with at least 30–35% fat content.
Step by step directions with photos:
1. First, let’s make the crust by crushing the biscuits. You can do the in a food processor or in a ziplock bag using a rolling pin.

2. Next, melt the butter (use 30-second intervals in the microwave) and mix it into the crushed biscuits.


3. Pour the crushed biscuits into your 26cm (or 24, for a taller Cheesecake) round cake tin and evenly distribute it, pressing it down firmly. Place it in the fridge while you prepare the batter.

4. Before making the batter, preheat your oven to 160•C (fan) and place a water bath inside. For the water bath, fill a cake tin with hot water and place it on the lowest oven rack.
5. In a large bowl mix togwther the cream cheese, sour cream and sugar until smooth. Then add the Biscoff spread and mix until well incorporated.


6. Next, add the eggs, one at a time, mixing after each addition until combined.


7. Lastly, pour in the heavy cream and mix. Optionally, pass it through a fine mesh sieve to get rid of any lumps (like the white stringy part from the eggs).


8. Once the batter is ready, pour it over the crust and bake in the preheated oven for 45- 50 minutes. The center should remain slightly jiggly!
9. After baking, turn off the oven and crack the door open slightly. Let the cheesecake cool inside for 30 minutes.
10. Once the 30 minutes are up, place the cheesecake in the fridge to fully cool. I recommend letting it cool for a minimum of 4 hours but it will taste even better if you let it cool overnight.
11. Then place it in the fridge to chill completely. I recommend at least 5 hours, but it tastes even better if left overnight.
12. Once chilled, spread melted Biscoff on top (just warm it slightly in the microwave to make it pourable).
13. Finish with more Biscoff biscuits on top and enjoy!


Biscoff Cheesecake
This cheesecake is a very delicious, creamy, baked cheesecake. If you’d like to try it, I recommend reading the Tips and Tricks section, as it contains important information and useful details. If you love Biscoff and cheesecake, you should definitely give this recipe a try.
Ingredients
- 250g Biscoff biscuits
- 120g unsalted butter, melted
- 525 Philadelphia cream cheese
- 80g sour cream
- 150g Biscoff spread
- 200g granulated sugar
- 3 eggs
- 250g heavy cream (32% fat content)
- Biscoff spread, for topping
- Biscoff biscuits, for topping
- Strawberries, for topping (Optional)
Instructions
- First, let’s make the crust by crushing the biscuits. You can do the in a food processor or in a ziplock bag using a rolling pin.
- Next, melt the butter (use 30-second intervals in the microwave) and mix it into the crushed biscuits.
- Pour the crushed biscuits into your 26cm (or 24, for a taller Cheesecake) round cake tin and evenly distribute it, pressing it down firmly. Place it in the fridge while you prepare the batter.
- Before making the batter, preheat your oven to 160•C (fan) and place a water bath inside. For the water bath, fill a cake tin with hot water and place it on the lowest oven rack.
- In a large bowl mix togwther the cream cheese, sour cream and sugar until smooth. Then add the Biscoff spread and mix until well incorporated.
- Next, add the eggs, one at a time, mixing after each addition until combined.
- Lastly, pour in the heavy cream and mix. Optionally, pass it through a fine mesh sieve to get rid of any lumps (like the white stringy part from the eggs).
- Once the batter is ready, pour it over the crust and bake in the preheated oven for 45- 50 minutes. The center should remain slightly jiggly!
- After baking, turn off the oven and crack the door open slightly. Let the cheesecake cool inside for 30 minutes.
- Once the 30 minutes are up, place the cheesecake in the fridge to fully cool. I recommend letting it cool for a minimum of 4 hours but it will taste even better if you let it cool overnight.
- Then place it in the fridge to chill completely. I recommend at least 5 hours, but it tastes even better if left overnight.
- Once chilled, spread melted Biscoff on top (just warm it slightly in the microwave to make it pourable).
- Finish with more Biscoff biscuits on top and enjoy!
Notes
Check the "Tips and Tricks" section above!
Nutrition Facts
Calories
712Fat
56 gSat. Fat
28 gCarbs
47 gFiber
0 gNet Carbs
46 gSugar
37 gProtein
9 gSodium
194 mgCholesterol
161 mg