Tiramisu Brownies
Published: 5 December, 2025
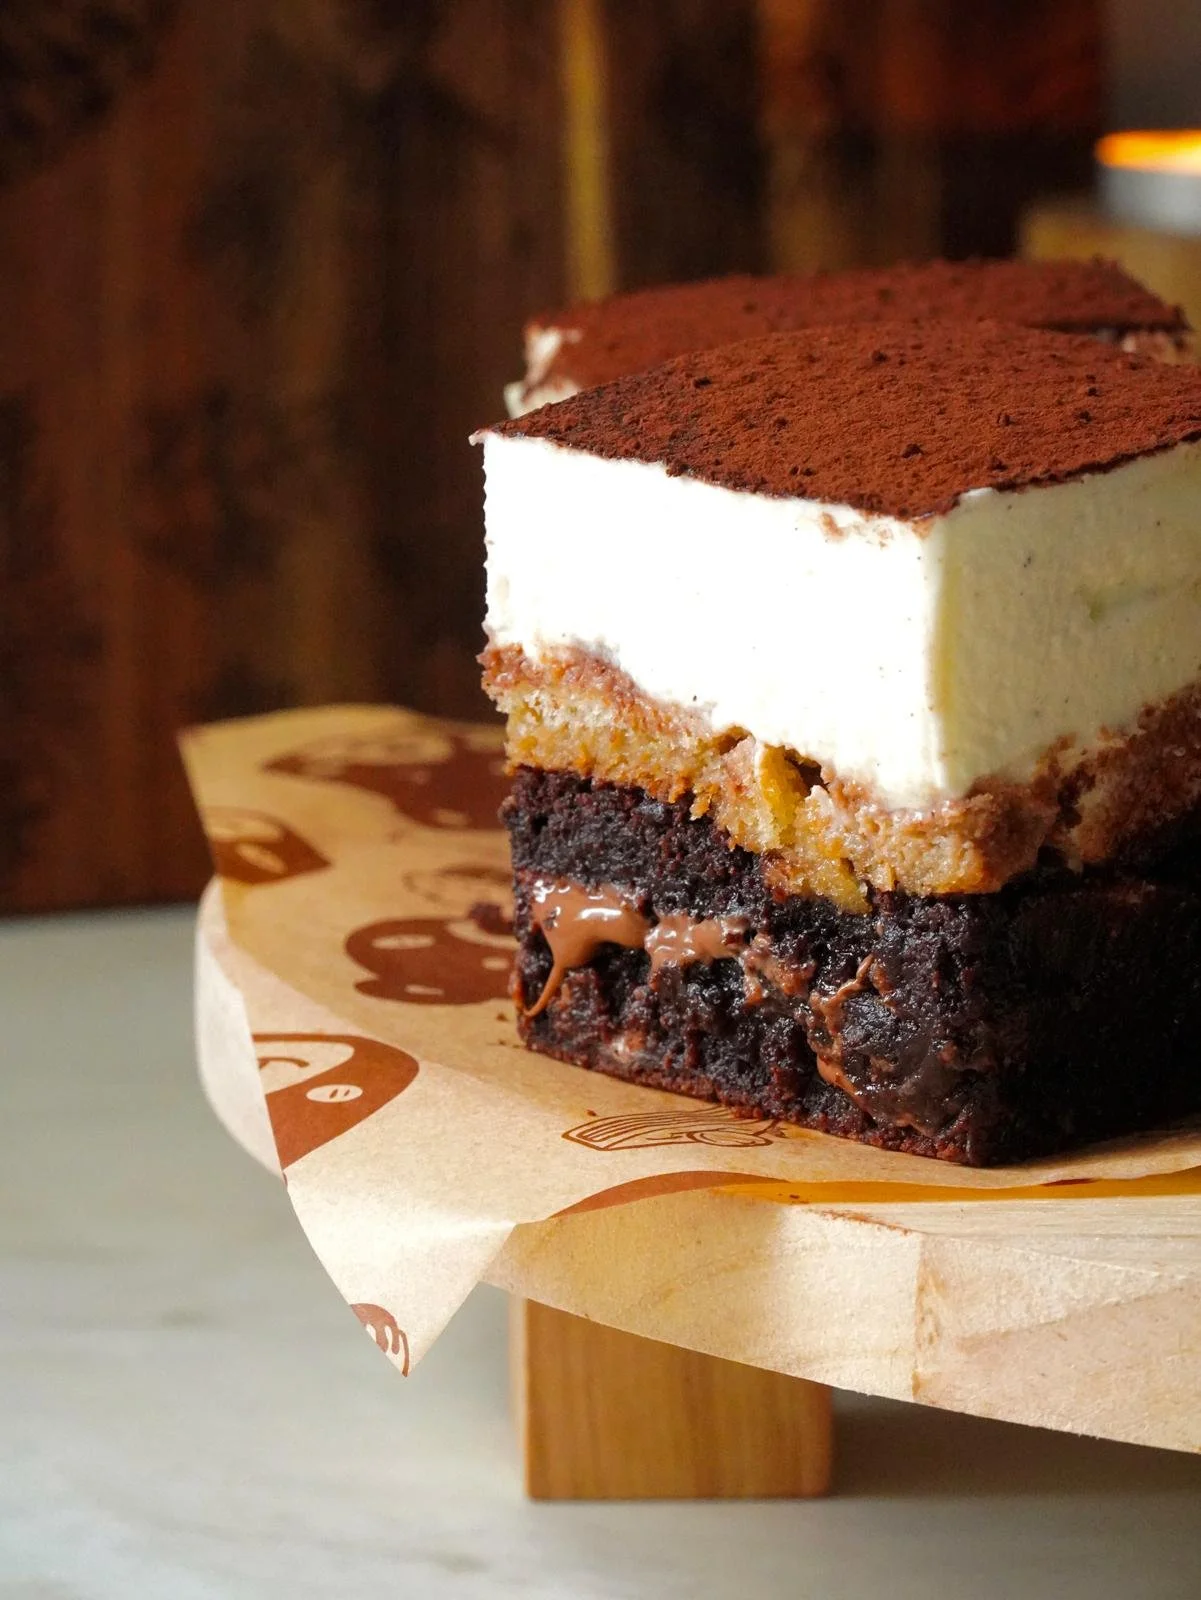
These Tiramisu Brownies are sweet, chocolatey and fudgy, with a creamy Mascarpone frosting on top and coffee-soaked Ladyfingers layered in between. It’s a rich, cozy twist on a classic Brownie and one of my favorite Tiramisu inspired treats.
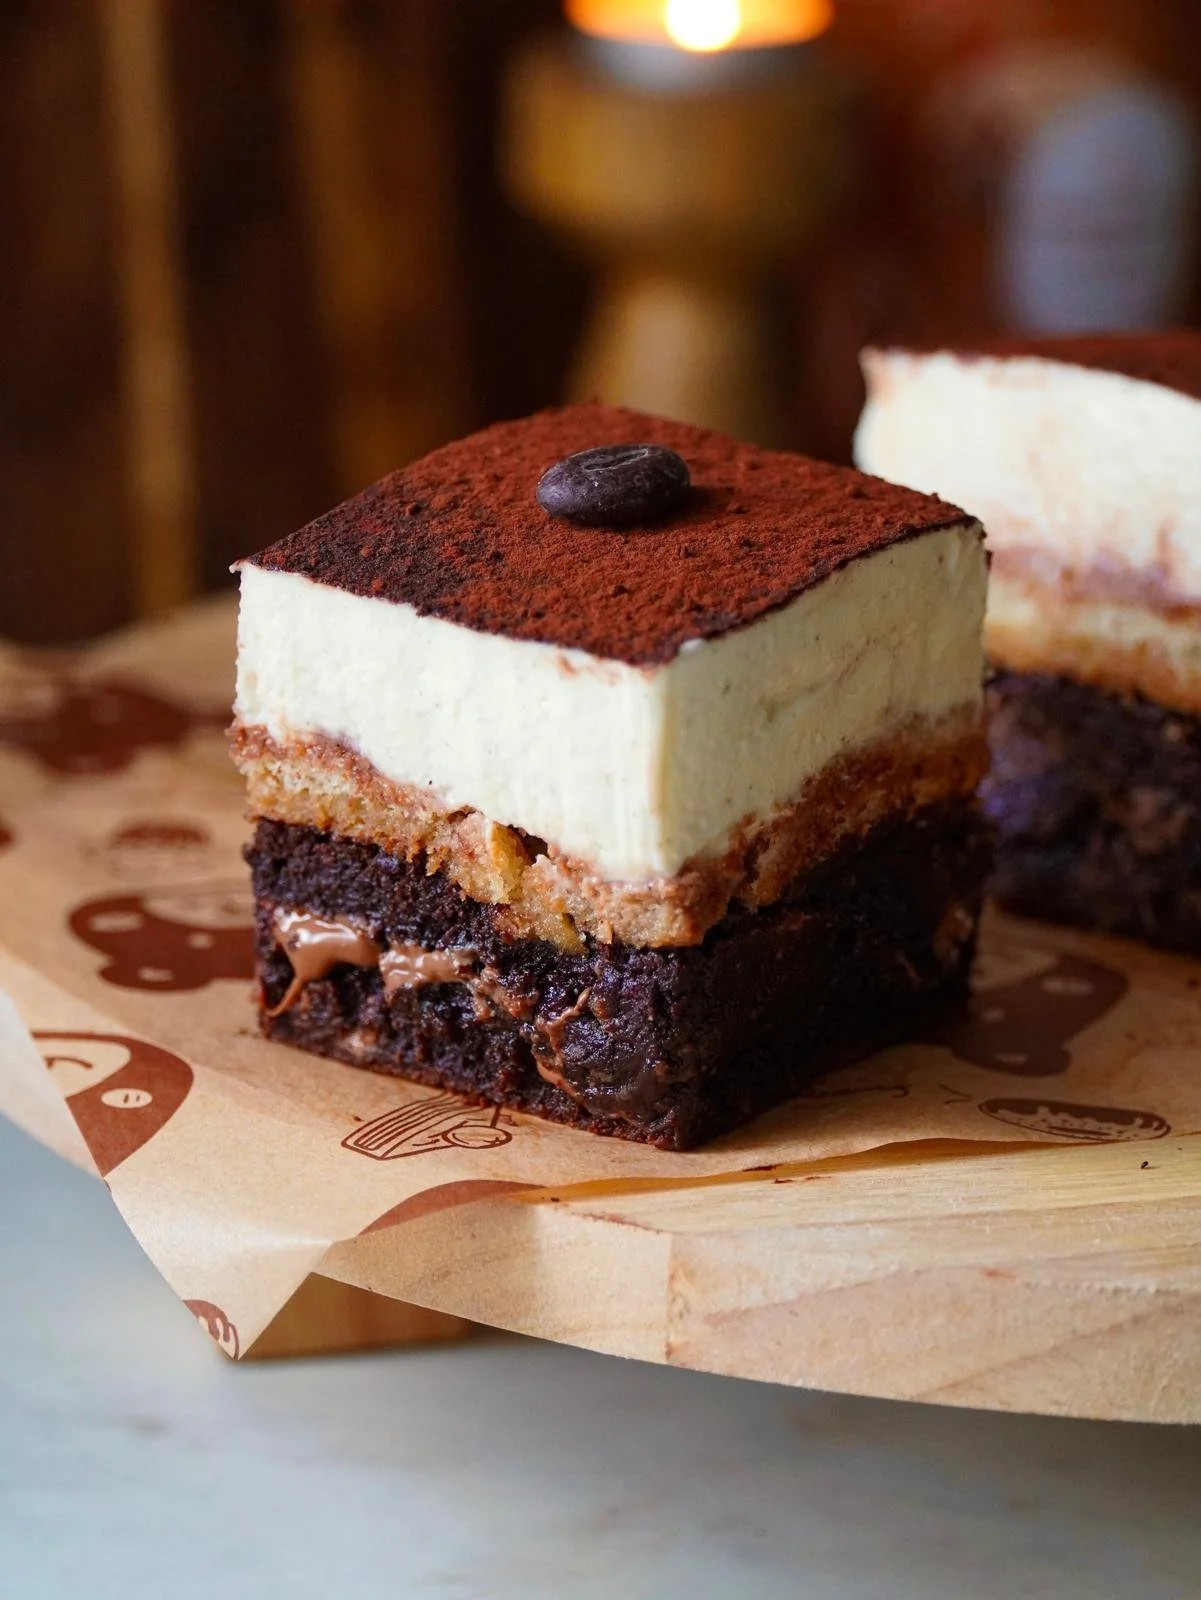
I made these Tiramisu Brownies for episode 1 of my Cozy Christmas Bakes series. I’ve tested and perfected my Brownie base many times, so I can guarantee it always turns out delicious. I wasn’t completely sure about this flavor combo at first, because I couldn’t really imagine how Brownies and Tiramisu would work together. But I kept seeing it online for years and since my Brownie recipe was ready, I finally decided to try it. I can confidently say it’s a very tasty but also a very indulgent dessert. If you love sweet desserts, this one is perfect for you. If you prefer less sweetness, you might want to go for a smaller piece. Either way I hope you give it a try and enjoy it.
WHY YOU’LL LOVE THIS RECIPE
🤎 Super fudgy texture - The Brownies stay soft and gooey.
🤎 Creamy mascarpone topping - Adds a light, smooth layer that balances the rich brownie.
🤎 Coffee-soaked ladyfingers – A delicious layer between the fudgy Brownie and the creamy frosting.
🤎 Great for coffee lovers - The subtle coffee flavor pairs perfectly with the chocolate.
🤎 Perfect holiday dessert - Looks festive and feels special for the Christmas season.
🤎 Beginner-friendly - No fancy techniques, just simple mixing and layering.
🤎 Makes a beautiful presentation - The layers look so pretty once sliced.
Tools you will need for this recipe
● A saucepan or skillet to brown the butter - You’ll use this to melt and brown the butter for the Brownie base. A small or medium pan works fine.
● Mixing bowls - You’ll need a couple of bowls for the Brownie batter and for the frosting.
● Spatula - A spatula helps you fold the batter gently and scrape down the sides of the bowl so nothing goes to waste.
● Hand whisk - Great for mixing the wet ingredients and making sure everything is smooth before combining with the dry mix.
● Kitchen scale - Perfect for accurate baking.
● Electric mixer (for the frosting) - Helps whip the mascarpone, sugar and cream quickly so the frosting becomes light and creamy.
● A 20×20 cm square cake tin - This is the perfect size for thick, fudgy Brownies.
ESSENTIAL KITCHEN TOOLS

Cuisinart 8-Inch Chef's Classic Skillet Buy Now → |

Wilton Gold Non-Stick, 8x8 Inch, Square Pan Buy Now → |

Silicone Spatula Set, 4 Piece Buy Now → |

NileHome Stainless Steel Whisk Set (3 Sizes) Buy Now → |

Mik-Nana Food Scale, 22lb Digital Kitchen Scale Buy Now → |

Baking Paper, High Temperature Resistant Buy Now → |
Notes, tips and tricks
→ Don’t overbake the Brownies - Brownies keep cooking even after you take them out of the oven, so removing them while the center is still slightly soft gives you that perfect fudgy texture.
→ Don’t overmix after the flour is added - Once the flour goes in, mix only until everything is combined. Overmixing can make the brownies dense and cakey instead of soft and gooey.
→ Let the butter-chocolate mixture cool before adding it to the eggs - If the mixture is too hot, it can scramble the eggs or affect the texture. Let them cool for about 15 minute.
→ Let the Brownies cool completely before layering - Warm Brownies will melt the Mascarpone frosting so cooling helps the layers stay clean and neat.
→ Prepare the frosting right before layering (not earlier) - Mascarpone frosting can deflate or loosen in the fridge if it sits too long, so making it fresh gives you the best texture.
→ Let them come to room temperature before serving - These Brownies are kept in the fridge because of the frosting. This can make them a bit hard, so I recommend taking them out the fridge about 30 minute before serving.
Frequently asked questions
1. How do I store the Brownies?
Keep them in an airtight container in the fridge so the Mascarpone frosting stays fresh and stable.
2. How long can I store them?
They’re best within 2-3 days.
3. What size pan did you use?
I used a 20×20 cm square baking tin.
4. Can I use a bigger pan?
Yes. Just keep in mind the baking time will change. With a bigger tin you’ll need to bake for less time. A 22×22 cm square tin works too, but the Brownies will be thinner.
5. Why is my frosting runny?
It probably just needs more whipping. Keep mixing until soft peaks form and the texture thickens.
6. Why is my frosting grainy?
It was likely overwhipped. Stop mixing as soon as it becomes smooth and creamy.
7. Can I skip the ladyfingers?
Yes. You can leave them out and the Brownies will still taste delicious, just slightly less Tiramisu-like.
8. Can I use regular melted butter instead of browned butter?
Yes, but reduce the amount to 150g. Browned butter gives a deeper flavor, but regular butter still works well.
9. Can I make the frosting ahead of time?
It’s better to make it right before layering because Mascarpone frosting can deflate or loosen while sitting in the fridge.
10. Can I freeze these Brownies?
Not recommended with the frosting on. If you want to freeze them, freeze the brownies alone and frost them fresh later.
11. Can I use instant coffee for soaking the ladyfingers?
Yes.
12. Can I make this dessert less sweet?
Yes. You can reduce the sugar slightly.
13. Do I have to use Mascarpone?
Mascarpone gives the classic Tiramisu flavor. You could use cream cheese but it won’t taste the same.
Ingredients you will need for this recipe
For the Brownies:
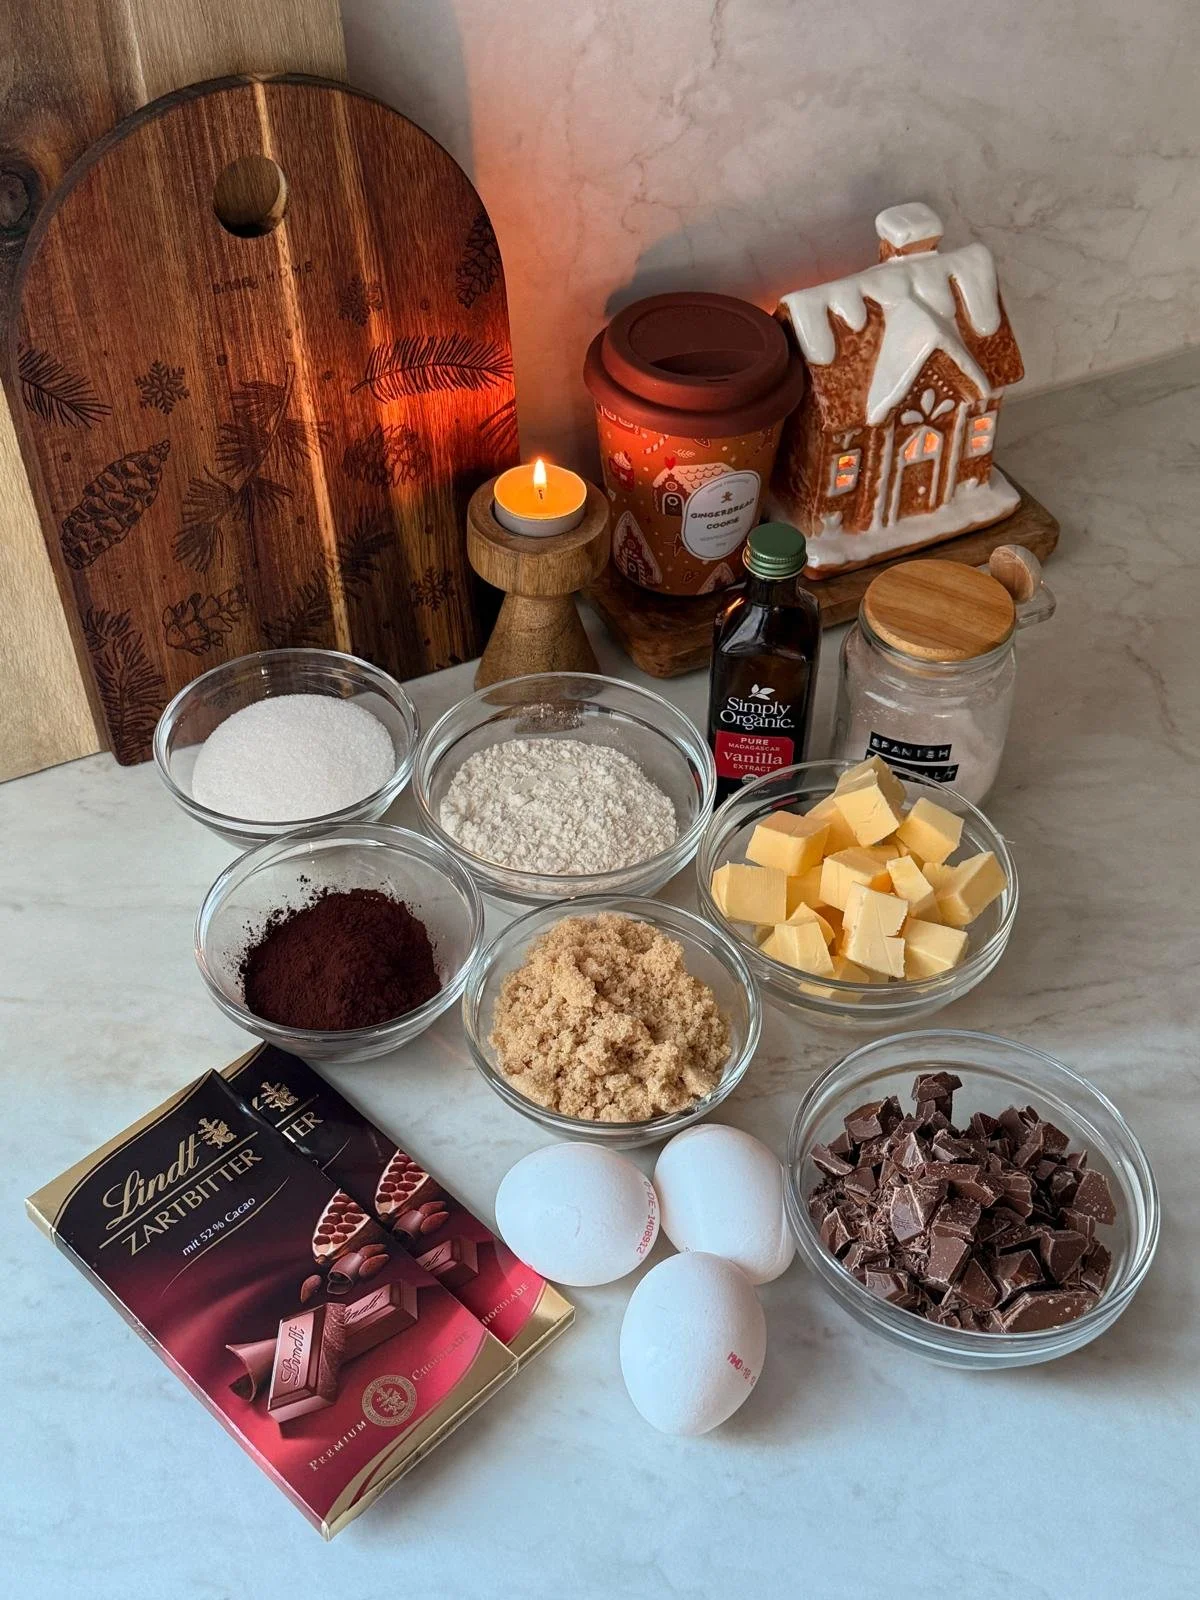
Dark chocolate: These give the Brownies a rich base.
Butter: We are browning the butter for this recipe, but you can use regular, melted butter, just reduce it to 150g.
Granulated sugar & light brown sugar: The mix of both gives sweetness and chewiness. Brown sugar adds moisture and a slightly deeper flavor. You can use dark brown sugar too instead of light brown.
Vanilla extract: You can use vanilla bean paste too.
Eggs: We’re using large eggs for this recipe.
All purpose flour: Just enough to hold the brownies together without making them cakey.
Cocoa powder: Boosts the chocolate flavor and keeps the texture fudgy instead of dense.
Salt: Balances the sweetness.
Milk chocolate chips or chunks: These melt into little pockets inside the brownies. You can use dark chocolate chips if you want the brownies less sweet.
For the frosting

Mascarpone: This gives the frosting the classic Tiramisu flavor.
Granulated sugar: Sweetens the frosting without making it too heavy.
Vanilla bean paste: Vanilla extract works too.
Whipping cream: Helps the frosting become fluffy and stable when whipped.
Extras
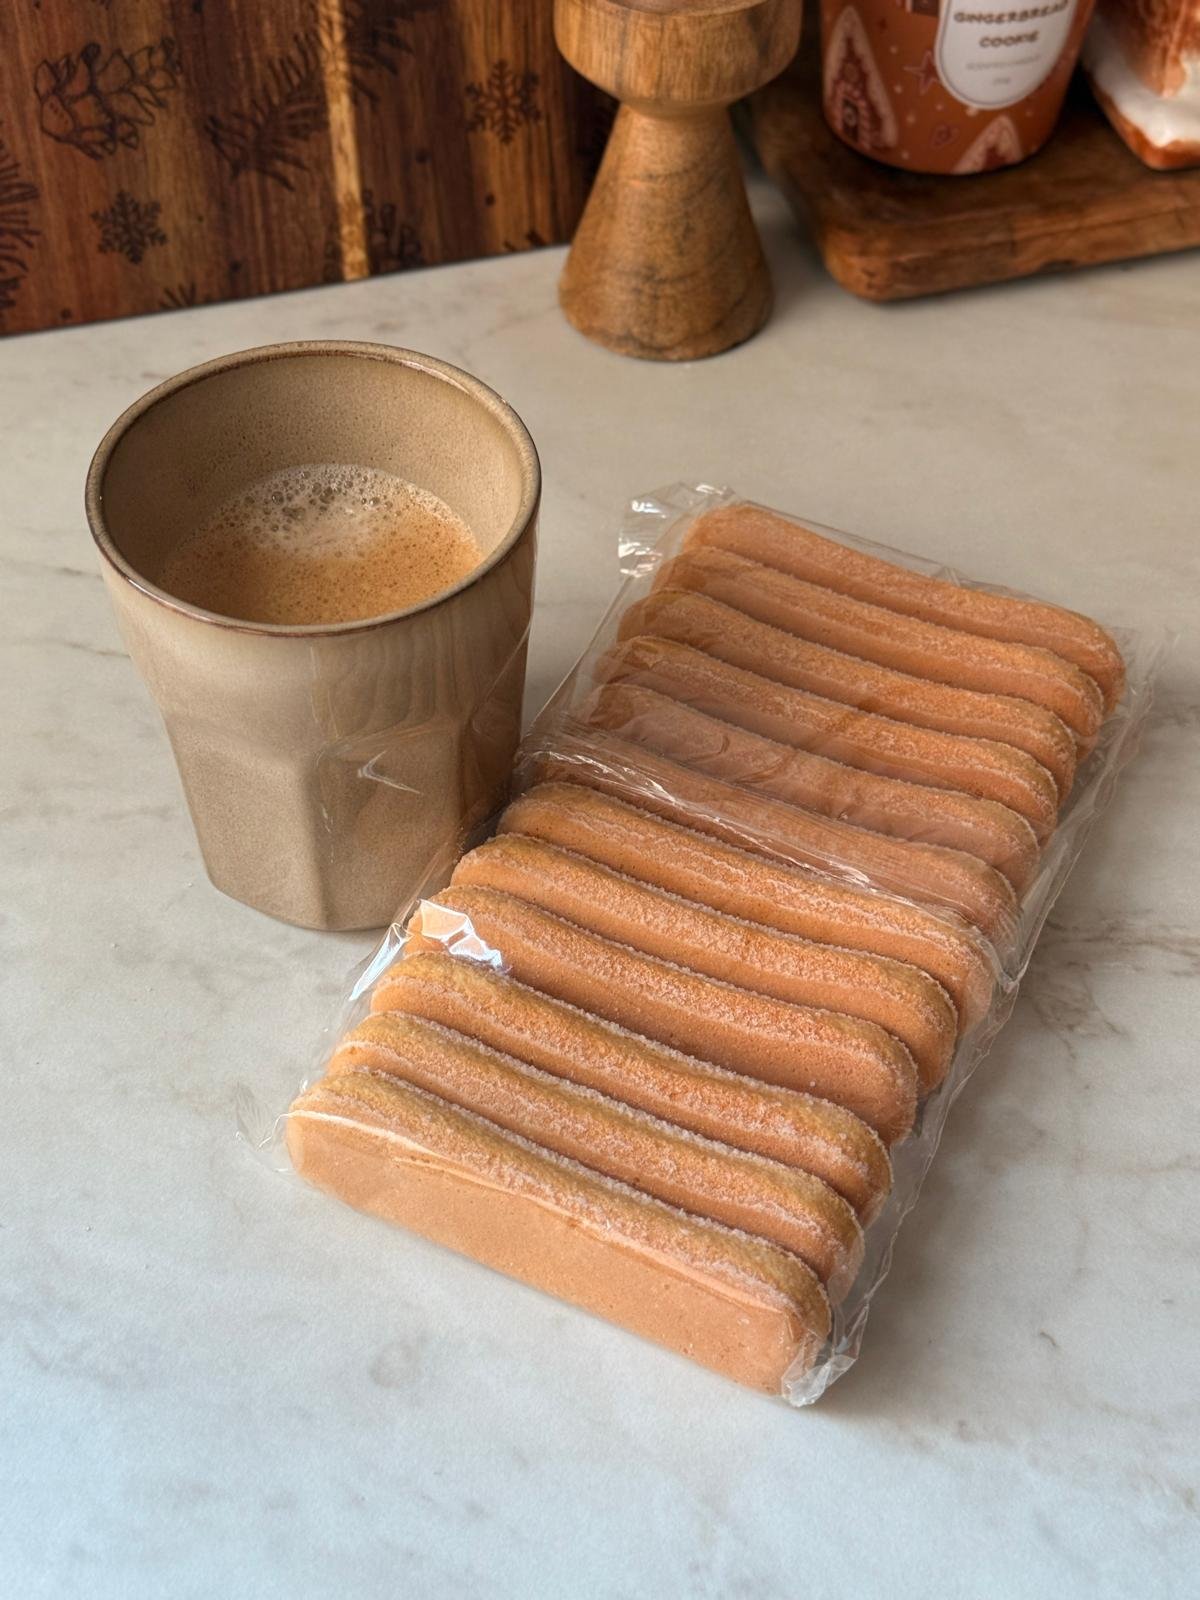
Ladyfingers: They create the Tiramisu layer between the Brownie and the frosting.
Coffee: Used to dip the ladyfingers in.
Cocoa powder: For dusting the top, just like a traditional Tiramisu.
Step by step instructions with photos
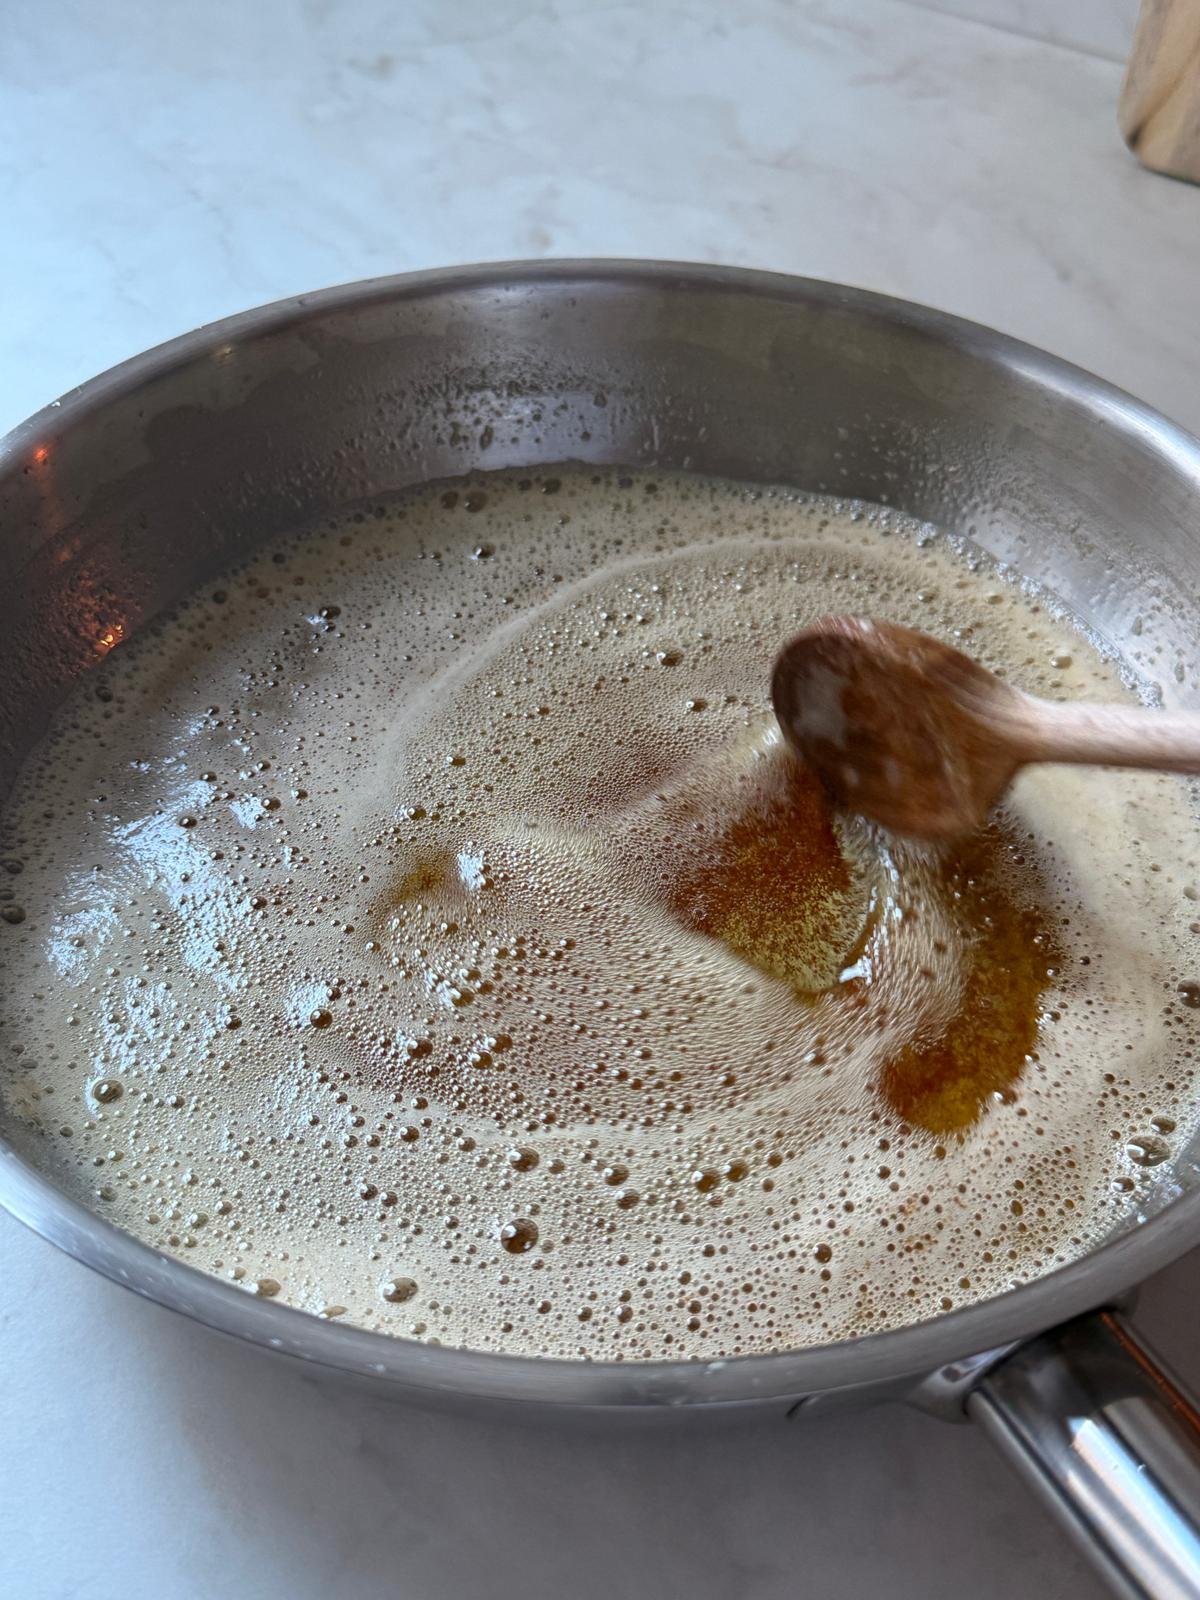
1. First we’re going to brown the butter.
2. Cut the butter into small cubes and place them in a saucepan or skillet.
3. Melt it over medium heat. Once it’s fully melted, let it lightly simmer and stir the whole time until the color turns golden brown. *Note: This took me about 10-12 minutes on medium heat. If your heat is lower, it might take a bit longer.

4. When the butter is ready, take it off the heat and stir in the cocoa powder right away until smooth.

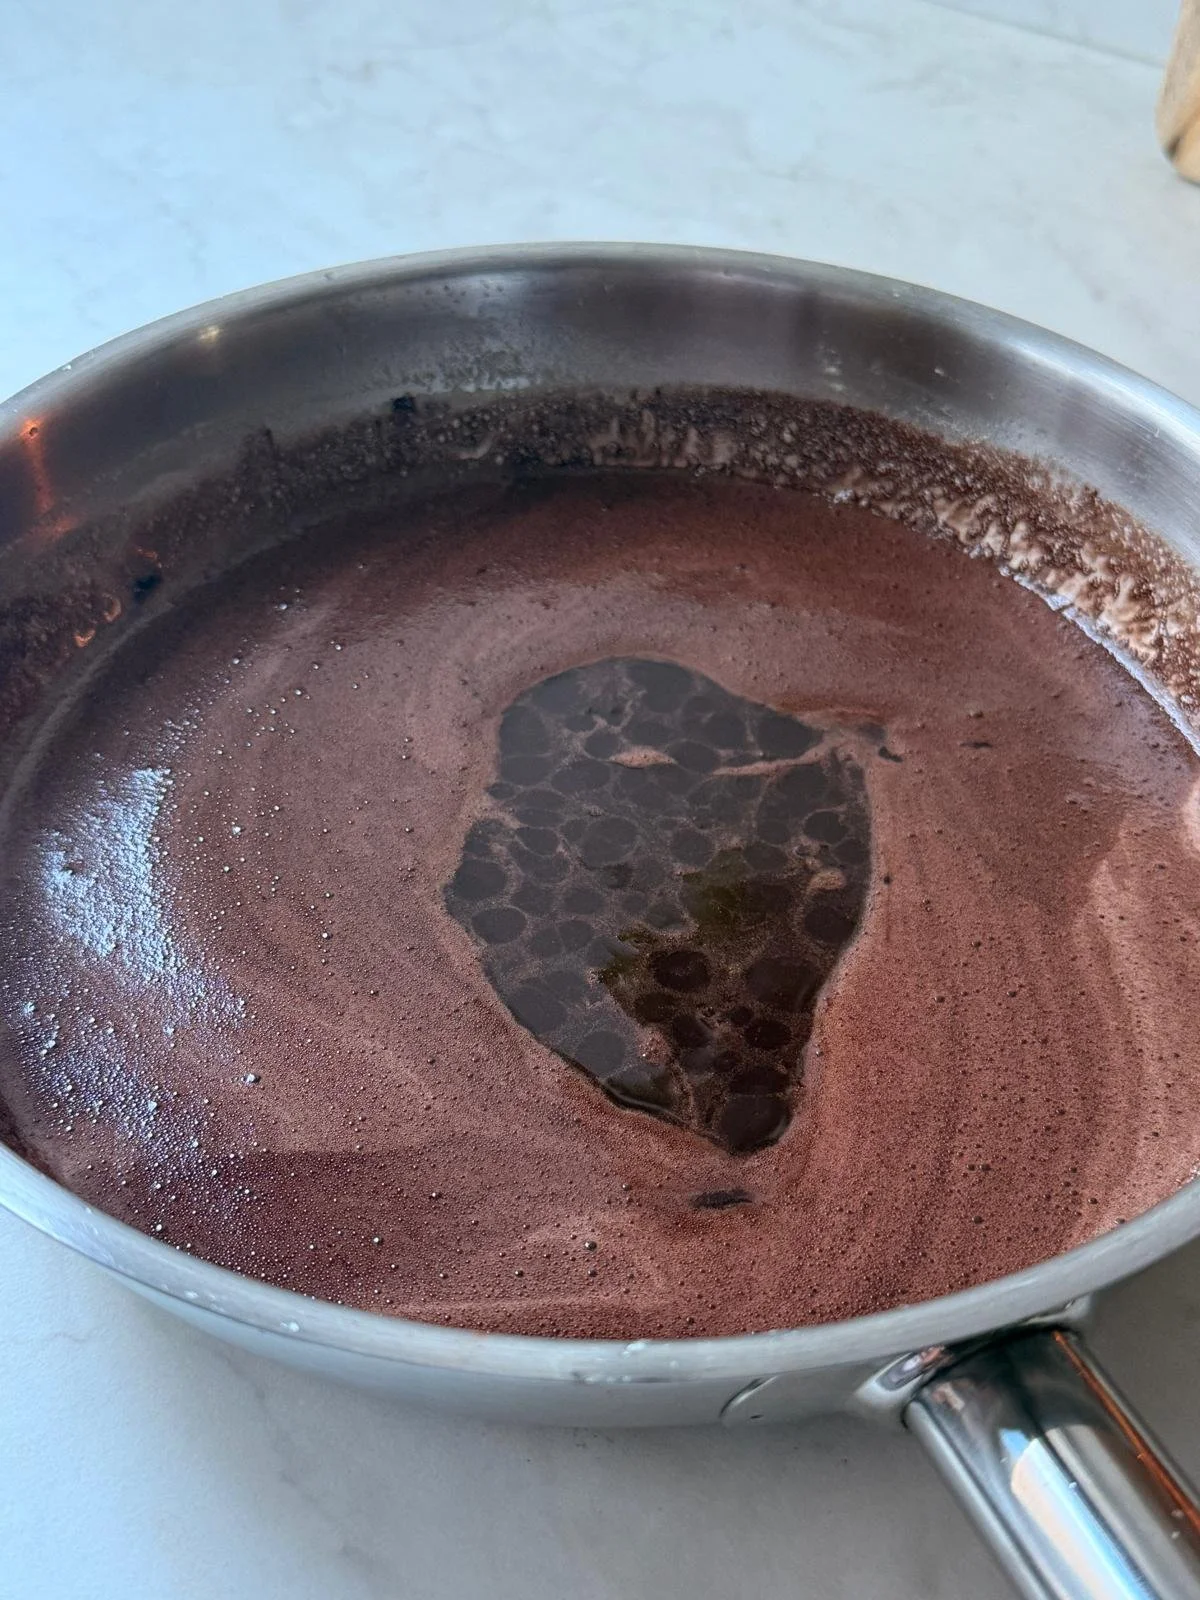
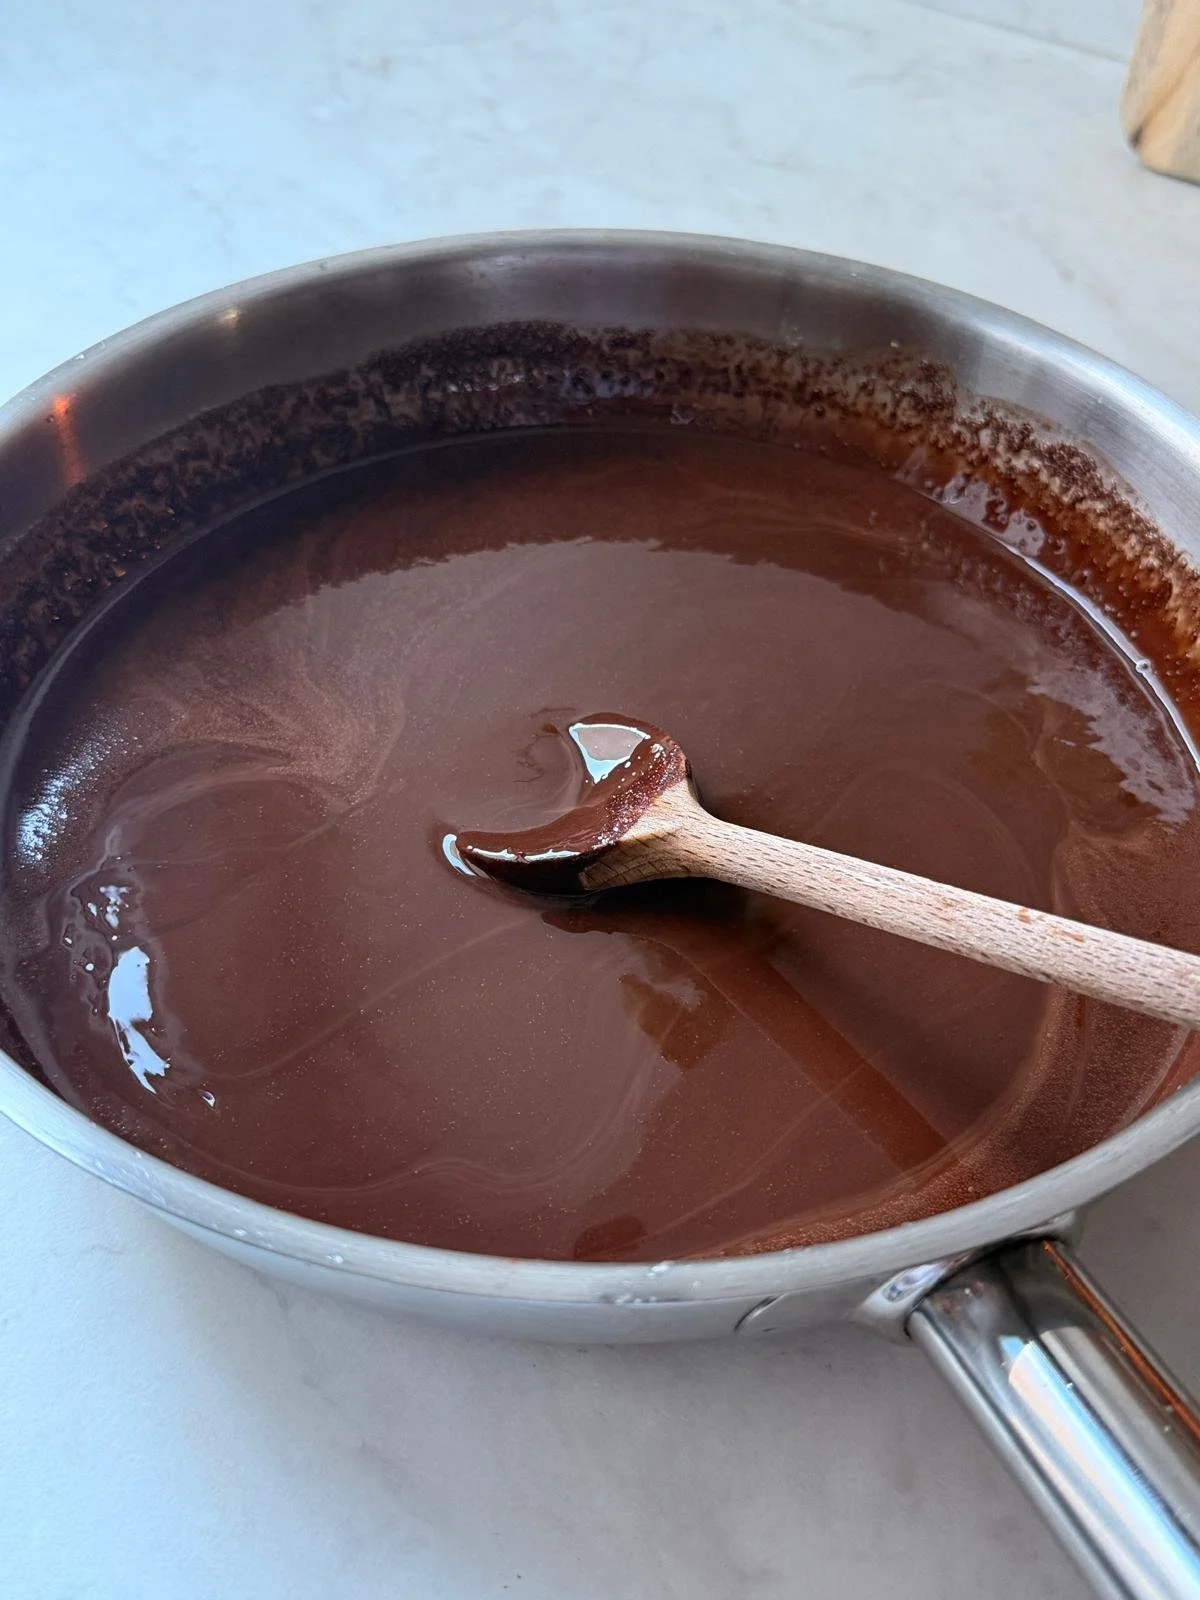
5. Add the chopped dark chocolate and mix until it melts completely. Set this mixture aside to cool for about 15 minutes.

6. Preheat your oven to 180°C. Line a 20×20 cm square baking pan with parchment paper.
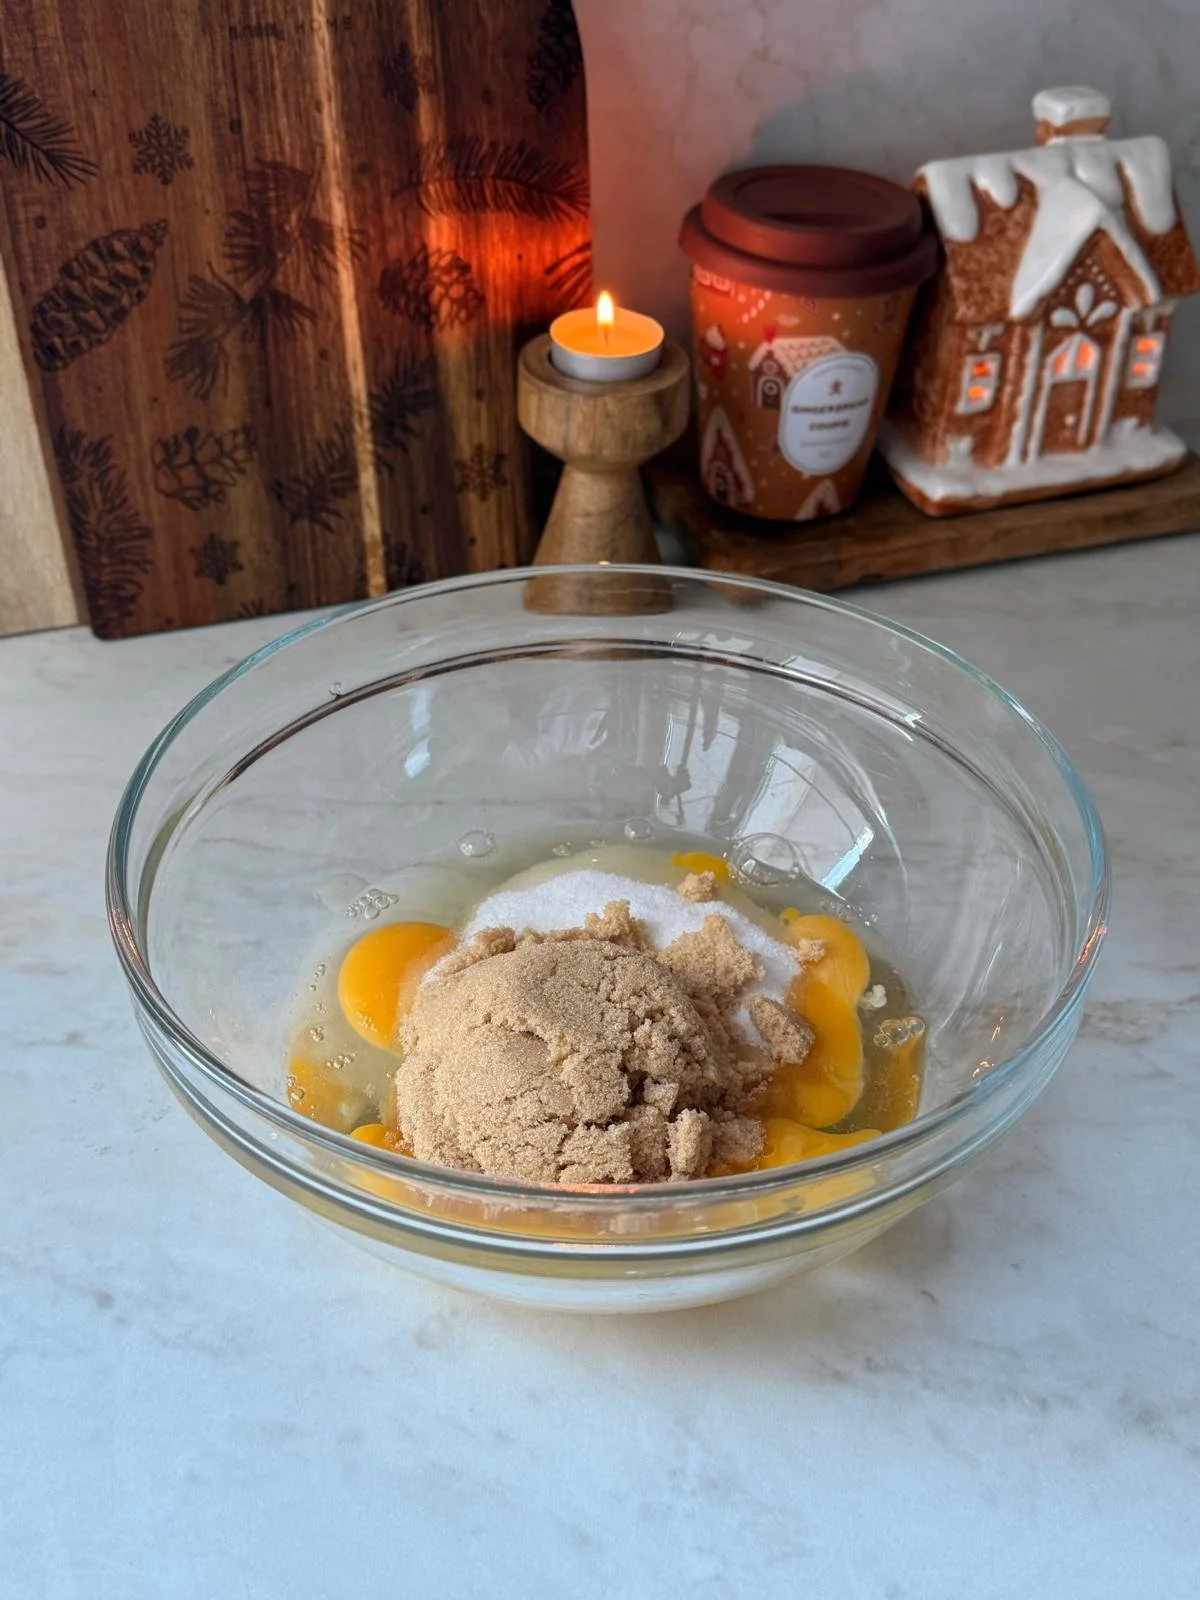
7. In a large bowl, use an electric hand mixer to beat the sugars and eggs together until the mixture turns very pale and fluffy, about 2-3 minutes.

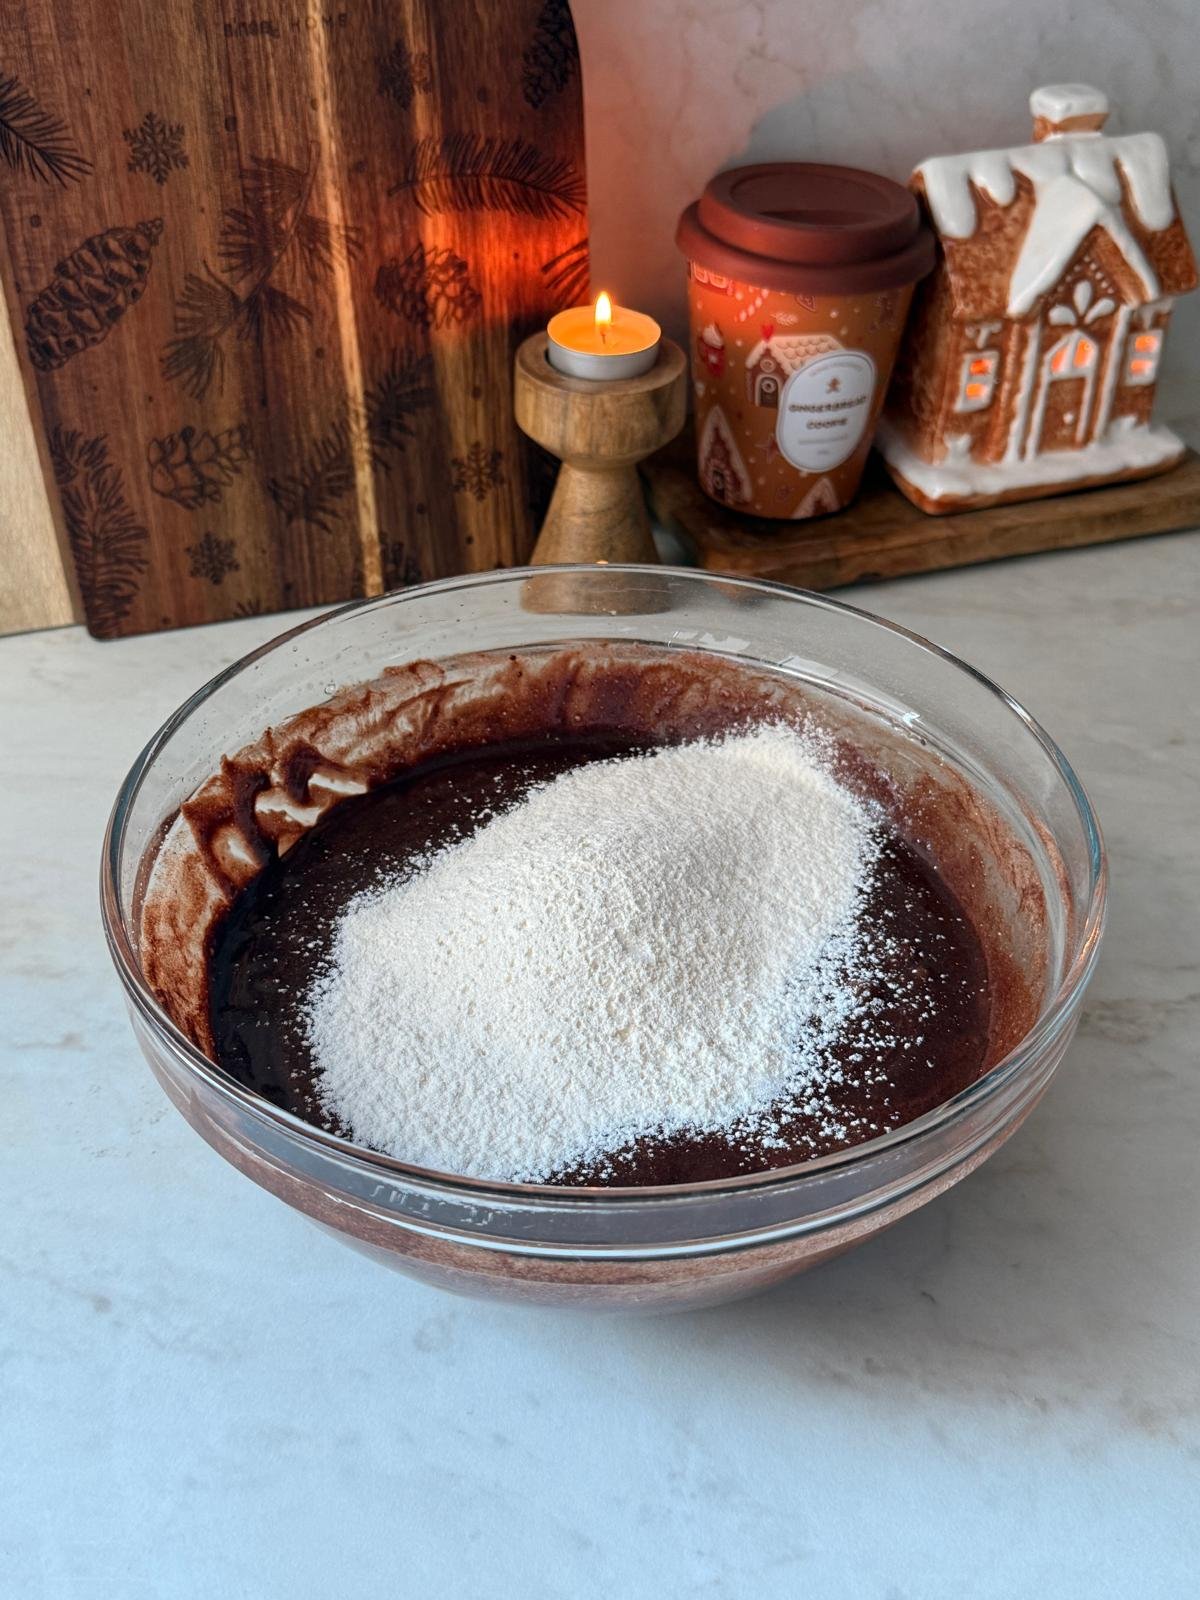
8. Pour the melted chocolate-brown butter mixture into the egg mixture and whisk until combined.


9. Sift the flour and salt into the bowl and gently fold it in. Don’t overmix, this keeps the brownies fudgy not cakey.
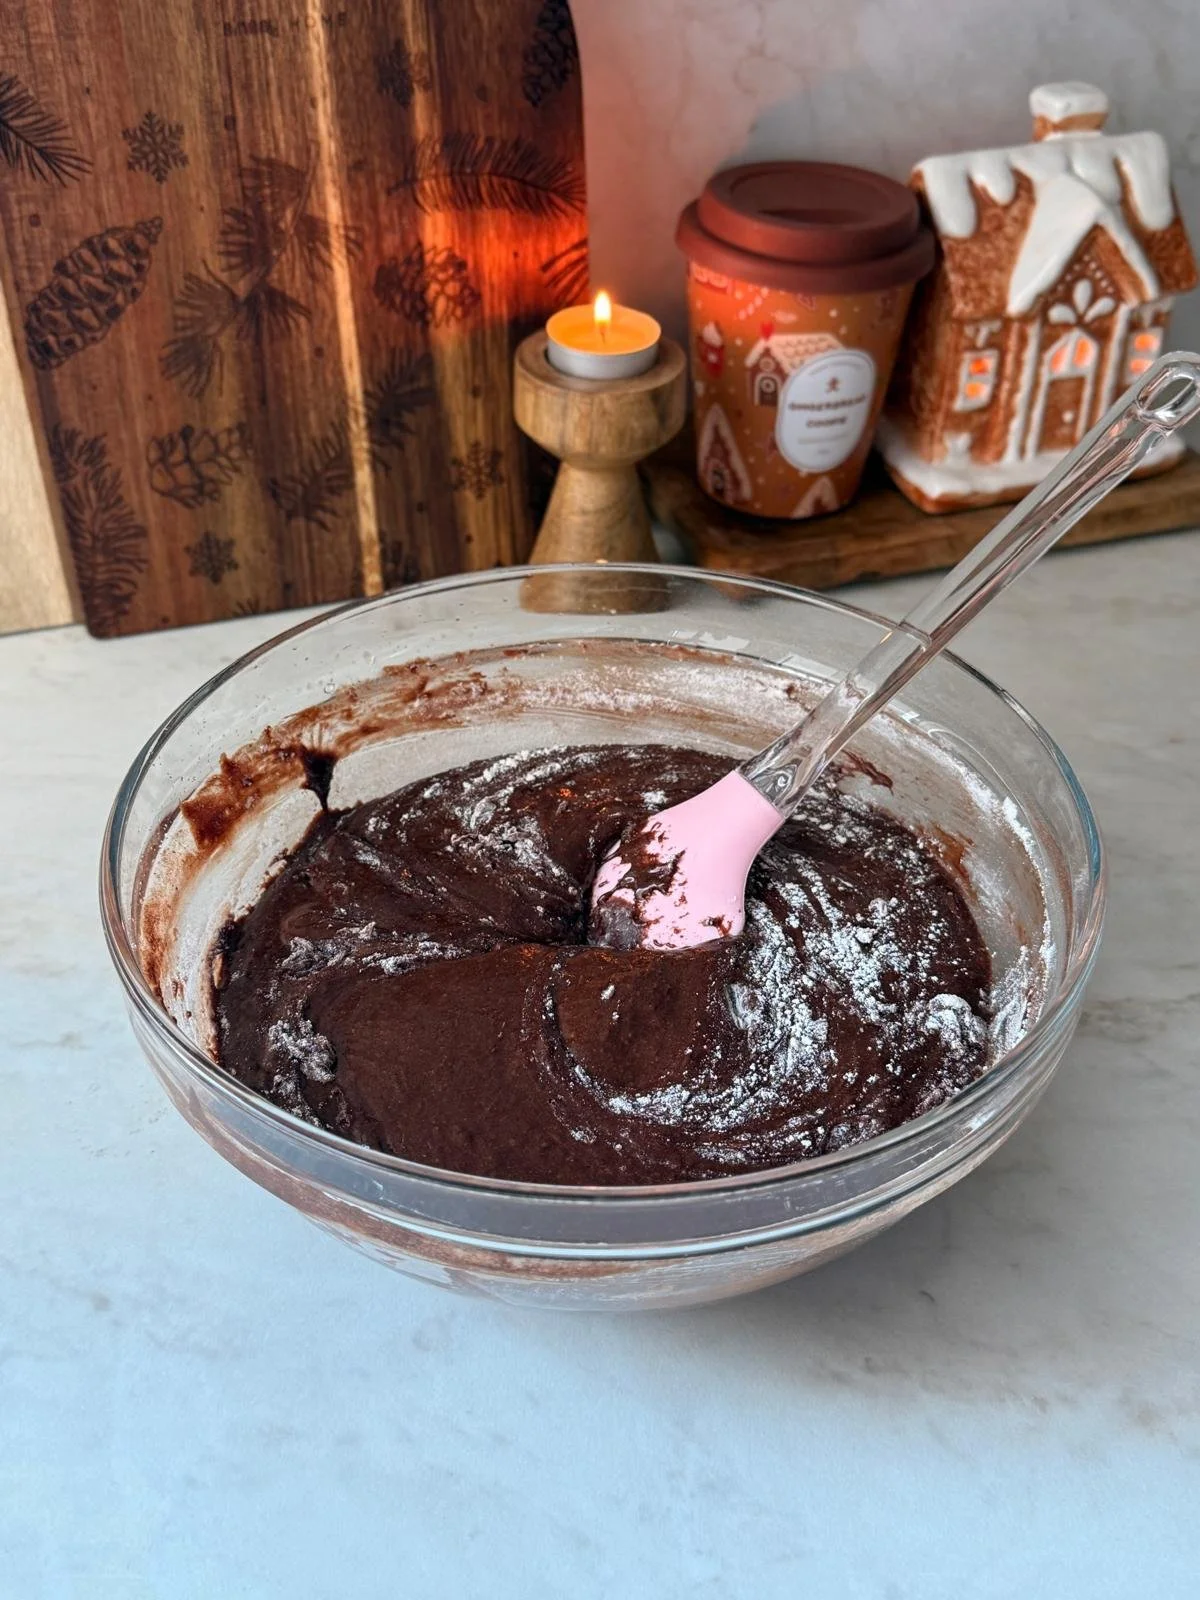
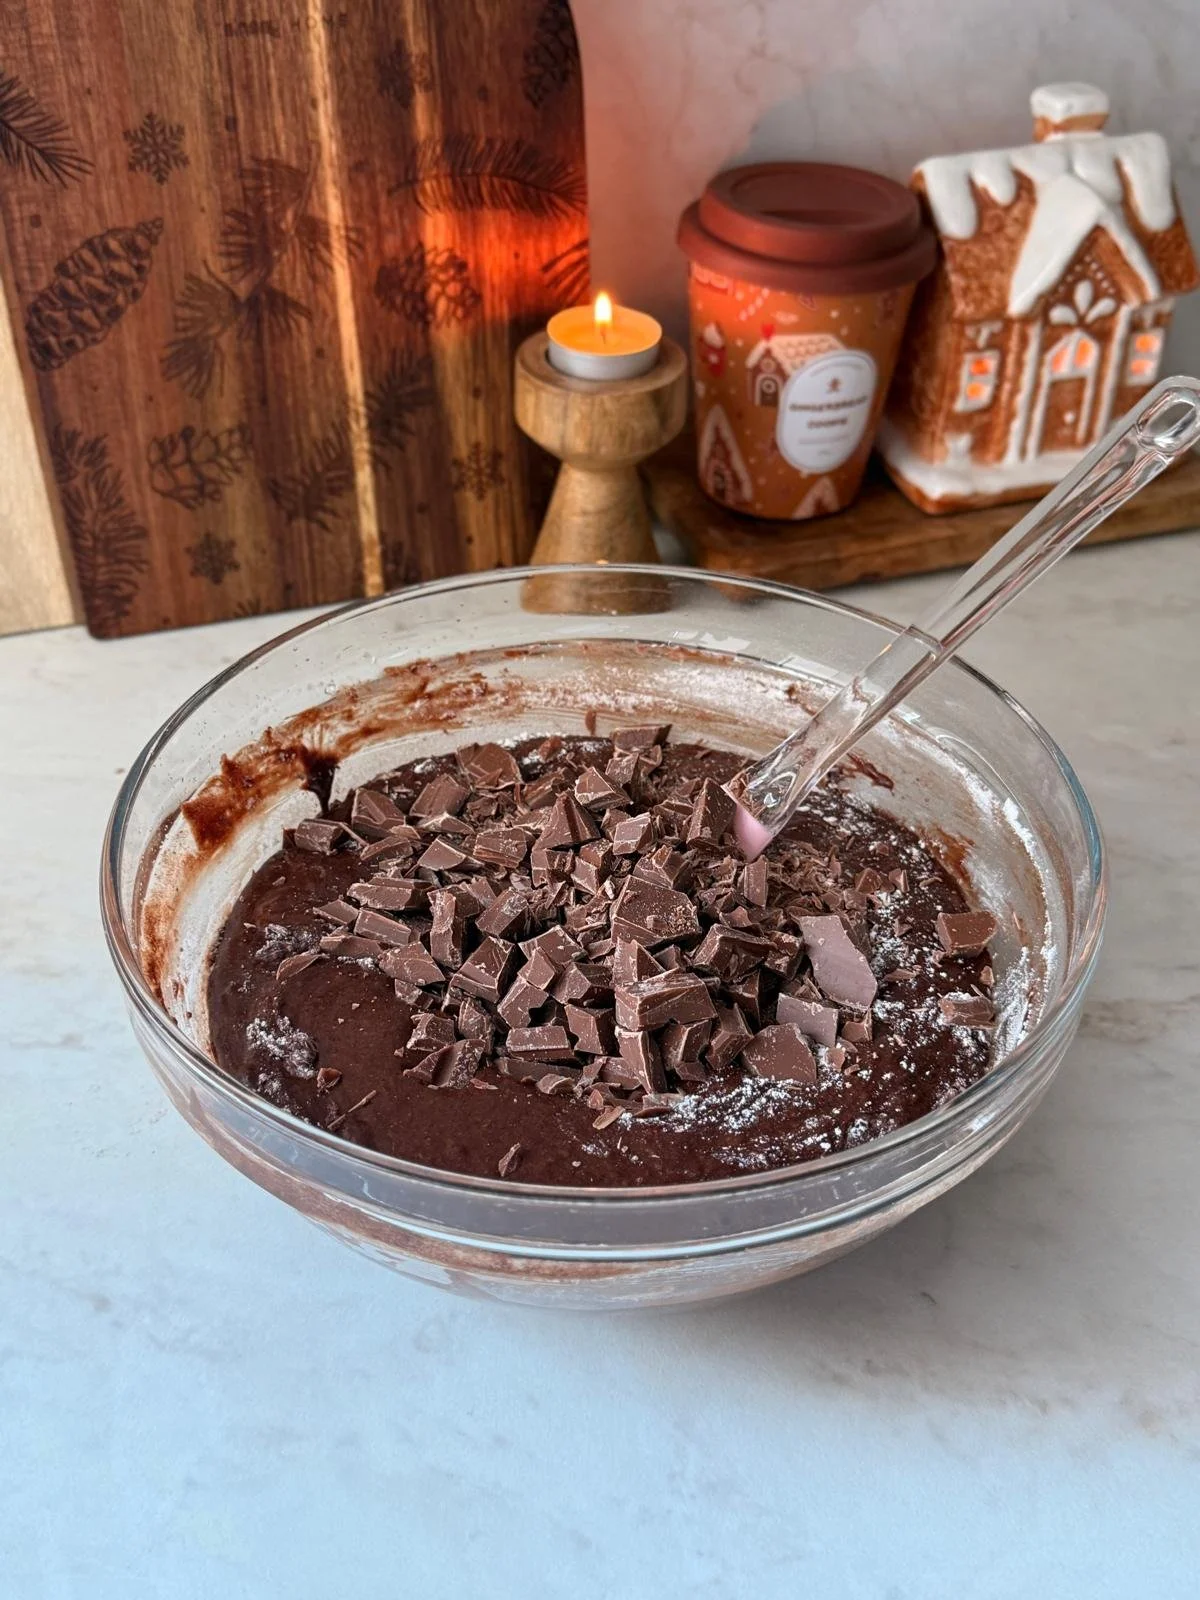
10. Fold in the milk chocolate chips or chunks.
11. Pour the batter into the baking pan and spread it out evenly.
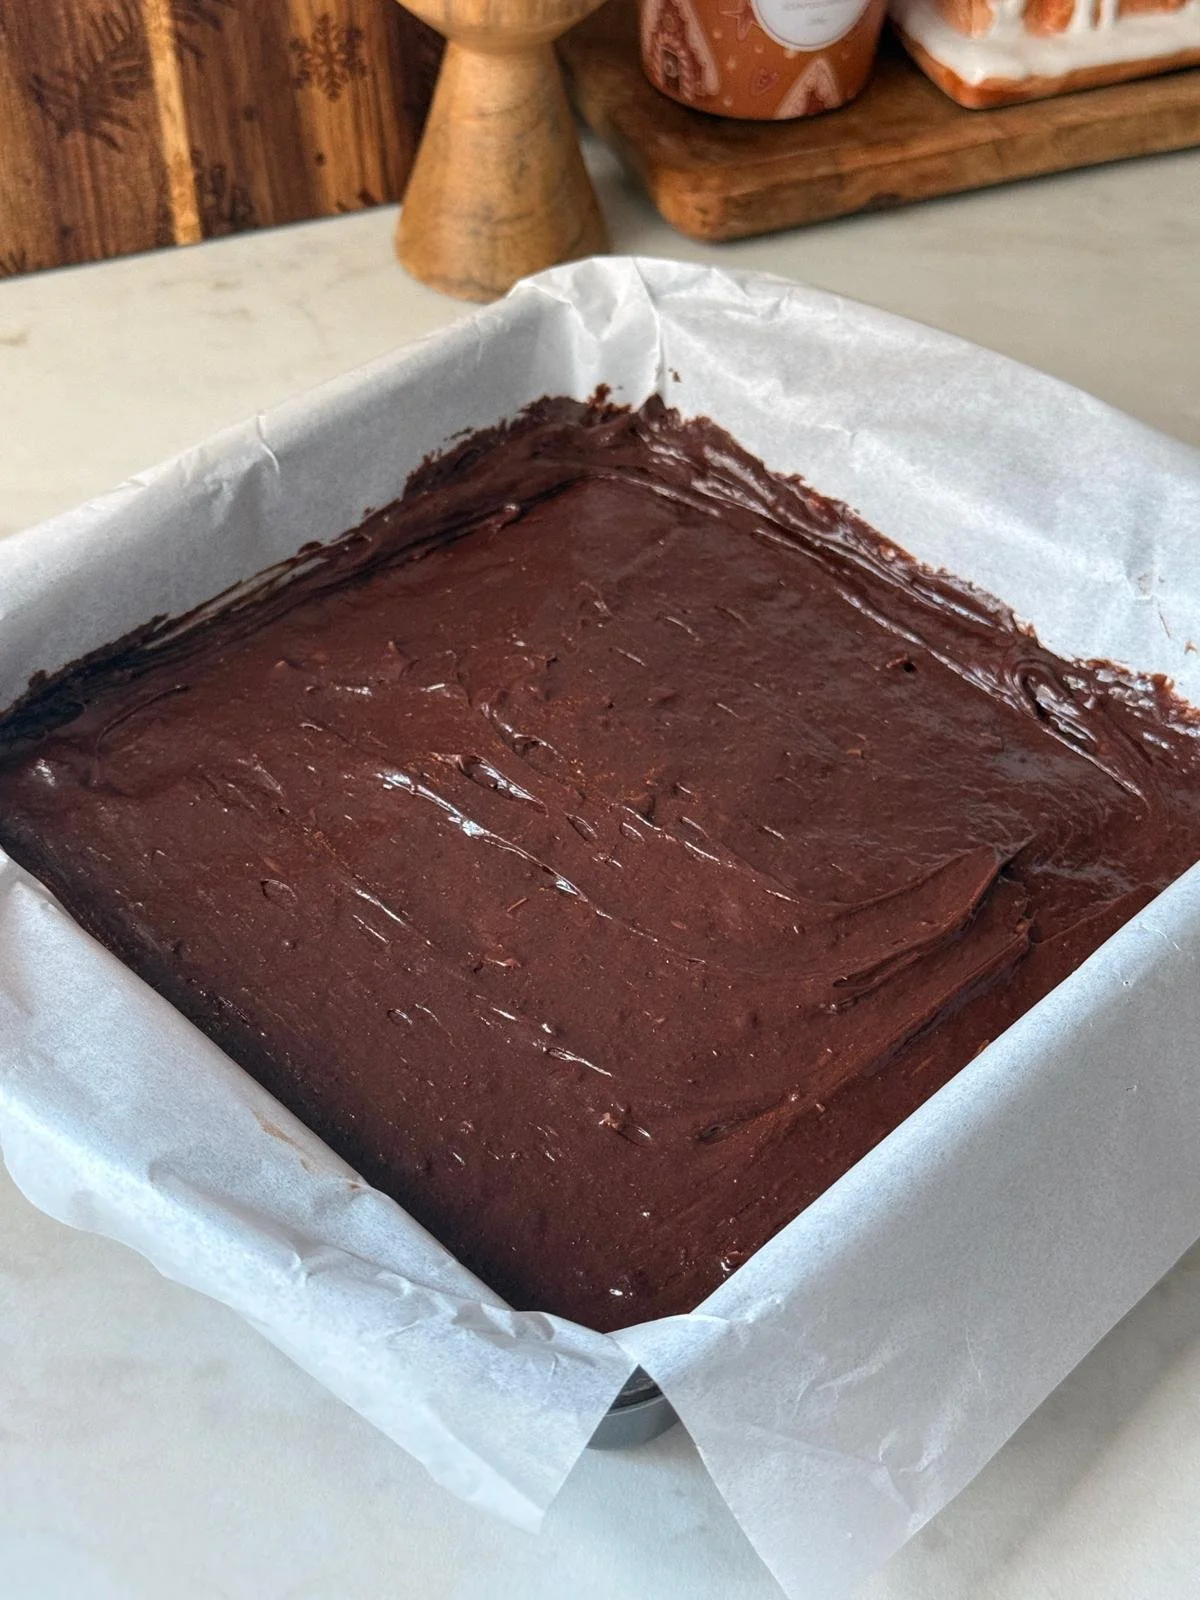
12. Bake for 25-28 minutes. *Note: My oven runs a bit hot, so you may need a little longer depending on yours.
13. Let the brownies cool completely in the pan for about 3 hours.
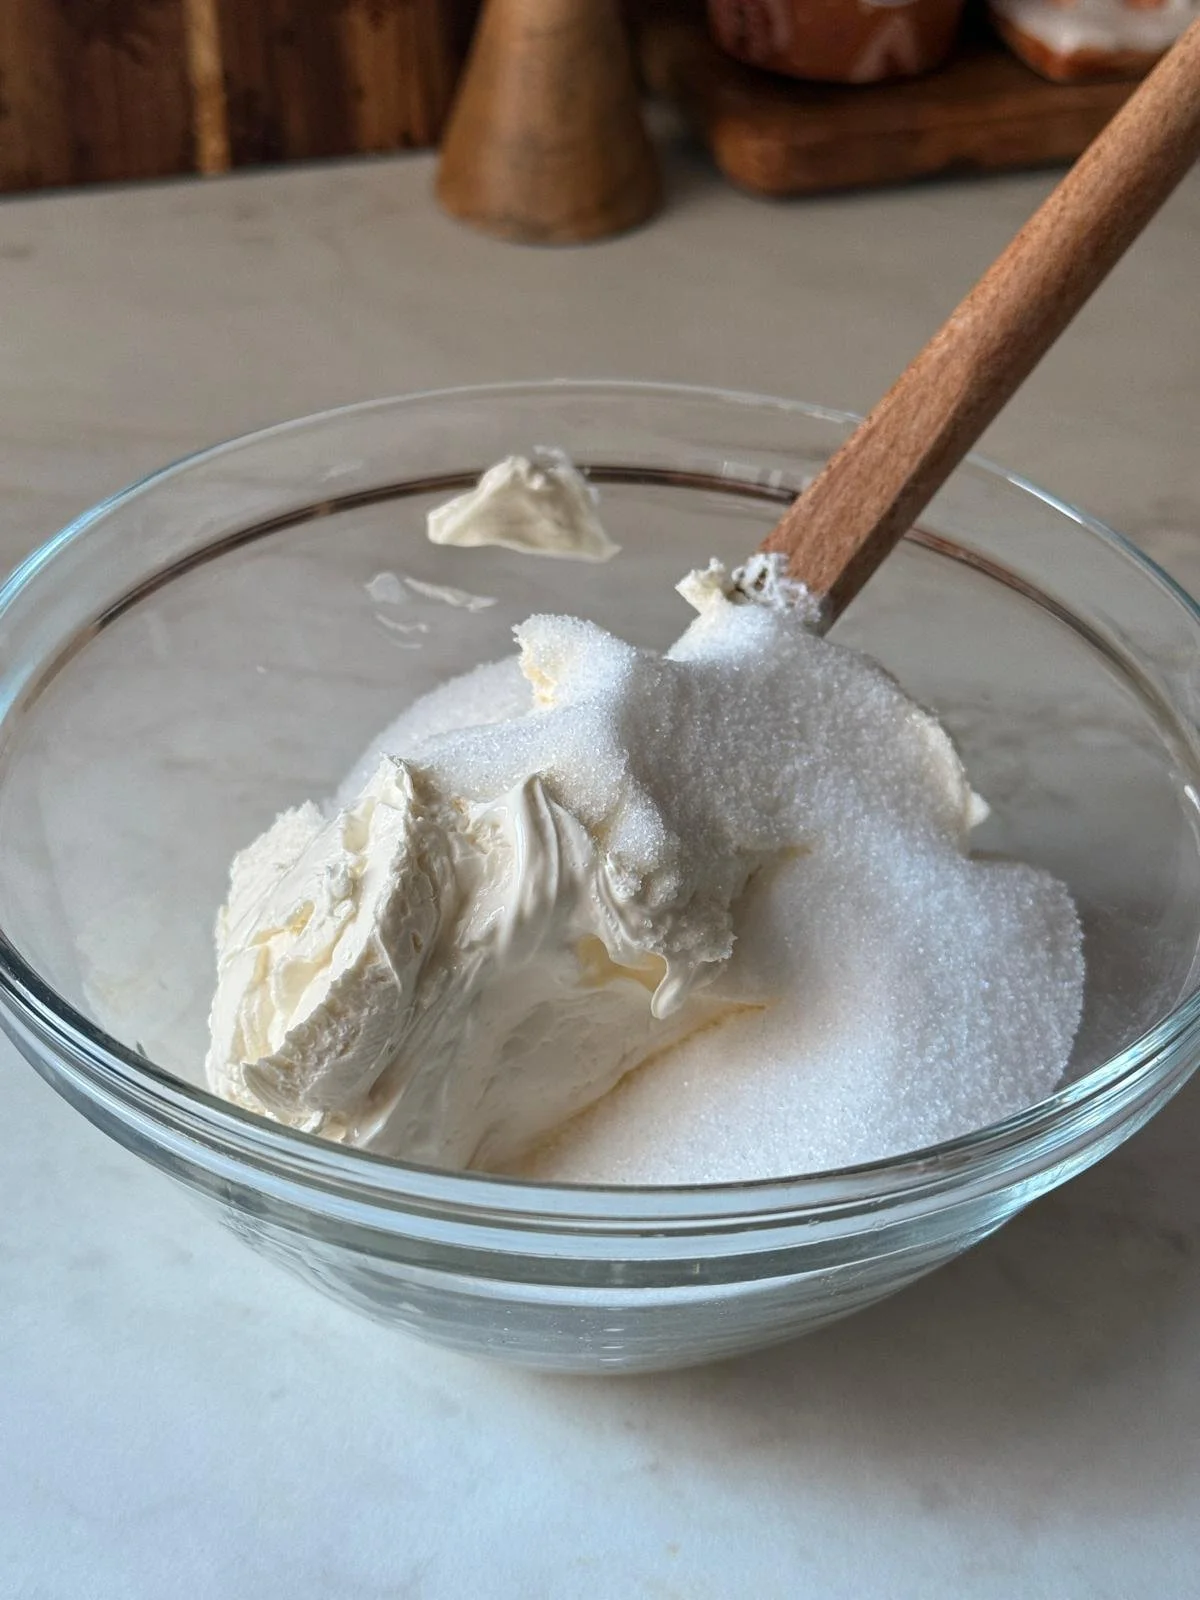
14. Once the Brownies have completely cooled down, time to prepare the frosting.
15. In a bowl mix together the mascarpone and sugar.
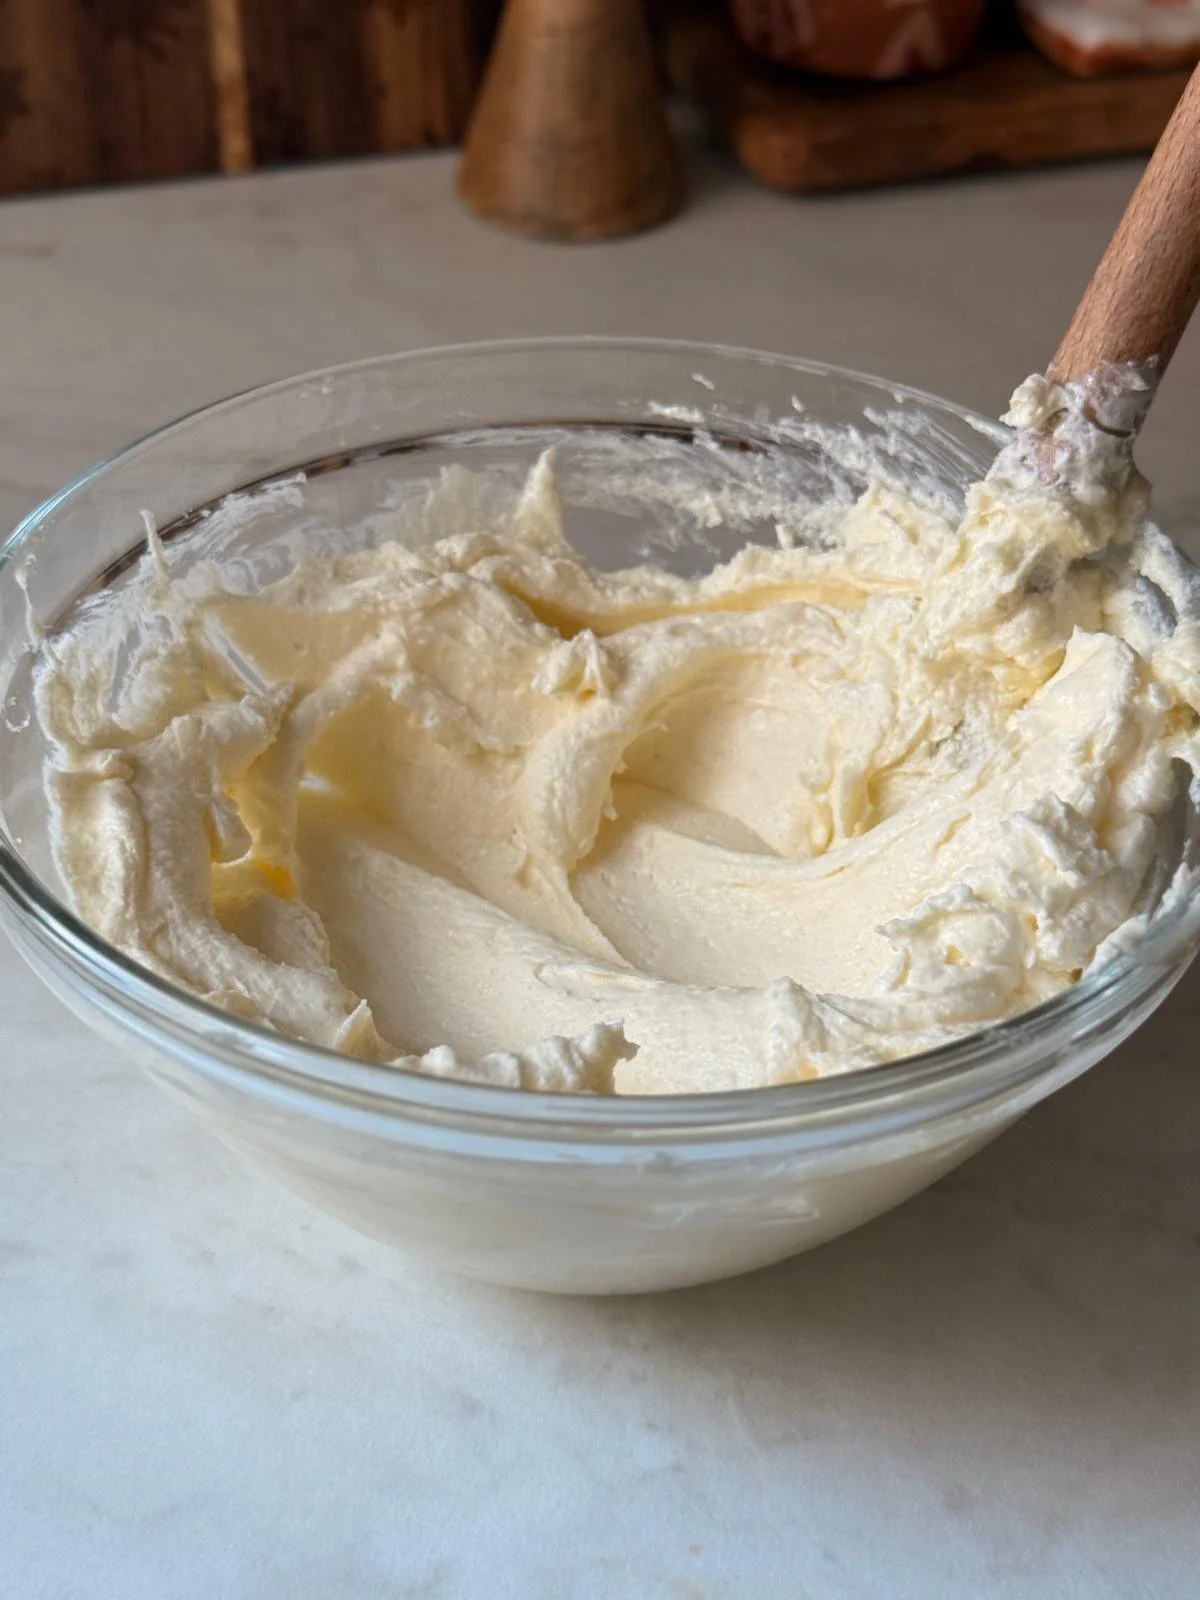
16. Add the whipping cream and vanilla, then whisk until the mixture turns fluffy and can hold its shape.

17. Once ready, time to start layering!
18. Dip the ladyfingers in coffee and place a layer on top of the brownies.

19. Spread the mascarpone frosting evenly over the top.
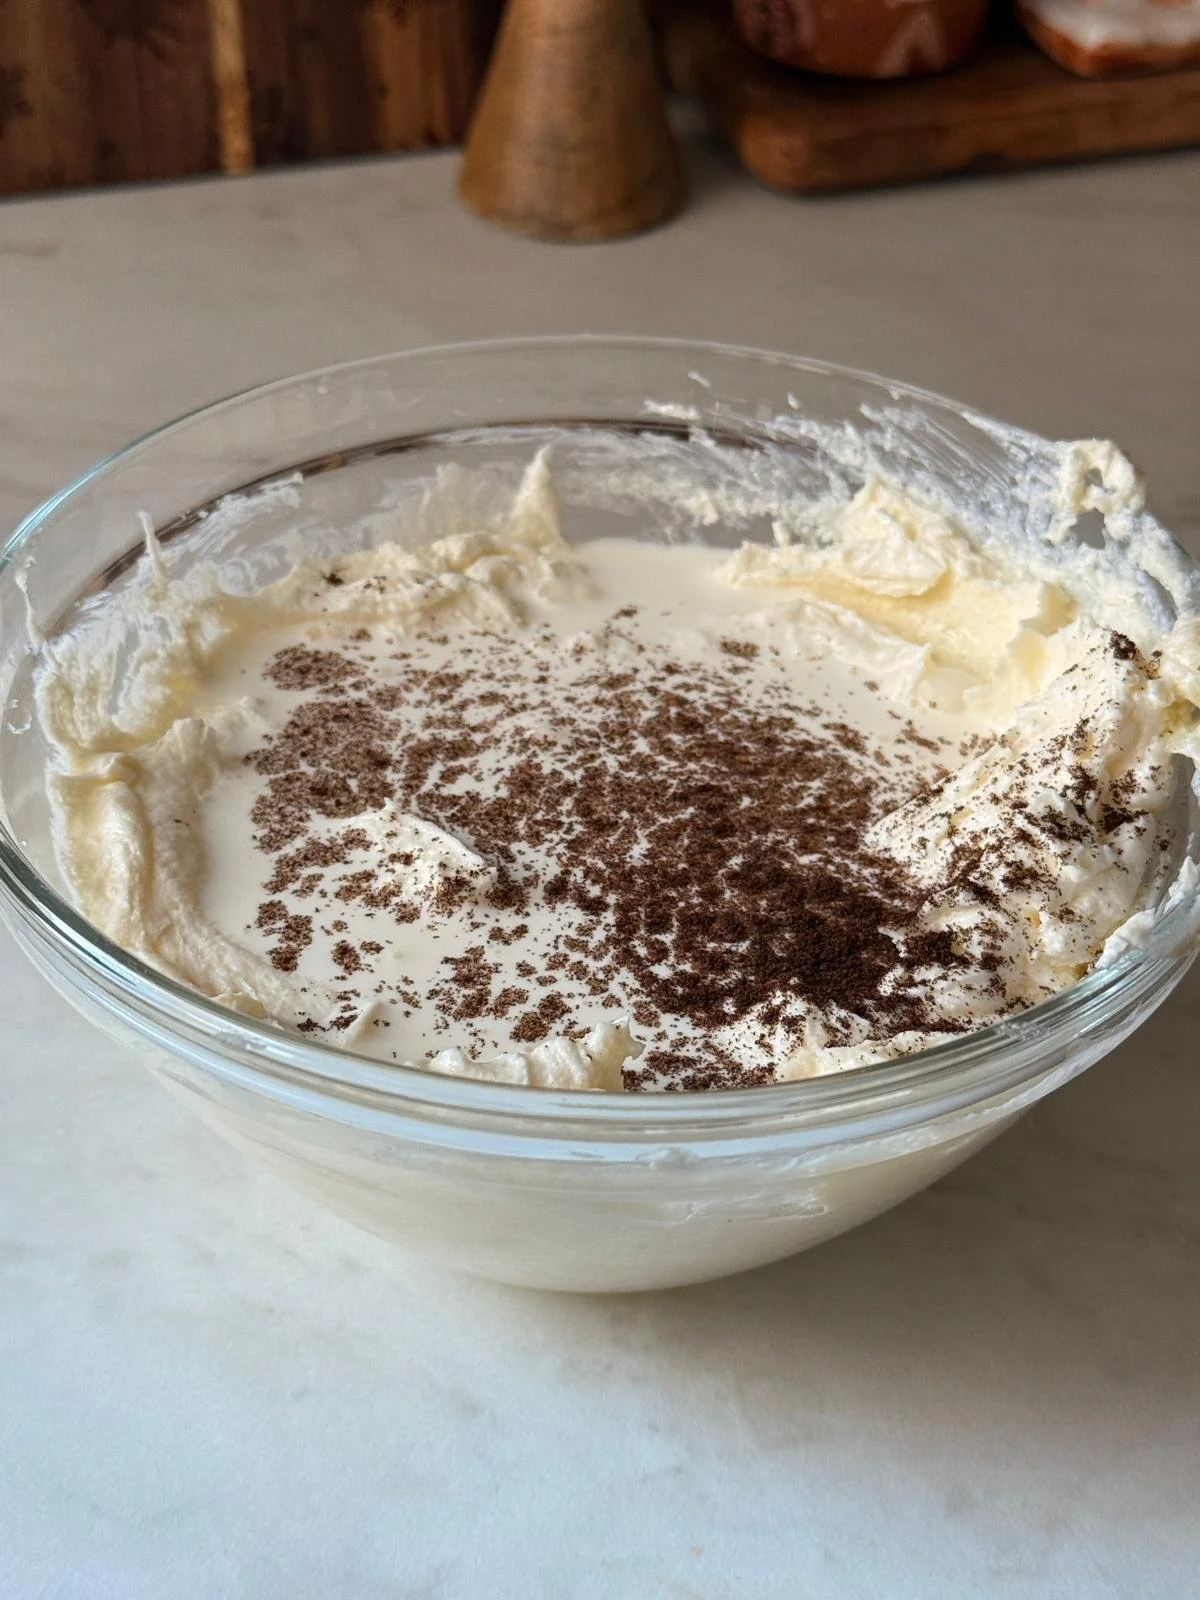
20. Dust with cocoa powder.
21. Slice and enjoy :)

Tiramisu Brownies
These Tiramisu Brownies are sweet, chocolatey and fudgy, with a creamy Mascarpone frosting on top and coffee-soaked Ladyfingers layered in between. It’s a rich, cozy twist on a classic Brownie and one of my favorite Tiramisu inspired treats.
Ingredients
- 200g dark chocolate (52%), chopped up - 7 oz
- 160g unsalted butter - 2/3 cup + 2 teaspoons
- 100g granulated sugar - 1/2 cup
- 100g light brown sugar - 1/2 cup
- 1 teaspooon vanilla extract
- 3 large eggs
- 70g all purpose flour - 1/2 cup + 1 tablespoon
- 35g cocoa powder - 1/3 cup + 2 tablespoons
- A pinch of salt
- 150g milk chocolate chips or chunks - 3/4 cup + 2 tablespoons
- 300g Mascarpone - 1 cup + 1/3 cup
- 100g granulated sugar - 1/2 cup
- 1 teaspoon vanilla bean paste
- 150g whipping cream - 2/3 cup
- Lady fingers, for the layer between the Brownie and the frosting
- Coffee, to dip the Lady fingers in
- Cocoa powder, for dusting
Instructions
- First we’re going to brown the butter.
- Cut the butter into small cubes and place them in a saucepan or skillet.
- Melt it over medium heat. Once it’s fully melted, let it lightly simmer and stir the whole time until the color turns golden brown. *Note: This took me about 10-12 minutes on medium heat. If your heat is lower, it might take a bit longer.
- When the butter is ready, take it off the heat and stir in the cocoa powder right away until smooth.
- Add the chopped dark chocolate and mix until it melts completely. Set this mixture aside to cool for about 15 minutes.
- Preheat your oven to 180°C. Line a 20×20 cm square baking pan with parchment paper.
- In a large bowl, use an electric hand mixer to beat the sugars and eggs together until the mixture turns very pale and fluffy, about 2-3 minutes.
- Pour the melted chocolate-brown butter mixture into the egg mixture and whisk until combined.
- Sift the flour and salt into the bowl and gently fold it in. Don’t overmix, this keeps the brownies fudgy not cakey.
- Fold in the milk chocolate chips or chunks.
- Pour the batter into the baking pan and spread it out evenly.
- Bake for 25-28 minutes. (See Note 1)
- Let the brownies cool completely in the pan for about 3 hours.
- Once the Brownies have completely cooled down, time to prepare the frosting.
- In a bowl mix together the mascarpone and sugar.
- Add the whipping cream and vanilla, then whisk until the mixture turns fluffy and can hold its shape.
- Once ready, time to start layering!
- Dip the ladyfingers in coffee and place a layer on top of the brownies.
- Spread the mascarpone frosting evenly over the top.
- Dust with cocoa powder.
- Slice and enjoy :)
Notes
- My oven runs a bit hot, so you may need a little longer depending on yours.
Nutrition Facts
Calories
698Fat
63 gSat. Fat
32 gCarbs
53 gFiber
4 gNet Carbs
60 gSugar
38 gProtein
8 gSodium
62 mgCholesterol
153 mg